
Table of Contents
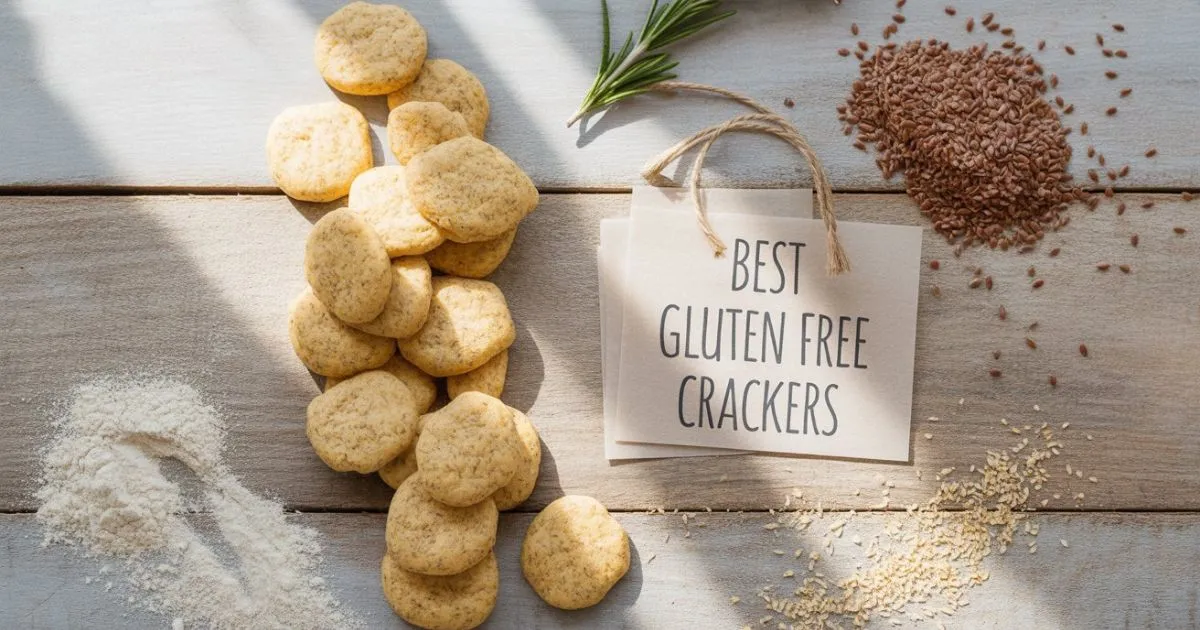
Best Gluten Free Crackers: Introduction
Ugh, remember that gut-punch moment when you first realized your favorite crackers were suddenly the enemy? I’m talking about that devastating day when you discovered gluten was basically your kryptonite. It felt like the snack gods were playing some cruel joke on you, right? But here’s the thing—and trust me on this—you don’t have to live in a world of cardboard-tasting alternatives forever. These homemade gluten-free crackers? They’re not just “okay for gluten-free.” They’re straight-up amazing. Like, “why didn’t I make these sooner?” amazing.
Why You Should Totally Make Gluten Free Crackers at Home
Let’s be real here—store-bought gluten-free crackers can cost more than your monthly Netflix subscription. I’m not even kidding! Making your own is like finding money in your couch cushions, except it’s way more satisfying and you get to eat the results.
But it’s not just about the money (though hey, that’s a nice bonus). When you make these babies yourself, you’re basically the boss of every single ingredient. No more playing detective with ingredient lists or wondering what “natural flavors” actually means. You know exactly what’s going into your body, and honestly? That peace of mind is priceless.
Plus, let’s talk about freshness. These homemade crackers stay crispy longer than most store-bought ones, and they taste about a million times better. You can literally customize them to your heart’s content—more salt, less salt, extra herbs, or whatever makes your taste buds happy. And if you’re looking for more gluten-free recipes to expand your repertoire, there are tons of options beyond just crackers.
The Must-Have Ingredients That’ll Make You a Cracker Wizard
Your Flour Squad
Rice flour is like the reliable friend who’s always there for you—neutral, dependable, and plays well with others. It’s perfect if you’re just starting out and don’t want any funky flavors throwing you off.
Almond flour is the fancy friend who makes everything better. It adds this rich, buttery taste and keeps you full longer (hello, protein!). Just heads up—it can be a bit pricey, but it’s totally worth it.
Tapioca starch is your secret weapon. This little guy helps everything stick together without making your crackers feel like you’re chewing on rubber. Trust me, you need this in your life.
Coconut flour is… well, it’s special. It’s like that friend who means well but needs extra attention. It soaks up liquid like crazy, so you’ll need more eggs and patience when working with it.
The Binding Squad
Xanthan gum sounds scary, but it’s basically magic powder that makes everything hold together. About half a teaspoon per cup of flour usually does the trick, but don’t go crazy with it—a little goes a long way.
Psyllium husk is the natural alternative that also adds fiber (your digestive system will thank you). It’s like nature’s own xanthan gum, but with bonus health points.
Eggs are your friends here. They help bind everything together and add richness. Room temperature eggs mix better, so take them out of the fridge about 30 minutes before you start.
The Flavor MVPs
Good salt makes everything taste better—it’s science! I’m partial to sea salt because it has this clean taste that doesn’t overpower everything else.
Dried herbs are where you can really have fun. Rosemary, thyme, oregano—go wild! Just remember to crush them up a bit so they distribute evenly.
Nutritional yeast is basically magic for anyone who wants that cheesy flavor without actual cheese. It’s like fairy dust for vegans, but honestly, everyone should try it.
7 Ridiculously Good Gluten Free Cracker Recipes
Recipe 1 – Classic Seed Crackers (The Overachiever)
These are like the overachiever in your friend group—packed with nutrients, super satisfying, and they make you feel good about your life choices. They’re perfect for when you want to impress people or just feel fancy.
What You’ll Need
| Ingredient | Amount | Why It’s Here |
|---|---|---|
| Sunflower seeds | 1/2 cup | The star of the show |
| Pumpkin seeds | 1/2 cup | For that satisfying crunch |
| Sesame seeds | 1/4 cup | Adds nutty goodness |
| Chia seeds | 2 tbsp | Tiny but mighty |
| Flax seeds | 2 tbsp | Ground works best |
| Psyllium husk | 1 tbsp | The magic binder |
| Sea salt | 1 tsp | Because flavor matters |
| Water | 1/2 cup | Room temp is fine |
| Olive oil | 2 tbsp | The good stuff |
Let’s Make Some Magic
- Crank your oven to 350°F—time to get this party started
- Dump all the dry stuff in a big bowl and mix it up
- Mix the water and oil, then pour it into your dry mix
- Here’s the important part: let it sit for 10 minutes. The psyllium needs time to do its thing and get all gel-like
- Roll this between parchment paper until it’s about 1/8-inch thick (don’t stress about perfection)
- Cut into whatever shapes make you happy—I use a pizza cutter because I’m lazy
- Bake for 20-25 minutes until they look golden and sound crispy when you tap them
- Let them cool completely or you’ll burn your tongue (learned this the hard way)
Time Investment: 15 minutes prep + 25 minutes baking = 50 minutes total (but so worth it!)
Recipe 2 – Cheesy Almond Flour Crackers (The Crowd Pleaser)
These are the crackers that’ll make your friends ask for the recipe. They’re rich, they’re cheesy, and they’re basically impossible to stop eating. Consider yourself warned.
Your Shopping List
| Ingredient | Amount | Pro Tips |
|---|---|---|
| Almond flour | 2 cups | Get the fine stuff, not chunky |
| Nutritional yeast | 1/4 cup | This is where the magic happens |
| Parmesan cheese | 1/4 cup | Optional but oh-so-good |
| Xanthan gum | 1 tsp | Don’t skip this! |
| Garlic powder | 1/2 tsp | Adjust to your liking |
| Paprika | 1/2 tsp | For color and a tiny kick |
| Salt | 1/2 tsp | Sea salt is my jam |
| Egg | 1 large | Room temperature works better |
| Olive oil | 2 tbsp | The good stuff again |
How to Make These Beauties
- Heat your oven to 325°F—we’re going a bit gentler here
- Toss all the dry ingredients in a food processor and pulse until mixed
- Add the egg and oil, then pulse until you get a nice dough
- Roll it out between parchment paper (seriously, parchment is your friend)
- Cut into squares or use cookie cutters if you’re feeling fancy
- Bake for 15-18 minutes until the edges look golden
- Let them cool on the pan for 5 minutes before moving them
Time Investment: 10 minutes prep + 18 minutes baking = 28 minutes (quickest route to happiness!)
Recipe 3 – Herb and Garlic Rice Crackers (The Versatile One)
These are like the little black dress of crackers—they go with everything. Light, crispy, and fragrant, they’re perfect for when you can’t decide what you want.
Gather These Goodies
| Ingredient | Amount | Notes from Experience |
|---|---|---|
| Brown rice flour | 1 1/2 cups | White rice flour works too |
| Tapioca starch | 1/2 cup | For that perfect crunch |
| Dried rosemary | 1 tbsp | Crush it up first |
| Dried thyme | 1 tbsp | The herb that makes everything better |
| Garlic powder | 1 tsp | Not garlic salt—learned that lesson |
| Onion powder | 1/2 tsp | Skip if you’re not a fan |
| Salt | 1 tsp | Sea salt for the win |
| Olive oil | 3 tbsp | Don’t cheap out here |
| Water | 1/3 cup | Add slowly |
Let’s Get Cooking
- Preheat to 375°F—we’re going hot and fast
- Whisk all the dry stuff together in a bowl
- Drizzle in the olive oil and mix it up
- Add water bit by bit until the dough comes together (don’t dump it all at once!)
- Roll it thin between parchment sheets
- Cut into rectangles or whatever shapes make you smile
- Bake for 12-15 minutes until they’re crispy and golden
- Cool completely before you try to move them
Time Investment: 12 minutes prep + 15 minutes baking = 27 minutes (almost instant gratification!)
Recipe 4 – Coconut Flour Crackers (The Sweet Surprise)
These have a subtle sweetness that’s totally unexpected in a cracker. They’re crispy, they’re low-carb, and they’re perfect for when you want something a little different.
What You’re Working With
| Ingredient | Amount | Real Talk |
|---|---|---|
| Coconut flour | 1 cup | Sift this or you’ll have lumps |
| Eggs | 3 large | Room temp is key |
| Coconut oil | 2 tbsp | Melted, not solid |
| Salt | 1/2 tsp | Balances the sweetness |
| Baking powder | 1/2 tsp | Make sure it’s gluten-free |
| Sesame seeds | 2 tbsp | For the top |
The Game Plan
- Oven to 350°F—standard operating temperature
- Mix the coconut flour, salt, and baking powder
- Whisk the eggs and melted coconut oil in a separate bowl
- Combine everything and let it sit for 5 minutes (coconut flour is thirsty)
- Roll it super thin—I cannot stress this enough
- Sprinkle sesame seeds on top and press gently
- Bake for 10-12 minutes until golden (watch them like a hawk!)
- Cool completely before you even think about touching them
Time Investment: 10 minutes prep + 12 minutes baking = 27 minutes (patience is a virtue here!)
Recipe 5 – Spicy Chickpea Crackers (The Protein Powerhouse)
These pack serious protein and a nice kick of heat. They’re perfect for scooping up hummus (because why not double down on the chickpeas?).
Your Ingredient Squad
| Ingredient | Amount | Why It’s Awesome |
|---|---|---|
| Chickpea flour | 1 1/2 cups | Also called besan if you’re shopping ethnic markets |
| Water | 1/2 cup | Room temp is perfect |
| Olive oil | 3 tbsp | The good stuff, always |
| Cumin powder | 1 tsp | Earthy and warm |
| Coriander powder | 1 tsp | Adds complexity |
| Cayenne pepper | 1/4 tsp | Adjust to your heat tolerance |
| Turmeric | 1/4 tsp | For that golden color |
| Salt | 1 tsp | Don’t be shy |
| Black pepper | 1/4 tsp | Freshly ground if you have it |
Making the Magic Happen
- Crank that oven to 400°F—we’re going hot
- Mix all the dry ingredients in a bowl
- Make a well in the center and add water and oil
- Whisk until you get a smooth batter (no lumps allowed!)
- Let it rest for 10 minutes—chickpea flour needs time to hydrate
- Pour onto a parchment-lined baking sheet
- Spread it evenly to about 1/8-inch thick
- Score into shapes while it’s still wet
- Bake for 20-25 minutes until crispy and golden
- Cool before breaking apart
Time Investment: 15 minutes prep + 25 minutes baking = 50 minutes (good things take time!)
Recipe 6 – Everything Bagel Crackers (The Trendy One)
If you’re obsessed with everything bagel seasoning (and honestly, who isn’t?), these are about to become your new favorite thing. They’re addictive in the best possible way.
What You Need
| Ingredient | Amount | Pro Tips |
|---|---|---|
| Almond flour | 1 cup | Fine grind is best |
| Coconut flour | 1/4 cup | Sift it! |
| Xanthan gum | 1/2 tsp | Your binding buddy |
| Everything bagel seasoning | 2 tbsp | Store-bought is fine |
| Salt | 1/4 tsp | Just a little extra |
| Egg white | 1 large | Save the yolk for something else |
| Olive oil | 1 tbsp | Quality matters |
The Process
- Oven to 325°F—lower and slower for these babies
- Mix both flours and xanthan gum
- Stir in 1 tablespoon of the everything seasoning
- Whisk the egg white until it’s foamy
- Add olive oil to the egg white
- Fold everything together gently
- Roll between parchment to 1/8-inch thick
- Sprinkle the remaining seasoning on top
- Cut into squares or rectangles
- Bake for 15-20 minutes until crispy
- Cool completely before storing
Time Investment: 12 minutes prep + 20 minutes baking = 32 minutes (worth every second!)
Recipe 7 – Sweet Cinnamon Oat Crackers (The Dessert Imposter)
These blur the line between cracker and cookie in the best way possible. They’re perfect with your morning coffee or as a light dessert. Speaking of sweet gluten-free treats, these crackers would make an excellent base for a dessert tart if you crush them up—similar to how you might use a gluten-free graham cracker crust for cheesecakes and pies.
Your Sweet Squad
| Ingredient | Amount | Notes |
|---|---|---|
| Gluten-free oat flour | 1 1/2 cups | Make sure it’s certified GF |
| Coconut sugar | 2 tbsp | Brown sugar works too |
| Cinnamon | 1 tsp | The star of the show |
| Salt | 1/4 tsp | Balances the sweetness |
| Coconut oil | 2 tbsp | Solid, not melted |
| Vanilla extract | 1/2 tsp | Pure is better |
| Water | 2-3 tbsp | Add slowly |
Sweet Success Steps
- Oven to 350°F—standard temperature
- Mix oat flour, coconut sugar, cinnamon, and salt
- Cut in the solid coconut oil until it looks like crumbs
- Add vanilla extract
- Add water slowly until dough forms
- Roll between parchment to 1/8-inch thick
- Cut into fun shapes
- Bake for 12-15 minutes until lightly golden
- Cool on the baking sheet
Time Investment: 10 minutes prep + 15 minutes baking = 25 minutes (sweetness achieved!)
Keeping Your Crackers Happy and Crispy
Storage That Actually Works
Okay, let’s talk real storage solutions here. Those fancy glass containers with the tight lids? They’re not just pretty—they actually keep your crackers crispy longer. I learned this after way too many batches went stale because I was lazy about storage.
Plastic containers work too, but make sure they seal well. Nobody wants sad, soggy crackers.
How Long Will They Last?
Here’s the deal: if you store them properly, most of these crackers will stay crispy for about a week at room temperature. If you want to push it, pop them in the fridge for up to two weeks (though they might lose a tiny bit of their crunch).
Freezing is totally an option too! Just freeze them in single layers first, then transfer to freezer bags. They’ll keep for up to three months.
The Crispness Revival Trick
If your crackers go a bit soft (it happens to the best of us), just pop them in a 300°F oven for 3-5 minutes. It’s like magic—they’ll be crispy again!
Why These Are Actually Good for You
Let’s be honest—these aren’t just empty calories. The seed crackers are packed with omega-3s and protein. The almond flour ones give you vitamin E and healthy fats. The chickpea ones? Hello, plant-based protein and fiber!
You’re basically snacking smart without feeling like you’re eating health food. Win-win!
Where to Find Store-Bought Options
While homemade is always best, sometimes you need the convenience of store-bought crackers. If you’re looking for quality gluten-free crackers to buy, Find Me Gluten Free has an excellent selection of certified gluten-free crackers from various brands. It’s a great resource for discovering new products and reading reviews from other gluten-free folks.
FAQ Section (Because I Know You Have Questions)
All Your Burning Questions About the Best Gluten Free Crackers
Q: Can I make these best gluten free crackers ahead of time? A: Absolutely! These gluten-free crackers are actually perfect for meal prep. Make a batch on Sunday, and you’ll have snacks for the whole week. Just store them properly and you’re golden.
Q: Which gluten free cracker recipe should I try first? A: If you’re new to this whole homemade cracker thing, start with the Herb and Garlic Rice Crackers. They’re super forgiving and taste amazing. Once you get the hang of it, these best gluten free crackers will become your go-to snack.
Q: Can I freeze these gluten free crackers? A: Yes! These best gluten free crackers freeze like champs. Just make sure to freeze them in single layers first, then bag them up. They’ll keep for months and taste just as good.
Q: Help! My crackers aren’t crispy enough! A: The secret to perfectly crispy best gluten free crackers is all about thickness and timing. Roll them thin (1/8-inch is your target), bake until golden, and let them cool completely. If they’re still not crispy enough, give them a few more minutes in the oven.
Q: Can I adapt these recipes for keto or other diets? A: Totally! Most of these best gluten free crackers recipes are pretty flexible. The almond flour and coconut flour ones are already keto-friendly. For vegan versions, swap eggs for flax eggs and you’re good to go.
Q: How do I know when they’re done baking? A: Your best gluten free crackers are ready when they’re golden brown around the edges and feel crispy when you tap them. They should sound hollow when you give them a gentle tap.
Final Thoughts (Because We’re Friends Now)
Look, I’m not gonna lie—going gluten-free felt like the end of the world at first. But these crackers? They’ve completely changed the game for me. They’re better than anything I used to buy, and I actually know what’s in them.
Making your own crackers gives you this amazing sense of control and creativity. Plus, your friends will be seriously impressed when you whip out a batch of homemade crackers at your next get-together.
Don’t stress if your first batch isn’t perfect. I’ve definitely had some epic fails (burnt coconut flour crackers, anyone?), but that’s how you learn. Every oven is different, and gluten-free baking can be a bit finicky until you get the hang of it.
Start with whichever recipe sounds most appealing to you. Maybe it’s the everything bagel ones because you’re obsessed with that seasoning, or maybe the sweet cinnamon ones because you need something to go with your coffee. There’s no wrong choice here.
Ready to become a cracker-making legend? Pick your favorite recipe and get started this weekend. Your taste buds (and your wallet) will thank you. And hey, once you master these, you can start getting creative with your own flavor combinations. The possibilities are endless!
Trust me, once you go homemade, you’ll never go back to those expensive store-bought ones. Welcome to the wonderful world of actually delicious gluten-free crackers!
Have You Given This Recipe A Try?
There are no reviews yet. Be the first one to write one.