
Table of Contents
Apple Pie Recipe from Scratch
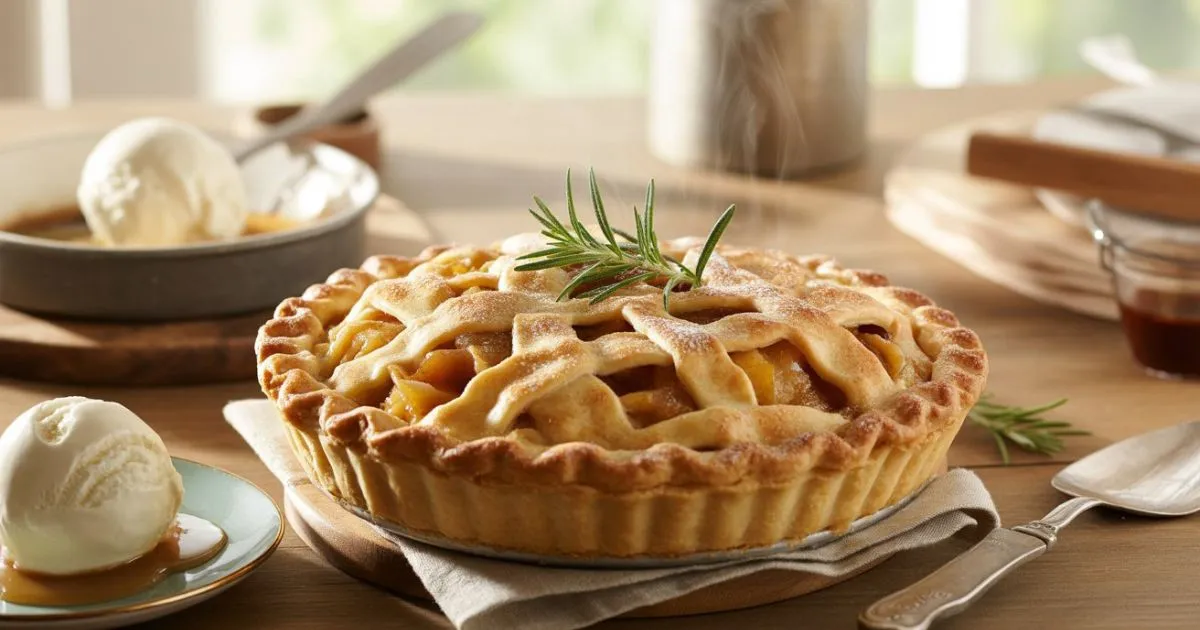
Okay, let’s talk about that moment when you walk into a kitchen and catch a whiff of cinnamon and buttery goodness floating through the air. You know what I’m talking about—that smell that makes you close your eyes and smile because it reminds you of your grandma’s kitchen on Sunday afternoons. That’s the magic we’re going for with homemade apple pie, and trust me, no store-bought version even comes close!
I bet you’ve tried making apple pie before and ended up with a soggy mess or a crust that looked more like cardboard than golden perfection. Don’t worry—we’ve all been there! I used to wonder why my apple pie recipe from scratch never looked like those gorgeous Pinterest photos. Turns out, making killer apple pie isn’t just about dumping ingredients together and hoping for the best.
Today, I’m spilling all the secrets that’ll make your friends beg for the recipe. These aren’t just random tips I found online—they’re the real deal techniques that pastry chefs use to make pies that’ll knock your socks off. If you’re more of a visual learner, there’s also this fantastic video tutorial that walks through the whole process step-by-step.
Why Your Apple Pie Recipe from Scratch Matters More Than Ever
Here’s something cool: about 73% of people actually prefer homemade desserts over store-bought ones (and honestly, who can blame them?). Apple pie is still America’s sweetheart when it comes to comfort food, and there are some pretty awesome reasons to make your own.
First off, when you make your apple pie recipe from scratch, you’re the boss of what goes in it. No weird preservatives, no crazy amounts of sugar, and definitely none of those ingredients you can’t even pronounce. Plus, homemade pies have about 40% less sodium than the store versions—your heart will thank you!
And can we talk money for a sec? Making your own pie costs maybe $8-12 in ingredients, while those fancy bakery pies can run you $20-35. That’s some serious savings right there!
But honestly, it’s not just about the money or health stuff. There’s something really special about making apple pie from scratch. It’s like you’re carrying on this awesome American tradition, creating memories, and showing people you care enough to spend time making something amazing just for them. And if you’re looking for more homemade treats to impress your guests, check out these amazing snacks and appetizers that pair perfectly with dessert!
The Foundation: Understanding Your Apple Pie Components
Choosing the Right Apples for Your Recipe
Alright, let’s get real about apples for a minute. Not all apples are created equal when it comes to baking—some turn into total mush while others stay perfectly tender. You want apples that won’t fall apart on you!
Here are my go-to baking superstars:
- Granny Smith: These tart little guys hold their shape like champions
- Honeycrisp: Sweet-tart perfection that won’t let you down
- Braeburn: Complex flavor and they actually behave in the oven
- Northern Spy: Old-school choice that pie makers have loved forever
Here’s a pro tip from someone who’s made way too many pies: mix it up! I usually go with about 60% tart apples (hello, Granny Smith) and 40% sweet ones (Honeycrisp, I’m looking at you). It’s like the perfect flavor symphony in your mouth.
The Science Behind Perfect Pie Crust
Okay, don’t let the word “science” scare you off! I’m not about to make you take notes or anything. But understanding why your crust works (or doesn’t) will seriously up your pie game.
The secret sauce? Keep everything COLD. I mean it—cold butter, cold water, cold hands if possible! When that cold butter hits the hot oven, it creates little steam pockets that make your crust flaky instead of tough.
Now, there’s this whole butter vs. shortening debate that gets bakers all fired up. My take? Butter tastes amazing, but shortening is easier to work with. So why not have the best of both worlds? I do about 75% butter for flavor and 25% shortening because I’m not trying to wrestle with impossible dough.
And here’s something that blew my mind when I first learned it: the type of flour matters! All-purpose flour is your best friend here. Don’t get fancy with bread flour unless you want a crust tougher than shoe leather.
The Complete Apple Pie Recipe from Scratch
This is it—the apple pie recipe from scratch that’s going to make you famous in your neighborhood (or at least in your family). It’s got that perfect flaky, buttery crust wrapped around perfectly spiced apples that aren’t too mushy or too crunchy.
Prep Time: 45 minutes (most of it’s pretty chill)
Bake Time: 55 minutes
Total Time: About 1 hour 40 minutes (plus chilling time—patience, grasshopper!)
Feeds: 8-10 people (or 4 people with serious pie commitment)
What You’ll Need
For the Crust (the star of the show):
- 2½ cups all-purpose flour
- 1 teaspoon salt
- 1 tablespoon sugar
- 1 cup cold butter, cut into cubes (and I mean COLD)
- 6-8 tablespoons ice water
For the Filling (the heart and soul):
- 7-8 big apples (mix those varieties!)
- ¾ cup regular sugar
- ¼ cup brown sugar (because brown sugar makes everything better)
- 2 tablespoons flour
- 1 tablespoon cornstarch
- 1 teaspoon cinnamon
- ¼ teaspoon nutmeg
- ¼ teaspoon salt
- 2 tablespoons butter, cubed
- 1 egg for brushing
- 1 tablespoon coarse sugar for that bakery look
Let’s Do This Thing
- Make the crust: Mix your flour, salt, and sugar in a big bowl. Add those cold butter cubes and cut them in until it looks like chunky breadcrumbs with some pea-sized butter bits. It’s supposed to look a little messy!
- Add water slowly: Sprinkle that ice water in one tablespoon at a time, mixing gently with a fork. Stop when the dough just starts to come together—it should look a bit shaggy, not smooth.
- Chill out: Split the dough in half, wrap each piece in plastic wrap, and stick it in the fridge for at least 2 hours. Trust me on this one—don’t skip the chilling!
- Prep your apples: Peel and slice those apples into ⅛-inch pieces (don’t stress about perfection). Toss them with all the sugars, flour, cornstarch, and spices. Let them sit for about 15 minutes—they’ll start getting juicy.
- Put it together: Roll out your bottom crust and plop it in a 9-inch pie pan. Add all that gorgeous apple mixture and dot with butter pieces. Roll out the top crust and cover everything up, sealing those edges like you mean it.
- Make it pretty: Beat that egg and brush it all over the top crust, then sprinkle with coarse sugar. Cut some vents so steam can escape (otherwise, you might have a pie explosion—not as fun as it sounds).
- Bake like a boss: Start at 425°F for 15 minutes, then drop it down to 350°F for another 35-40 minutes. You want that gorgeous golden brown color and bubbling filling.
- The hardest part: Let it cool for at least 3 hours before you cut into it. I know, I know—it’s torture, but runny pie filling isn’t cute.
7 Expert Tips for Perfect Golden Crust Every Time
Tip #1 – Master the Cold Butter Technique
I can’t stress this enough—temperature is EVERYTHING. Your butter should feel like cold cheese, not rock-hard but definitely not squishy. If your kitchen’s hot (hello, summer baking!), stick those butter cubes back in the fridge while you’re measuring other stuff.
You’ll know you’ve got it right when the butter looks like irregular flakes mixed through the flour. Some pieces should be pea-sized, some smaller. It’s not supposed to look perfect!
Tip #2 – The Ice Water Secret
This one’s a game-changer, folks. That water needs to be ice-cold—like, actually has ice cubes in it cold. And here’s the kicker: add it super slowly while you’re watching how the dough comes together.
Stop adding water the second your dough barely holds together. It should look kind of rough and shaggy, not smooth like cookie dough. If you add too much water, you’ll end up with tough, chewy crust that nobody wants.
Tip #3 – Strategic Flour Application
Want to avoid the dreaded soggy bottom? (And yes, that’s a real baking term, not just a British comedy reference!) Sprinkle about a tablespoon of flour right on your bottom crust before adding the filling. It’s like a little moisture-absorbing superhero.
If your apples are super juicy, you might want to blind bake that bottom crust for about 10 minutes first. Just use some pie weights or dried beans to keep it from puffing up like a balloon.
Tip #4 – Apple Preparation That Makes the Difference
Here’s where consistency pays off big time. Slice those apples evenly—about ⅛ to ¼ inch thick. Chunky pieces will be crunchy while thin ones turn to mush, and nobody wants apple pie roulette.
Pro tip that changed my life: toss your sliced apples with the sugar mixture and let them sit for 15-20 minutes before assembling. The sugar draws out some of the juice, which means less soggy crust later. Science is awesome!
Tip #5 – Oven Temperature and Timing Mastery
This two-temperature trick is pure magic. Start hot (425°F) to get that crust set and golden, then back it down to 350°F so everything cooks through without burning the top.
Start your pie on the bottom rack for that initial blast of heat, then move it to the center when you lower the temp. Your bottom crust will thank you with perfect browning!
Tip #6 – Egg Wash and Finishing Techniques
Want your pie to look like it came from a fancy bakery? Egg wash is your secret weapon! Beat one egg with a tablespoon of milk and brush it all over the top crust. Don’t go crazy—you’re not painting a fence.
That coarse sugar on top? Chef’s kiss It adds crunch and makes the browning even more gorgeous. Regular sugar just dissolves, but coarse sugar sticks around to make your pie look professional.
Tip #7 – The Cooling and Storage Game-Changer
I know this is the hardest part, but you HAVE to let that pie cool completely. I’m talking 4-6 hours at room temperature. I know it smells incredible and you want to dive right in, but hot pie filling is basically apple lava and won’t hold together.
If you can manage it, let it chill overnight in the fridge, then bring it back to room temperature before serving. Your slices will be picture-perfect!
Troubleshooting Common Apple Pie Problems
Soggy Bottom Solutions
We’ve all been there—you cut into your beautiful pie and the bottom crust is more like apple soup. Usually, this happens because of too much moisture or not enough bottom heat.
Glass pie pans are your friend here because they conduct heat better than ceramic ones. And those dark metal pans? Even better for browning that bottom crust. For more detailed troubleshooting and additional techniques, this comprehensive guide on Instructables has some great visual aids that might help.
Pale Crust Remedies
If your crust looks anemic, check your oven temp with a separate thermometer. A lot of ovens run cooler than they say, which is super annoying but totally fixable.
Don’t crank up the heat though—just bake it longer and cover the edges with foil if they’re getting too brown while the rest catches up.
Filling Issues
Watery filling usually means you picked apples that release too much juice or didn’t use enough thickener. Next time, add a bit more flour or cornstarch to soak up that extra liquid.
And if your apples are cooking unevenly, make sure you’re slicing them the same thickness and not packing them in too tight. They need room to do their thing!
Advanced Variations and Creative Twists
Flavor Enhancement Ideas
Once you’ve mastered the basic apple pie recipe from scratch, it’s time to get creative!
- Caramel Apple: Drizzle homemade caramel between the apple layers (or use good store-bought—I won’t tell)
- Maple Bourbon: Replace some sugar with maple syrup and add a splash of bourbon to the filling (adults only!)
- Cranberry Apple: Toss in some dried cranberries for extra tartness and pretty color
- Dutch Apple: Skip the top crust and go with a crumbly streusel topping instead
Dietary Modifications
Got friends with dietary restrictions? No problem!
- Gluten-free: Use a cup-for-cup GF flour blend (add xanthan gum if it’s not already included)
- Vegan: Swap the butter for plant-based alternatives and skip the egg wash
- Less sugar: Cut the sugar by about 25% and bump up the cinnamon and vanilla for extra flavor
Frequently Asked Questions About Apple Pie Recipe from Scratch
Q: Can I make my apple pie recipe from scratch ahead of time?
A: Absolutely! You can put the whole thing together and keep it in the fridge for up to 2 days before baking. Or freeze it for up to 3 months—just bake it straight from frozen (add about 15-20 extra minutes).
Q: Why does my apple pie recipe from scratch always have a soggy bottom?
A: Ugh, soggy bottoms are the worst! It’s usually because of too much apple juice and not enough bottom heat. Try using the right apple varieties, add that flour barrier I mentioned, and make sure your oven’s bottom element is working properly.
Q: How do I know when my homemade apple pie is done?
A: Look for that gorgeous golden-brown crust and filling that’s actively bubbling through the vents. If you want to get technical, the internal temp should hit 200°F, and the crust should sound hollow when you tap it gently.
Q: What’s the secret to a flaky crust in my apple pie recipe from scratch?
A: Cold ingredients, don’t overwork the dough, and make sure that butter is properly distributed. Those cold butter pieces create steam in the oven, and steam equals flaky layers!
Q: Can I freeze my apple pie recipe from scratch?
A: You bet! Freeze it before baking for best results, or freeze a fully baked pie wrapped up tight for up to 4 months. Just thaw overnight in the fridge and warm it up in a 350°F oven for 15-20 minutes.
Conclusion: Your Journey to Apple Pie Mastery
Making an incredible apple pie recipe from scratch isn’t about following a recipe word-for-word—it’s about understanding why each step matters. These seven tips are going to transform your baking from “fingers crossed” to “guaranteed showstopper.”
Look, everyone starts somewhere. My first pie looked like it got in a fight and lost, but that’s totally normal! The difference between beginners and pros isn’t talent—it’s knowing these little tricks and practicing them until they become second nature.
Your family and friends are going to notice the difference immediately: that crispy-but-tender bottom crust, the perfectly spiced apples that aren’t mushy or too firm, and that golden top that makes everyone’s mouth water before you even cut the first slice.
So grab your rolling pin, crank up some good music, and get ready to create something absolutely amazing from scratch. Your perfect apple pie is waiting, and trust me—once you nail this, you’ll be everyone’s favorite person come dessert time.
Ready to become the pie legend in your circle? Start with the best ingredients you can find, follow these tried-and-true techniques, and get ready for some serious bragging rights. Drop a comment below and tell me how your pie turned out—I love hearing about baking wins (and even the learning experiences)!
Have You Given This Recipe A Try?
There are no reviews yet. Be the first one to write one.