
Table of Contents
Easy Halloween Snacks for Kids
Picture this: It’s October 30th, and your kiddo bursts through the door like a tiny tornado, practically bouncing off the walls about tomorrow’s Halloween party. “Mom! Dad! Can we make something SUPER spooky for the party?” they beg, giving you those irresistible puppy dog eyes. Your heart totally melts, but then your brain kicks in – you’ve got maybe an hour before bedtime, your kitchen looks like a disaster zone, and let’s be honest, you can barely make toast without burning it some days.
Been there, done that, got the flour-covered t-shirt to prove it! Every parent knows this exact scenario. We all want to be that Pinterest-perfect mom or dad who whips up amazing treats, but reality? We’re usually scrambling at the last minute with whatever’s lurking in our pantry. But here’s the thing – creating jaw-dropping Easy Halloween Snacks for Kids doesn’t mean you need to channel your inner Gordon Ramsay or blow your grocery budget on fancy ingredients.
Trust me, with just a few sneaky tricks and stuff you probably already have at home, you can turn boring everyday snacks into totally epic Halloween treats that’ll have your kids bragging to their friends for weeks. And the best part? You won’t be pulling your hair out in the process! If you’re looking for even more inspiration, check out these kid-friendly recipes that work year-round.
Why Easy Halloween Snacks for Kids Are Perfect for Busy Parents
Look, October is absolutely bonkers for parents. Between costume shopping (why are kids’ costumes so expensive?!), school parties, and trying to figure out trick-or-treat logistics, the last thing you need is some complicated recipe that requires 47 ingredients and a culinary degree.
These Easy Halloween Snacks for Kids? They’re total lifesavers. Most of them take under 30 minutes – that’s less time than it takes to argue with your kid about wearing a jacket. You’ll spend maybe $20 creating enough treats for an entire classroom, and I bet you’ve got half the ingredients sitting in your kitchen right now.
Here’s what I love most though – your kids can actually help without you having a complete meltdown. No sharp knives, no hot ovens (for most of these), just good old-fashioned family fun. Plus, they’ll learn some basic kitchen skills without you having to stress about safety every two seconds.
And can we talk about school parties for a hot minute? Ugh, the pressure is real! Everyone’s got food allergies these days (which is totally valid, by the way), and you’re sitting there wondering if your kid’s gonna be the one whose mom brought “the boring snacks.” Well, guess what? These recipes have got your back with super easy swaps. Need nut-free? Boom, use sunflower seed butter instead. Dairy issues? Coconut cream works like magic.
The best part? These babies travel like champs. No more showing up to the party with a lopsided cake that looks like it survived an earthquake!
Essential Ingredients and Tools for Spooky Snack Success
Pantry Staples You Probably Already Have
Okay, so before you start panicking about having to make a special grocery run, let me tell you what you actually need. Spoiler alert: it’s not much!
- Orange and black food coloring (this stuff is pure magic, I swear)
- Pretzel sticks and crackers (the backbone of so many Halloween hacks)
- Cream cheese and peanut butter (your new best friends)
- Chocolate chips and those little candy eyes (if you don’t have candy eyes, mini chocolate chips work too)
- Orange cheese like cheddar or even Cheez-Its (nature’s Halloween color!)
- Fresh apples and oranges (because we’re sneaking in some nutrition here)
Simple Tools That Make the Magic Happen
Don’t worry, you won’t need any fancy gadgets. Just grab:
- Cookie cutters (Halloween shapes if you’ve got ’em, but honestly, any shape works)
- Some ziplock bags or piping bags (ziplock works perfectly – just snip the corner)
- An ice cream scoop for making things look uniform
- A sharp knife (that’s for you, not the kids!)
- A few small bowls to keep everything organized
If you’re more of a visual learner, this video tutorial shows some great techniques for decorating Halloween treats that might give you even more ideas!
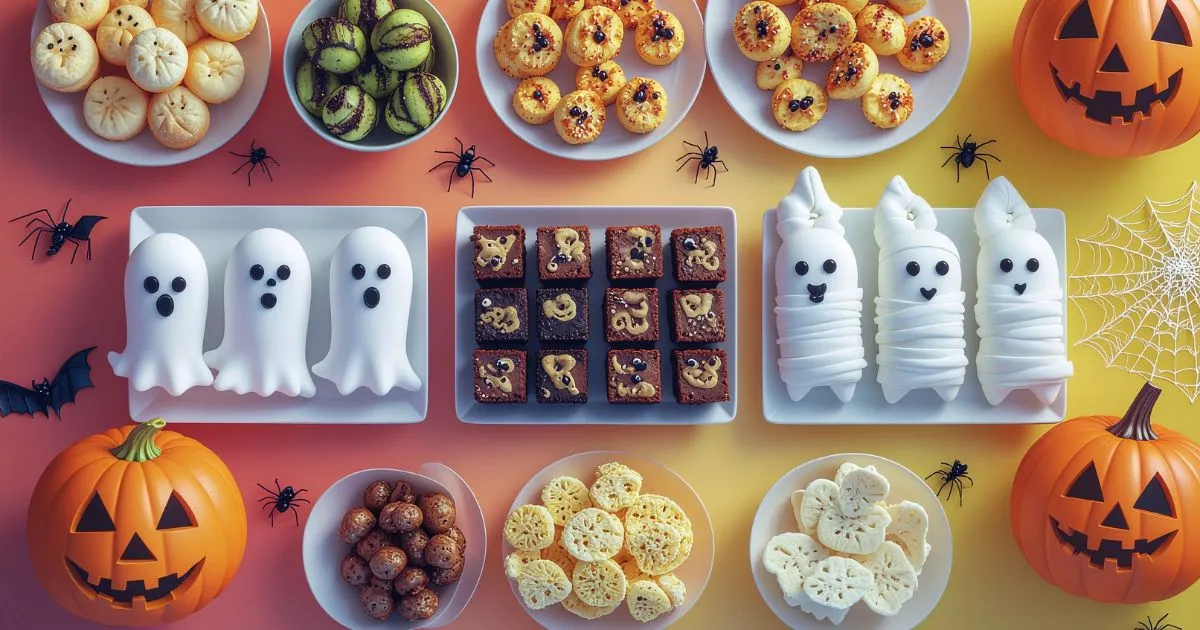
7 Spooktacular Easy Halloween Snacks for Kids
Recipe #1 – Ghostly Banana Bites
Okay, this one’s so simple it almost feels like cheating, but your kids will think you’re a total genius. We’re basically turning bananas into the cutest little ghosts ever with just three ingredients. And bonus – it’s actually healthy! (Don’t tell the kids that part.)
Preparation Time: 10 minutes
Cooking Time: 0 minutes
Total Time: 10 minutes
Serves: 4-6 kids
Ingredients:
- 3 ripe bananas
- 12 mini chocolate chips
- 6 pretzel sticks, broken in half
Instructions:
- Peel your bananas and chop each one into 4 pieces
- Stick half a pretzel into the bottom of each banana chunk (these are the ghost “handles”)
- Push 2 mini chocolate chips into each piece for spooky eyes
- Arrange on a plate and boom – you’re done!
- Pro tip: If you’re making these ahead of time, brush them with a little lemon juice so they don’t turn brown and look weird
Honestly, these are so cute and the kids get fruit, so everyone wins. Plus, they’re ready in literally 10 minutes!
Recipe #2 – Pumpkin Cheese Balls
These little orange cheese balls are ridiculously adorable and taste amazing. Your kids will have a blast rolling them up, and you’ll love that they’re getting protein instead of just sugar. Win-win!
Preparation Time: 15 minutes
Cooking Time: 0 minutes (but you’ll need 30 minutes to chill them)
Total Time: 45 minutes
Serves: 6-8 kids
Ingredients:
- 8 oz cream cheese (make sure it’s soft – nobody wants to fight with cold cream cheese)
- 1 cup shredded cheddar cheese
- 1/4 cup ranch dressing mix (the secret ingredient!)
- Orange food coloring
- 12 small pretzel sticks
- 1/4 cup chopped chives if you’re feeling fancy (totally optional)
Instructions:
- Mix your cream cheese, cheddar, and ranch powder in a bowl
- Add orange food coloring until it looks like a proper pumpkin (don’t be shy with the color!)
- Stick this mixture in the fridge for about 30 minutes so it firms up
- Roll the mixture into 12 little balls with your hands (this is messy but fun)
- Use a butter knife to make little vertical lines on each ball (pumpkin grooves!)
- Stick pretzel pieces on top for stems
- Sprinkle some chives around if you want to get all fancy
- Storage tip: Keep these babies in the fridge until party time
These are seriously impressive looking, and everyone always asks for the recipe!
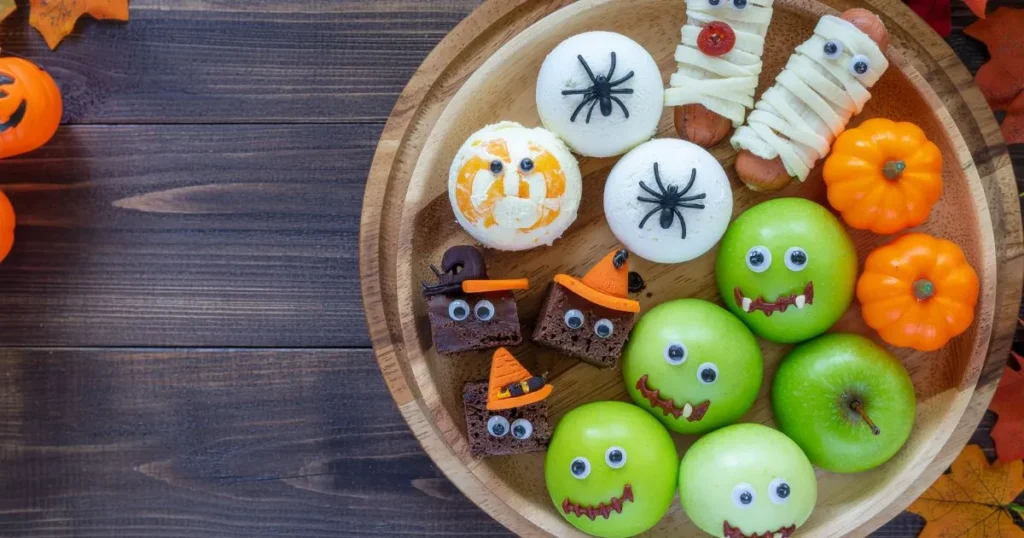
Recipe #3 – Spider Deviled Eggs
Deviled eggs are already crowd-pleasers, but when you turn them into creepy spiders? Game over. The adults will be impressed, and the kids will think it’s hilarious.
Preparation Time: 20 minutes
Cooking Time: 12 minutes
Total Time: 32 minutes
Serves: 6 kids (12 egg halves)
Ingredients:
- 6 hard-boiled eggs (buy them pre-made if you want – no judgment here!)
- 3 tablespoons mayonnaise
- 1 teaspoon yellow mustard
- 12 black olives, pitted
- Salt and pepper to taste
Instructions:
- Cut your hard-boiled eggs in half the long way and scoop out the yolks
- Mash up those yolks with mayo, mustard, salt, and pepper
- Spoon or pipe the yolk mixture back into the egg whites
- Cut your olives in half lengthwise for the spider bodies
- Slice the leftover olive bits into skinny strips for legs
- Plop an olive half on each egg for the body
- Arrange 8 little strips around each body for creepy spider legs
- Make-ahead tip: You can prep the eggs the day before and just add the olive spiders right before serving
These look way fancier than they actually are, which is exactly what we’re going for!
Recipe #4 – Mummy Hot Dogs
This one’s pure genius – regular hot dogs wrapped up like little mummies! Your kids can totally help with the wrapping part, which makes them feel super involved.
Preparation Time: 15 minutes
Cooking Time: 15 minutes
Total Time: 30 minutes
Serves: 8 kids
Ingredients:
- 8 hot dogs (use whatever brand your family likes)
- 2 sheets puff pastry, thawed (check the freezer section)
- 16 mustard seeds or tiny dabs of yellow mustard
- 1 egg, beaten (this makes them golden and pretty)
Instructions:
- Preheat your oven to 400°F
- Cut the puff pastry into skinny strips (about half an inch wide)
- Wrap each hot dog with the pastry strips, but leave gaps so it looks like bandages
- Make sure to leave a spot near one end for the “face”
- Brush them with beaten egg so they get nice and golden
- Bake for 12-15 minutes until they’re golden brown
- While they’re still warm, add mustard seed “eyes”
- Serving suggestion: These are awesome with ketchup and mustard for dipping
These are perfect for dinner or as a more filling snack. Plus, they smell incredible while they’re baking!
Recipe #5 – Witch Hat Brownies
This is my favorite cheat code – store-bought brownies turned into adorable witch hats! Nobody needs to know you didn’t make the brownies from scratch. It’ll be our little secret.
Preparation Time: 20 minutes
Cooking Time: 0 minutes (assuming you bought brownies)
Total Time: 20 minutes
Serves: 12 kids
Ingredients:
- 12 square brownies (store-bought is totally fine!)
- 12 ice cream cones (the sugar cone kind works best)
- 1 cup chocolate frosting
- Orange and purple decorating gel
- 24 mini chocolate chips
Instructions:
- Flip each brownie upside down (this becomes the hat brim)
- Spread some frosting on the bottom of each cone
- Smoosh the cone onto the center of each brownie
- Use the decorating gel to draw stars, moons, or squiggly lines on the cones
- Stick some mini chocolate chips on there for extra decoration
- Let them sit for about 10 minutes so everything sets
- Creative tip: You can use different colored cones if you find them
- Storage: These are best eaten the same day, just keep them covered
These look so professional that people will think you spent hours on them. Little do they know!
Recipe #6 – Monster Apple Slices
Here’s how to make healthy snacks fun – turn apple slices into grinning monsters! This proves you can totally do nutritious Halloween treats without anyone complaining.
Preparation Time: 15 minutes
Cooking Time: 0 minutes
Total Time: 15 minutes
Serves: 4-6 kids
Ingredients:
- 3 green apples, cored and sliced (green looks more monster-like)
- 1/4 cup peanut butter or sunflower seed butter
- 24 mini marshmallows
- 12 mini chocolate chips
- Lemon juice (trust me on this one)
Instructions:
- Cut your apples into wedges, but leave the skin on for that monster green color
- Brush them with lemon juice so they don’t turn brown and gross
- Spread a thin layer of peanut butter on one side of each slice
- Cut a small slit in what’ll be the “mouth” area
- Stuff 2-3 mini marshmallows into each slit for “teeth”
- Press chocolate chips above the mouth for googly eyes
- Arrange them on a platter and serve within a couple hours
- Allergy note: Use cream cheese or hummus instead of peanut butter for nut-free kids
Parents love these because they’re healthy, kids love them because they’re silly. Everyone’s happy!
Recipe #7 – Pumpkin Orange Cups
This one’s so clever – we’re turning oranges into jack-o’-lantern bowls filled with fruit salad. It’s healthy, it looks amazing, and it tastes great. Triple win!
Preparation Time: 25 minutes
Cooking Time: 0 minutes
Total Time: 25 minutes
Serves: 6 kids
Ingredients:
- 6 large oranges (pick the biggest ones you can find)
- 2 cups mixed fruit (whatever looks good – grapes, berries, diced apples)
- 1 tablespoon honey if your fruit needs some extra sweetness
- 6 small orange or black straws for fun
Instructions:
- Cut the top third off each orange and set those tops aside
- Scoop out all the orange flesh, leaving just the “bowl” part
- Dice up that orange flesh and mix it with your other fruits
- Add a little honey if everything needs to be a bit sweeter
- Use a small knife to cut triangle eyes and a zigzag mouth in each orange (adult job!)
- Fill up your carved oranges with the fruit mix
- Stick in some fun straws if you want
- Prep tip: You can make these up to 4 hours ahead – just keep them in the fridge
- Fun variation: Add a small scoop of orange sherbet on top for an extra special treat
These are so Instagram-worthy, and you’re basically sneaking vitamins into Halloween treats. Genius move!
Pro Tips for Halloween Snack Success
Make-Ahead Strategies
Let’s be real – Halloween is crazy enough without last-minute cooking stress. Here’s how to get ahead of the game:
Prep everything you can the night before. Wash your fruit, soften that cream cheese, and get all your supplies organized. There’s absolutely nothing wrong with using store-bought shortcuts – we’re going for results here, not martyrdom!
Set up little assembly stations with everything you need in reach. This way, if your kids want to help (and they will), everyone’s not bumping into each other trying to grab ingredients.
Kid-Friendly Assembly Tips
Getting the kids involved is half the fun, but let’s be smart about it:
Little ones (3-5): They’re great at placing decorations and being your official taste-testers. Keep them busy with the simple stuff while you handle anything sharp or tricky.
Middle kids (6-9): These guys can handle some basic cutting (soft stuff only!) and most of the assembly work. They love feeling useful!
Older kids (10+): Let them take charge of entire recipes! They can handle the more complex stuff and probably have their own creative ideas too.
Allergy-Conscious Substitutions
Nobody wants to be the parent whose snack sends someone to the nurse, so here are some easy swaps:
- Swap any nuts for seeds (sunflower seed butter is amazing)
- Use coconut cream instead of regular dairy
- Grab gluten-free crackers if needed
- Always, ALWAYS tell other parents exactly what’s in your treats
Conclusion
Here’s the truth – creating Easy Halloween Snacks for Kids doesn’t have to make you want to hide under a rock. These seven recipes prove that with some basic ingredients and a little creativity, you can totally nail the Halloween snack game without losing your mind in the process.
Whether you go for the healthy route with those Monster Apple Slices or decide to live a little with the Witch Hat Brownies, there’s something here that’ll work for your family. The best part isn’t even how they taste (though they’re pretty darn good) – it’s the memories you’ll make putting these together with your kids.
So grab those little monsters of yours, throw on some aprons (or don’t – we’re going for fun here, not perfection), and start creating some seriously awesome Halloween memories. Trust me, years from now, your kids won’t remember if the decorations were Pinterest-perfect, but they’ll totally remember the time you made spiders out of eggs and laughed until your sides hurt.
Ready to become the coolest parent in the neighborhood? Pick whichever recipe made you go “ooh, that looks doable” and dive right in! And hey, if you end up with some epic photos of your Halloween creations, definitely share them – we love seeing how these Easy Halloween Snacks for Kids turn out in real kitchens with real families! For even more Halloween treat ideas, you might want to browse through these easy kid-friendly Halloween treats that other families swear by.
Frequently Asked Questions About Easy Halloween Snacks for Kids
Can these Easy Halloween Snacks for Kids be made ahead of time?
Most of them, yeah! The cheese balls and spider eggs actually get better overnight in the fridge (the flavors have time to hang out and get friendly). But hold off on assembling the apple monsters and banana ghosts until right before your party – nobody wants brown, sad-looking fruit.
Are these Halloween snacks suitable for school parties?
Absolutely! Schools usually love these Easy Halloween Snacks for Kids because they use normal ingredients that most kids can eat. Just double-check your school’s rules first (some have gotten pretty strict about homemade stuff), and always ask about allergies. Better safe than sorry!
How can I make these snacks nut-free for children with allergies?
Super easy! Most of these are already nut-free, and for the apple monsters, just swap the peanut butter for sunflower seed butter or cream cheese. Always read labels though – some random ingredients have nuts hiding in them. And definitely let other parents know what’s in your treats!
What’s the most budget-friendly option among these Easy Halloween Snacks for Kids?
The banana ghosts and apple monsters are your wallet’s best friends. You can make either one for under $10 and feed a bunch of kids. Plus, they’re actually good for the kiddos, so you can feel good about not just pumping them full of sugar.
How long do these Halloween snacks stay fresh?
The refrigerated stuff (like those deviled eggs and cheese balls) will keep for 2-3 days if stored right. The room temperature treats like the witch hat brownies? Eat ’em within 24 hours for the best taste. But let’s be honest – with kids around, nothing lasts that long anyway!
Have You Given This Recipe A Try?
There are no reviews yet. Be the first one to write one.