
Table of Contents
Remember the first time you bit into a strawberry shortcake ice cream bar? That cold, creamy center wrapped in a crumbly, pink-flecked coating that somehow made everything better? Now picture that same magic — warm, layered, and tall on a cake stand — sitting in the middle of your kitchen table while everyone leans in just a little closer.
That’s exactly what this strawberry crunch cake recipe delivers. And once you bake it, you’ll never show up to another gathering empty-handed again.
This isn’t just another pretty cake. It’s the kind of dessert that makes people put down their phones, look up, and actually ask for the recipe. Whether you’re baking for a birthday, a baby shower, a Sunday dinner, or simply because the week has been long and you deserve something extraordinary — this guide walks you through every detail, including three professional tips that genuinely transform the flavor from good to unforgettable.
If you love pulling off impressive desserts without spending your entire day in the kitchen, you’ll want to bookmark this alongside other quick and easy meal ideas that make weeknight and weekend cooking feel equally rewarding.

What Makes a Strawberry Crunch Cake Recipe So Special?
Before you start measuring and mixing, it helps to understand what you’re actually building here — because this cake is more than the sum of its parts.
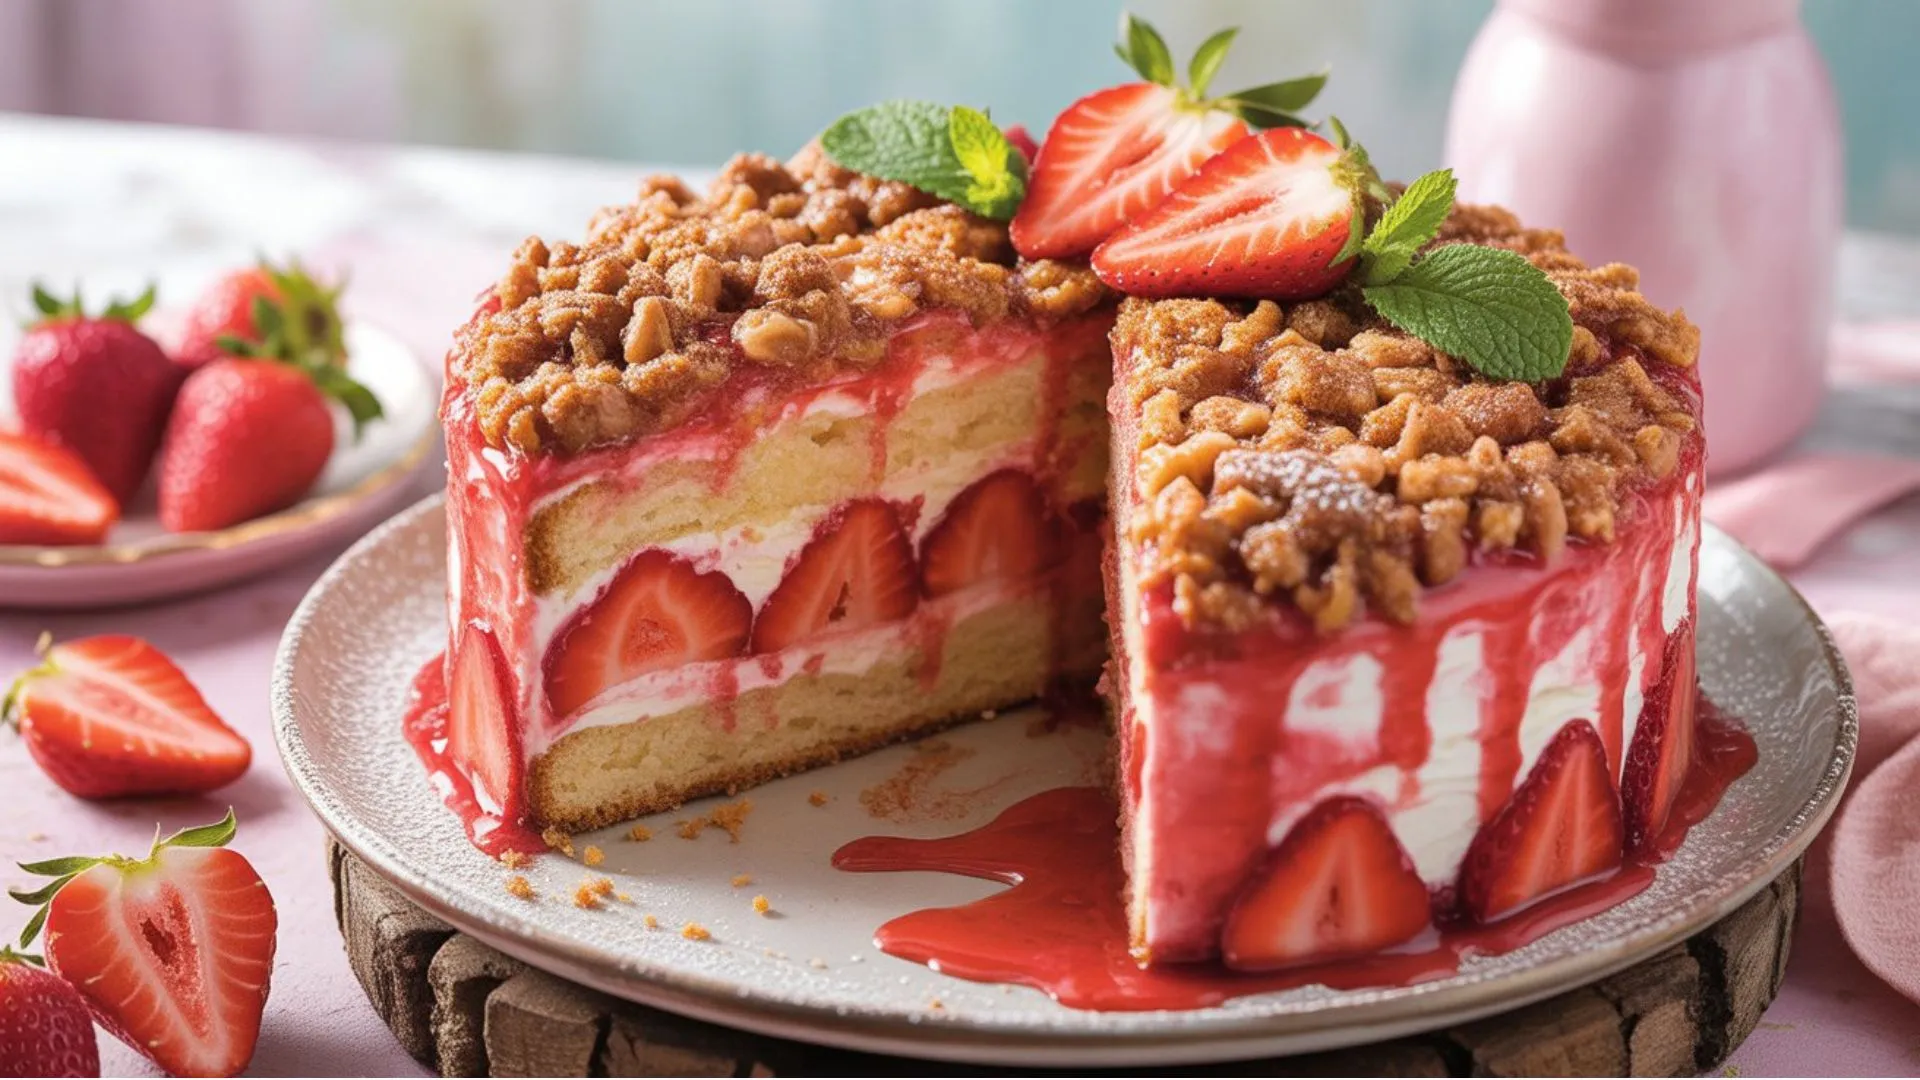
A strawberry crunch cake layers soft, buttery vanilla or strawberry cake with a tangy cream cheese frosting and a golden, strawberry-flecked crumble coating pressed along the outside. That crumble is the heart of everything. It’s made from crushed Golden Oreos and freeze-dried strawberries, and it mimics the exact texture and flavor of the coating on those beloved strawberry shortcake ice cream bars.
Bakers like the team at Broma Bakery have helped bring this style of cake into the mainstream spotlight — and for very good reason. Once you understand the building blocks, you can make it entirely your own.
Why Readers Keep Coming Back to This Recipe:
- It combines nostalgia with elegance — familiar flavors, elevated presentation
- The crunch topping adds a textural contrast most cakes completely lack
- It’s stunning to look at without requiring professional decorating skills
- Every component can be made ahead, making it surprisingly stress-free to assemble
Ingredients Breakdown
For the Cake Layers
- 2 ½ cups all-purpose flour
- 2 ½ tsp baking powder
- ½ tsp fine salt
- 1 cup unsalted butter, softened to room temperature
- 2 cups granulated sugar
- 4 large eggs, room temperature
- 1 tbsp pure vanilla extract
- 1 cup whole milk, room temperature
- ½ cup full-fat sour cream
- 2–3 drops pink or red gel food coloring (optional but adds visual warmth)
For the Cream Cheese Frosting
- 16 oz full-fat cream cheese, softened
- 1 cup unsalted butter, softened
- 5–6 cups powdered sugar, sifted
- 2 tsp vanilla extract
- Pinch of salt
- 3–4 tbsp heavy cream
For the Strawberry Crunch Recipe Topping
- 1 ½ cups Golden Oreo cookies, roughly crushed
- 1 cup freeze-dried strawberries, crushed
- 4 tbsp unsalted butter, melted
The Full Strawberry Crunch Cake Recipe
A nostalgic, layered showstopper with silky cream cheese frosting and a golden strawberry crunch coating you won’t be able to stop picking at.
| Detail | Time |
|---|---|
| Prep Time | 40 minutes |
| Cook Time | 30–35 minutes |
| Cooling & Chilling Time | 1 hour |
| Total Time | Approximately 2 hours 15 minutes |
| Yield | 12–14 generous slices |
How to Make the Cake Layers
Step 1: Prepare Your Pans and Oven
Preheat your oven to 350°F (175°C). Grease three 8-inch round cake pans, dust lightly with flour, and line the bottom of each with a circle of parchment paper. This triple step — grease, flour, parchment — guarantees your layers release cleanly every single time.
Step 2: Mix the Dry Ingredients
In a medium bowl, whisk together your flour, baking powder, and salt. Set this aside. Whisking your dry ingredients separately ensures the leavening is distributed evenly, which means your cake rises consistently rather than creating domed peaks in the center.
Step 3: Cream the Butter and Sugar
In a large bowl using a stand mixer or hand mixer, beat the softened butter and sugar together on medium-high speed for a full 4 to 5 minutes. You’re looking for a mixture that’s noticeably pale — almost white — and feels fluffy rather than heavy. This step builds the structure of your entire cake, so give it the time it deserves.
Step 4: Add Eggs and Vanilla
Add your eggs one at a time, beating well after each one before adding the next. This slow incorporation prevents the batter from breaking. Add your vanilla extract and mix until combined.
Step 5: Alternate Wet and Dry
Combine your milk and sour cream in a small bowl or measuring cup. Now, add your flour mixture and milk mixture to the butter mixture in alternating additions — starting and ending with the flour. Use three additions of flour and two of liquid. Mix only until just combined after each addition. Overmixing past this point develops gluten and produces a tough, chewy crumb instead of a tender one.
Step 6: Bake
Divide the batter evenly between your three prepared pans. Bake for 28 to 33 minutes, rotating the pans halfway through. The cake is done when a toothpick inserted in the center pulls out clean and the top springs back lightly when touched. Cool in the pans for 10 minutes, then turn out onto a wire rack to cool completely before any frosting touches them.
How to Make the Cream Cheese Frosting
- Beat your softened cream cheese and butter together on high speed for 3 full minutes. Don’t cut this short — you want zero lumps and a completely airy base.
- Add sifted powdered sugar one cup at a time, starting on low speed to prevent a cloud of sugar from filling your kitchen.
- Add vanilla extract, salt, and heavy cream. Beat on high for another 2 minutes until the frosting is light, fluffy, and holds a peak.
- If your frosting feels too soft to work with right away, refrigerate it for 15 to 20 minutes before you begin assembling. A slightly chilled frosting spreads far more cleanly than one that’s too loose.
How to Make the Strawberry Crunch Topping
- Place your Golden Oreos in a zip-lock bag and use a rolling pin to crush them into a rough crumble — you want a mix of textures, from fine crumbs to small chunks. Avoid going too far and turning them into powder.
- Crush your freeze-dried strawberries separately until fine.
- Combine both in a bowl, pour the melted butter over everything, and toss until every piece is coated evenly.
- Spread the mixture onto a parchment-lined baking sheet and let it set for 15 minutes. The butter helps the crumble clump into those satisfying clusters that give the cake its signature look and feel.
Assembling Your Cake
- Level your cooled cake layers with a serrated knife if any have domed during baking.
- Place your first layer on a cake board or serving plate. Spread a generous, even layer of cream cheese frosting using an offset spatula.
- Stack and repeat with all three layers.
- Apply a thin crumb coat — a sheer layer of frosting that seals in any loose crumbs — over the entire outside of the cake. Refrigerate for 20 minutes.
- Apply your final thick, smooth layer of frosting. Work from the top down on the sides, using your spatula at a slight angle to create clean, sharp edges.
- While the frosting is still slightly tacky, press your strawberry crunch topping firmly onto the sides and top of the cake, working in sections so nothing slides.
- Decorate with fresh strawberry halves, a drizzle of white chocolate, or piped frosting rosettes around the top edge for a polished, bakery-worthy finish.
3 Pro Tips for Better Flavor in Your Strawberry Crunch Cake Recipe
Here’s where the real transformation happens. These aren’t suggestions — they’re the decisions that separate a beautiful cake from a legendary one. Whether you’re a seasoned home baker or someone trying a layered cake for the very first time, these three shifts will make an immediate, noticeable difference in your results.
Pro Tip 1: Always Choose Freeze-Dried Strawberries Over Fresh for the Topping
This is non-negotiable, and here’s exactly why. Fresh strawberries are delicious in almost every other context, but they carry a significant amount of water. When you incorporate fresh strawberry pieces into your crunch topping, that moisture begins releasing within hours, turning your crispy coating into a soft, deflated layer by the time you’re ready to serve.
Freeze-dried strawberries have had all moisture removed through a controlled process that preserves flavor without any compromise. What you’re left with is an ingredient that’s intensely fruity, vividly colored, and bone-dry — everything you need for a topping that stays genuinely crunchy from the moment you press it on to the last slice served.
What to look for when buying freeze-dried strawberries:
- Label reads “100% strawberries” with no added sugar or preservatives
- Bright, deep red color — faded pink indicates lower quality or age
- Lightweight and crisp when you squeeze the bag gently
Bonus tip: Stir two tablespoons of crushed freeze-dried strawberries directly into your cream cheese frosting for a naturally pink hue and a real strawberry flavor note that runs through every single layer — not just the outside.
Pro Tip 2: Toast Your Crushed Golden Oreos Before Mixing
Most strawberry crunch cake recipes skip this step entirely, and that’s a genuinely missed opportunity. Spreading your crushed Oreos in a single layer on a baking sheet and toasting them at 325°F for 8 to 10 minutes does something remarkable to the overall flavor profile of your finished cake.
The gentle heat caramelizes the fat in the cream filling slightly, deepening those vanilla and butterscotch notes that make Golden Oreos so distinctive. It also drives out any residual moisture still sitting in the cookies, which means your crunch topping stays crunchier for significantly longer — even after the cake has spent a full night in the refrigerator.
Why this one extra step is worth it:
- Adds roasted, caramelized depth that pairs beautifully with bright strawberry flavor
- Extends the structural crunch life of the topping considerably
- Costs you only 10 additional minutes and requires no extra ingredients whatsoever
Pull the toasted crumbs out of the oven, let them cool completely on the pan, then proceed with mixing in your crushed freeze-dried strawberries and melted butter as directed. The difference in flavor complexity will confirm this step is worth every second of the wait.
Pro Tip 3: Chill Every Stage of Your Assembly Process
Patience is the ingredient that every great baker includes and every rushed baker skips. Assembling a layer cake when your components are even slightly too warm is the fastest route to sliding layers, cracked frosting surfaces, and a crunch topping that sinks into softness rather than adhering cleanly to the outside.
Here is your professional chilling checklist — follow it in order and your cake will hold its shape beautifully from the first cut to the very last slice:
- ✅ Cake layers — fully cooled to room temperature, then 30 minutes in the refrigerator before you begin assembly
- ✅ Frosting — 15 to 20 minutes in the refrigerator after mixing if it feels too loose or soft
- ✅ After crumb coat — 20 full minutes of refrigerator time before applying your final frosting layer
- ✅ After final frosting — 20 to 30 minutes chilled before pressing on the crunch topping
Following this sequence gives you clean, clearly defined layers when the cake is sliced, a frosting surface firm enough to anchor the crunch coating in place, and an overall cake that photographs sharply and holds its structure under the pressure of serving.
If you enjoy recipes that reward a little forward planning — whether that’s a show-stopping cake or a reliable weeknight dinner — exploring a range of quick and easy recipes alongside your baking practice keeps your whole culinary repertoire strong and versatile.
Storing Your Strawberry Crunch Cake
- In the refrigerator: Keep in an airtight cake container for up to 5 days. Expect some softening of the crunch topping after day two — it’s still completely delicious, just slightly less dramatic in texture.
- Freezing unfrosted layers: Wrap each layer tightly in plastic wrap, then in foil, and freeze for up to 3 months. Thaw overnight in the refrigerator before frosting.
- Freezing the fully assembled cake: Flash freeze uncovered for one hour, then wrap well and store for up to 1 month. After thawing, press a fresh layer of crunch topping onto the outside to fully restore that signature texture.
Common Mistakes to Avoid
- Overmixing the batter after adding flour : develops excess gluten and produces a dense, tough crumb. Mix until just combined and stop.
- Using cold butter, eggs, or cream cheese : cold ingredients don’t emulsify correctly and leave lumps in both batter and frosting. Set everything out at least an hour ahead.
- Skipping the crumb coat : without it, loose crumbs tear through your final frosting layer and ruin the clean finish you’re working toward.
- Rushing the assembly process : warm cake plus soft frosting equals structural collapse. Follow the chilling checklist above without shortcuts.
- Crushing your Oreos too uniformly fine : you need textural variety in every bite. Some larger pieces, some medium crumbs, some fine dust. Never a single uniform powder throughout.
Conclusion
Your strawberry crunch cake recipe journey doesn’t end when the last handful of crunch topping is pressed into place — it peaks the moment someone takes that first bite and looks at you like you’ve done something truly extraordinary. And honestly? You have.
By choosing freeze-dried strawberries for a crunch that actually stays crunchy, toasting your Oreo crumble for deeper and more layered flavor, and following a disciplined chilling process through every stage of assembly, you’re not simply baking a cake. You’re creating an experience that lingers in people’s memories long after the plate is empty.
Bakers who have studied this style of cake — including the well-known version from Broma Bakery — consistently point to the crunch topping as the detail that elevates everything. Now you know exactly how to make that topping perform at its very best.
You have the full recipe. You have the pro tips. You have the storage guidance and the mistakes to avoid. The only thing left is to preheat that oven, trust the process, and save yourself the corner slice.
Tried this recipe? Share your results in the comments, tag a friend who needs this cake in their life this weekend, and don’t forget to pin this for the next time a celebration calls for something unforgettable.
Frequently Asked Questions About Strawberry Crunch Cake Recipe
Q: Can I make a strawberry crunch cake recipe using a box mix?
A: Yes — a quality vanilla or strawberry box mix works well as a practical shortcut. Swap the water called for on the box with whole milk and stir in one tablespoon of sour cream for a noticeably richer, more homemade-tasting result.
Q: Why does my crunch topping keep going soggy?
A: The two most common causes are fresh strawberries in the topping (always use freeze-dried only) and applying the crunch to frosting that hasn’t been chilled long enough. Follow the chilling checklist in Pro Tip #3 and this problem disappears entirely.
Q: How far in advance can I bake the cake layers?
A: You can bake and freeze individual layers up to 3 months ahead. The fully assembled and frosted cake keeps well in the refrigerator for up to 5 days — just store it in an airtight container.
Q: What can I substitute for Golden Oreos in the strawberry crunch cake recipe topping?
A: Shortbread cookies or vanilla wafers are your best alternatives. The flavor shifts slightly toward a more buttery, less sweet base, but the crunch texture holds up well with either option.
Q: Does this strawberry crunch cake recipe work scaled down into cupcakes?
A: Absolutely. Use a standard muffin tin, reduce your baking time to 18 to 22 minutes, and roll the tops of your freshly frosted cupcakes directly into the crunch mixture for a stunning, individually portioned result that’s perfect for parties or gifting.
Have You Given This Recipe A Try?
There are no reviews yet. Be the first one to write one.