
Table of Contents
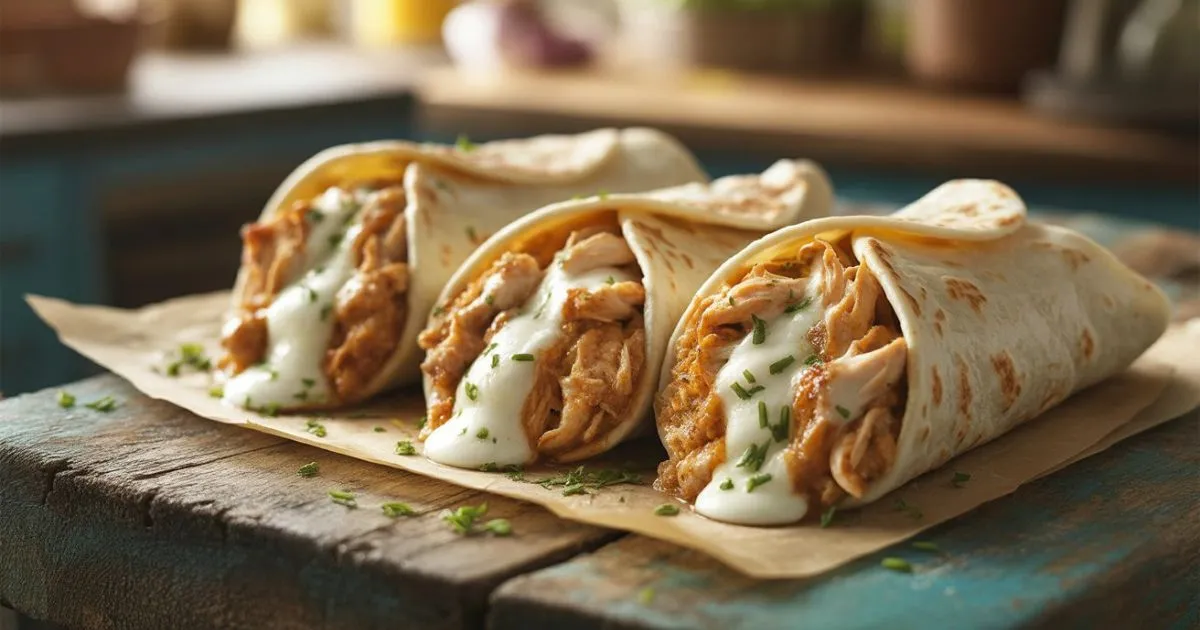
After a long, draining day, you walk in the door, stomach growling, and all you can think about is something quick, comforting, and downright delicious. That’s why Cheesy Garlic Chicken Wraps have become my lifesaver. They’re warm, cheesy, bursting with flavor, and come together in just five simple steps. Tonight, you can take a few everyday ingredients and turn them into a dinner that feels like a cozy hug on a plate.
Trust me, you don’t need to stress about dinner tonight. These wraps are like a warm hug for your taste buds, and your family’s gonna lose their minds over how good they are. Plus, you’ll look like a total kitchen rockstar without breaking a sweat!
Why Cheesy Garlic Chicken Wraps Are the Perfect Weeknight Solution
Look, I get it. We’re all crazy busy these days. Did you know most of us spend less than 30 minutes making dinner on weeknights? And yet we’re still craving something that actually tastes homemade and doesn’t cost a fortune.
Here’s the thing about takeout – a family dinner can easily run you $40-60, but these wraps? They’ll cost you maybe $12-15 to feed everyone. Your wallet will thank you, and honestly, they taste way better than anything you’d get delivered.
What I love most about these wraps is how flexible they are. Got a picky eater? No problem. Someone’s on a diet? Easy to customize. They’re basically the Swiss Army knife of weeknight dinners.
Here’s why you’re gonna love these wraps:
- Ready faster than you can say “delivery pizza”
- Made with stuff you probably already have hanging around
- Kids AND adults go crazy for them (trust me on this one)
- Actually good for you with real protein and veggies
- Perfect for meal prep if you’re into that whole Sunday prep thing
Essential Ingredients for Perfect Cheesy Garlic Chicken Wraps
Alright, let’s talk ingredients. Don’t worry – we’re not getting fancy here. This is real-life cooking for real people who don’t have time to hunt down exotic ingredients.
Core Ingredients List
The protein star:
- 1 pound chicken (breasts or thighs – I personally love thighs because they’re juicier and harder to mess up)
The wrap squad:
- 4-6 big flour tortillas (get the burrito-size ones, you’ll thank me later)
- 1½ cups shredded cheese (mozzarella’s great, but sharp cheddar is chef’s kiss)
- 4 cloves fresh garlic, chopped up fine
The veggie crew:
- 1 bell pepper, diced
- 1 small onion, chopped
- Some lettuce if you’re feeling fancy
The flavor makers:
- Salt, pepper, paprika, Italian herbs
- Basically whatever’s in your spice cabinet
Pantry Staples You’ll Need
You’ve probably got most of this stuff already: olive oil for cooking, a little butter (because butter makes everything better), and maybe some sour cream or hot sauce if that’s your thing.
Smart Substitutions and Storage Tips
Here’s where it gets fun – you can totally switch things up! Turkey instead of chicken? Go for it. Want some heat? Throw in pepper jack cheese. Trying to be healthier? Grab some whole wheat tortillas.
Pro tip: Fresh garlic is way better than the jarred stuff, but we’re not judging if that’s what you’ve got. And hey, pre-shredded cheese saves time, but if you want to be fancy and grate your own, the melting is so much better.
Step-by-Step Guide: 5 Easy Steps to Make Cheesy Garlic Chicken Wraps
Here’s the deal:
- Prep Time: 10 minutes (seriously, that’s it)
- Cook Time: 15 minutes
- Total Time: 25 minutes
- Feeds: 4-6 people (or 2 really hungry people)
- Difficulty: So easy your teenager could make it
Step 1 – Prepare and Season the Chicken
Cut your chicken into little bite-sized chunks – about the size of your thumb maybe? You want them all roughly the same size so they cook evenly. Nobody likes rubbery chicken next to perfectly cooked pieces, am I right?
Sprinkle on the salt, pepper, and paprika like you mean it. Let it sit for about 5 minutes while you do something else (like find a clean pan, because let’s be honest, the dishes are never caught up).
Pat the chicken dry with paper towels if it’s looking a bit wet. This helps it get that nice golden color instead of just steaming in the pan.
Real talk: If you remember to take the chicken out of the fridge 15 minutes before cooking, it’ll cook more evenly. But if you forget? Don’t stress about it – we’ve all been there.
Step 2 – Cook the Chicken to Perfection
Heat up some olive oil in your biggest pan over medium-high heat. You’ll know it’s ready when it starts to shimmer a bit – fancy, right?
Toss the chicken in there, but don’t crowd it! I know you want to get this done fast, but give those pieces some space to breathe. Let them sit there for 4-5 minutes without poking at them (I know, it’s hard to resist).
Flip ’em over and cook for another 3-4 minutes. If you’ve got a meat thermometer, you’re looking for 165°F. If not, just cut into a piece and make sure there’s no pink. Take the chicken out and set it aside – it’s gonna smell amazing.
Step 3 – Create the Garlic Aromatics
Here’s where the magic happens! Turn the heat down to medium and add some butter to that same pan. Don’t wash it – all those yummy brown bits are flavor gold.
Add your chopped garlic and let it sizzle for about a minute. But seriously, don’t walk away! Garlic goes from perfect to burnt faster than you can say “oops.” If it starts getting too brown, just pull the pan off the heat for a sec.
Throw in your onions and bell peppers and let them cook until they’re getting soft but still have a little crunch. Then add the chicken back in and toss it all together. Your kitchen is gonna smell incredible right now.
Warning: If you burn the garlic, it’ll taste bitter and you’ll have to start over. Been there, done that, learned the hard way!
Step 4 – Warm Tortillas and Prepare Assembly Station
Warm up your tortillas either in a dry pan (15 seconds each side) or wrap them in a damp paper towel and microwave for 30 seconds. Warm tortillas are way easier to work with and won’t crack on you.
Set up your little assembly line – tortillas, chicken mixture, cheese, and whatever else you’re adding. Trust me, you don’t want to be scrambling around looking for stuff while your food gets cold.
Step 5 – Assemble and Melt the Cheese
Put about ⅓ cup of that delicious chicken mixture in the center of each tortilla. Don’t go overboard – I’ve made that mistake and ended up with exploding wraps. Top with about ¼ cup of cheese.
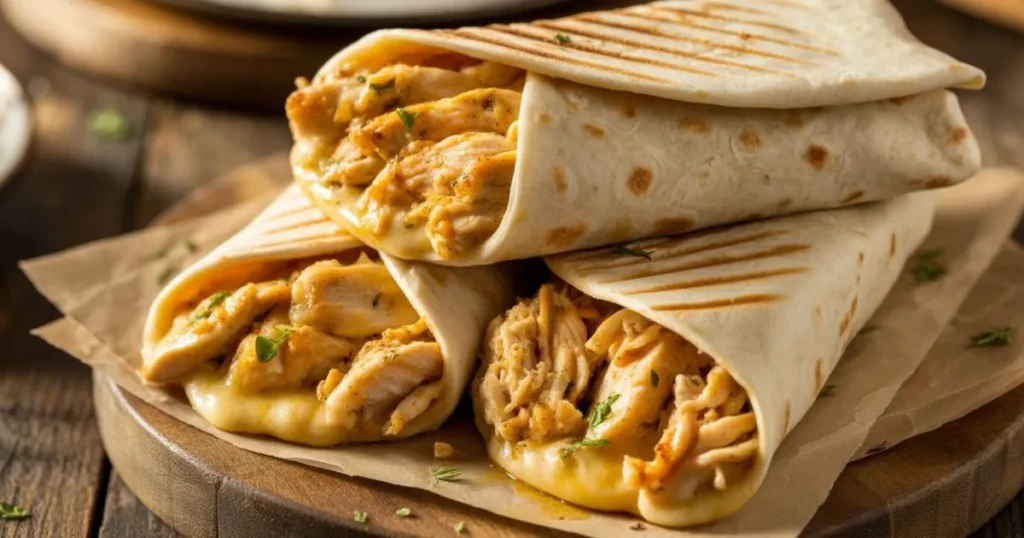
Now for the folding part (don’t panic, it’s easier than it looks): fold up the bottom, fold in the sides, then roll toward the top. Place them seam-side down in a clean pan over medium heat.
Cook for 1-2 minutes on each side until they’re golden and the cheese is all melty and gorgeous inside. Serve these babies right away while they’re hot and crispy!
Pro Tips for Restaurant-Quality Results at Home
Mastering Cooking Techniques
Here’s the thing – temperature control is everything. Keep it at medium heat and you won’t burn your garlic or end up with rubbery chicken. A good non-stick pan is your best friend here, but cast iron works great too if that’s what you’ve got.
Want to level up? Marinate the chicken in some Italian dressing for 30 minutes before cooking. It adds crazy good flavor and only takes a tiny bit more effort.
Cheese Melting Perfection
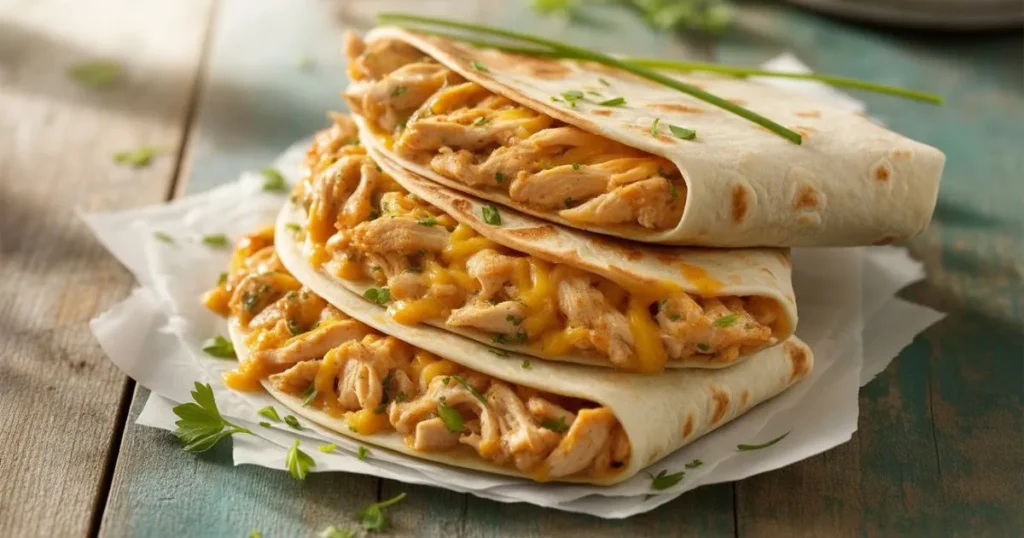
Okay, let’s talk cheese science for a hot second. Mozzarella gives you those amazing cheese pulls (you know, the Instagram-worthy ones), while cheddar brings the flavor. Why not use both? Mix ’em up!
Fresh grated cheese melts way better than the pre-shredded stuff because it doesn’t have all those anti-clumping chemicals. But honestly? If pre-shredded is what you’ve got, it’ll still be delicious.
Professional Wrapping Technique
Don’t stuff these things like a burrito at Chipotle! Keep the filling to about one-third of the tortilla. Pull it tight as you roll to avoid air bubbles that’ll make your wrap fall apart.
If you’re feeling unsure about your wrapping skills, stick a toothpick in there while it cooks. Just remember to take it out before serving – learned that one the hard way too!
For more creative chicken wrap variations and detailed techniques, check out this comprehensive recipe guide for cheesy garlic chicken wraps that explores additional flavor combinations and preparation methods.
Creative Variations and Customizations
Dietary Adaptations
Going keto? Swap those tortillas for big lettuce leaves or those fancy low-carb wraps they sell now. Honestly, they’re pretty good!
Gluten-free friends: There are tons of great gluten-free tortillas out there now. Some are actually better than the regular ones – who knew?
Dairy-free? Plant-based cheeses have come a long way. The cashew-based ones melt pretty nicely, though they don’t quite get that stretchy thing going.
International Flavor Profiles
Mediterranean vibes: Throw in some feta, diced tomatoes, fresh basil, and a drizzle of balsamic. It’s like a Greek vacation in a wrap.
Mexican fiesta: Add jalapeños, cilantro, pepper jack, and a squeeze of lime. Serve with salsa and guac because… why not?
Asian fusion: This might sound weird, but teriyaki chicken with sesame oil, green onions, and sesame seeds? Trust me, it works!
If you enjoy garlic-forward chicken dishes, you might also love this garlic parmesan chicken pasta recipe that showcases similar aromatic flavors in a different format.
Seasonal Adaptations
Summer calls for fresh veggies from your garden – zucchini, cherry tomatoes, whatever you’ve got growing. Winter? Try some roasted butternut squash or caramelized onions for that cozy comfort food vibe.
Nutritional Benefits and Meal Planning Strategies
Each wrap packs about 25-30 grams of protein, which is pretty awesome for keeping you full and satisfied. Compare that to most fast food wraps that are loaded with sodium and mystery ingredients, and you’re winning big time.
The best part? You control everything that goes in there. Less sodium, more veggies, better quality ingredients – it’s all up to you.
Meal Prep Excellence
Here’s a game-changer: make a big batch of the chicken mixture and keep it in the fridge for up to 3 days. When dinner panic strikes, just warm it up and assemble fresh wraps. Boom – dinner in 5 minutes.
You can even freeze the whole assembled wraps! Wrap them individually (plastic wrap then foil), freeze for up to 3 months, and you’ve got emergency dinners ready to go. Just thaw overnight and reheat.
Conclusion
Look, I’m not gonna lie – these Cheesy Garlic Chicken Wraps have basically saved my weeknight sanity. They’re quick, they’re delicious, and they make me feel like I’ve got my life together (even when I definitely don’t).
The best part? You can totally make them your own. Your family’s got weird preferences? Work around them. You’re missing an ingredient? Substitute something else. They’re basically foolproof.
So tonight, instead of scrolling through delivery apps and spending way too much money, give these a shot. Your family’s gonna think you’re amazing, your bank account will thank you, and you’ll have dinner on the table faster than you can say “pizza delivery.”
Trust me on this one – you’ve got this!
Frequently Asked Questions About Cheesy Garlic Chicken Wraps
Q: How long do Cheesy Garlic Chicken Wraps stay fresh in the fridge? A: They’ll keep for about 2-3 days wrapped up in foil or stored in containers. Just reheat and you’re good to go!
Q: Can I make Cheesy Garlic Chicken Wraps ahead of time for crazy busy nights? A: Absolutely! Make the chicken mixture up to 2 days ahead, then just assemble fresh wraps when you need them. Life-saver!
Q: What’s the best way to reheat leftover Cheesy Garlic Chicken Wraps? A: Pop them in a skillet for 2-3 minutes per side, or wrap in damp paper towels and microwave for about a minute. Skip the regular toaster – it’ll make them weird.
Q: Can I freeze these Cheesy Garlic Chicken Wraps for later? A: Yep! Wrap them individually in plastic wrap then foil. They’ll keep for 3 months in the freezer. Just thaw overnight and reheat.
Q: What should I serve with Cheesy Garlic Chicken Wraps? A: A simple salad, some roasted veggies, sweet potato fries, or even just some coleslaw. Keep it simple!
Q: How do I make my Cheesy Garlic Chicken Wraps extra crispy? A: Brush the outside with melted butter before cooking them in the pan. Game-changer for getting that perfect golden crispy outside!
Have You Given This Recipe A Try?
There are no reviews yet. Be the first one to write one.