
Table of Contents
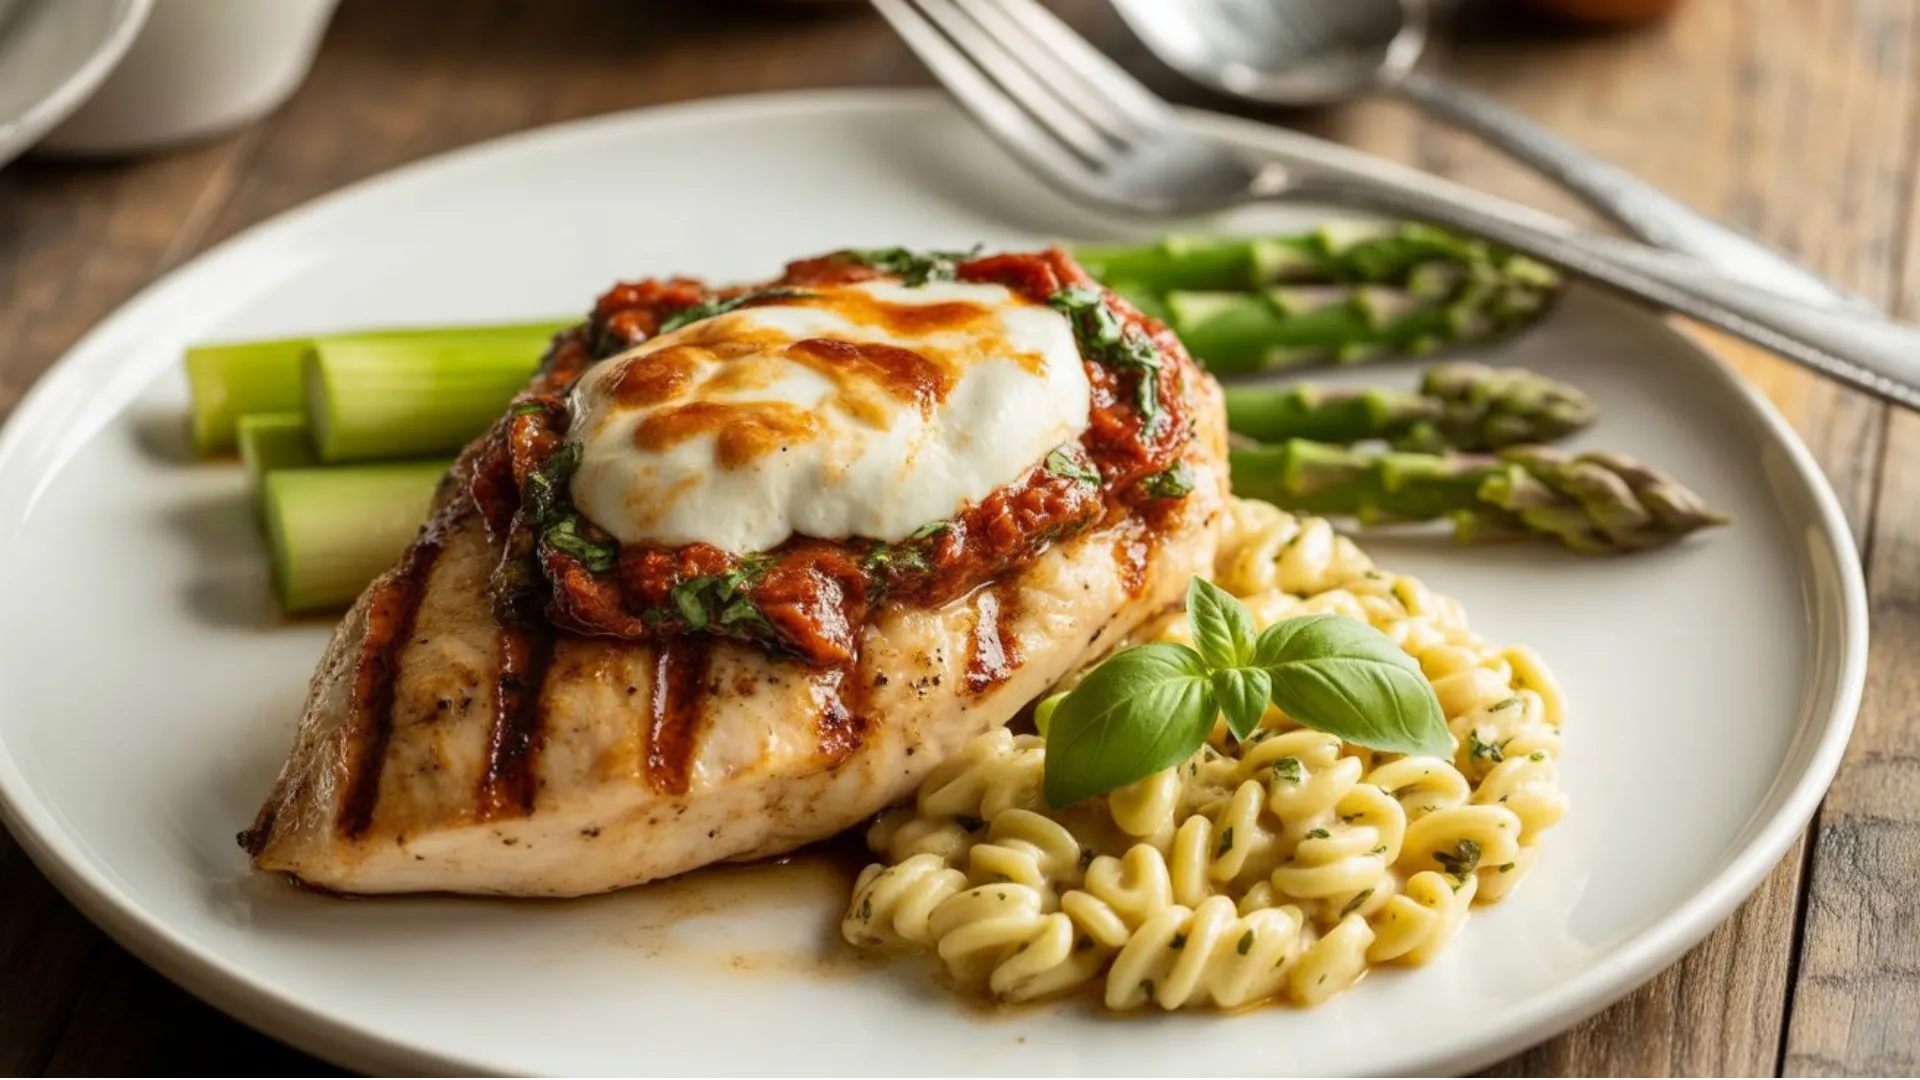
There are some dishes you never quite forget, and Chicken Bryan is one of them. The smoky grilled chicken, the bright lemon butter, the tang of creamy goat cheese, and the sweet pop of sun-dried tomatoes all come together in a way that makes you pause after the first bite. You might have ordered it at a favorite Italian restaurant and wondered why your home attempts never quite reached that same level. Maybe your chicken came out dry, the sauce felt flat, or the flavors didn’t blend the way you hoped.
This guide is designed to change that for you. By breaking the process into seven clear, repeatable steps, you’ll learn exactly how to recreate that restaurant-level Chicken Bryan flavor in your own kitchen. You’ll know which ingredients matter most, how to cook the chicken just right, and how to build a sauce that tastes bright, silky, and balanced. By the time you finish, you’ll not only have a reliable chicken bryan recipe—you’ll have a signature dish you can proudly serve to family and friends.
What Makes Chicken Bryan So Special?
Chicken Bryan stands out because it does something many chicken recipes don’t: it layers flavors with intention. You’re working with juicy grilled chicken, a lemon butter sauce that’s both rich and vibrant, creamy goat cheese that melts into the sauce, and sun-dried tomatoes that add sweetness and depth. Each bite hits multiple notes—tangy, savory, slightly sweet, and smoky—without feeling heavy.
You also get a satisfying balance of comfort and freshness. The butter and cheese wrap you in warmth, while the lemon and basil keep the dish light and bright. That’s why this recipe feels just as fitting for a special date-night dinner as it does for a relaxed weekend meal. Once you understand how each part contributes to the final plate, you can control the flavor and texture instead of leaving it to chance.
Essential Ingredients for an Authentic Chicken Bryan Recipe
Core Ingredients Overview
To get the best results, you need ingredients that deliver both flavor and consistency. You’re not chasing complexity here—you’re aiming for quality and balance. Choosing fresh, well-prepared components is what makes this version taste like a restaurant dish rather than a rushed weeknight experiment.
Chicken Ingredients
- 4 boneless, skinless chicken breasts (about 6–8 oz each)
- 2 tablespoons olive oil
- 1 teaspoon Italian seasoning
- 1 teaspoon garlic powder
- Salt, to taste
- Freshly ground black pepper, to taste
You want chicken breasts that are similar in size so they cook evenly. Olive oil helps the seasonings cling to the surface and encourages better browning on the grill.
Lemon Butter Sauce Ingredients
- 4 tablespoons unsalted butter
- 3 cloves garlic, minced
- 1/4 cup dry white wine (such as Pinot Grigio or Sauvignon Blanc)
- Juice of 2 fresh lemons
- 1/2 cup chicken broth (preferably low sodium)
- 1 teaspoon fresh basil, finely chopped
- Salt and pepper, to taste
The lemon and wine bring acidity, the butter adds richness, and the broth stretches the sauce without watering down the flavor. Fresh basil ties everything together with a fragrant finish.
Topping Ingredients
- 4 oz goat cheese, crumbled
- 1/2 cup oil-packed sun-dried tomatoes, chopped
- 2 tablespoons fresh basil, cut into thin ribbons (chiffonade)
- 1 tablespoon pine nuts (optional, for extra texture and flavor)
Oil-packed sun-dried tomatoes are ideal because they’re soft, flavorful, and integrate better with the cheese and sauce. If you enjoy a bit of crunch and nuttiness, toasted pine nuts are a subtle but impressive addition.
Kitchen Tools You’ll Need
Having the right tools ready before you start makes the entire process smoother and more enjoyable. You don’t need anything fancy—just reliable basics that help you control heat, timing, and texture.
- Grill pan or outdoor grill
- Large skillet (for the sauce)
- Meat thermometer
- Tongs
- Whisk
- Cutting board and sharp knife
- Measuring cups and spoons
The meat thermometer is especially helpful because it lets you cook the chicken to the perfect internal temperature instead of guessing. The whisk helps you bring the sauce together into a smooth, glossy consistency that clings beautifully to the chicken.
Preparation: Setting Yourself Up for Success
Preparing the Chicken
Before you even turn on the heat, you’ll want to prep the chicken properly:
- Place the chicken breasts on a cutting board and cover them with plastic wrap.
- Pound them gently to an even thickness of about 3/4 inch. This simple step ensures even cooking and improves tenderness.
- Pat the chicken completely dry with paper towels. Excess surface moisture interferes with browning and can cause the chicken to steam instead of sear.
- Let the chicken rest at room temperature for 15–20 minutes before cooking. Cold meat thrown directly onto a hot grill can seize up and cook unevenly.
Mise en Place: Organizing Before You Cook
“Mise en place” simply means having everything in its place. This habit makes you feel calm and in control while cooking:
- Mince your garlic and chop the sun-dried tomatoes.
- Juice your lemons and measure the wine, broth, and butter.
- Crumble the goat cheese and slice the basil.
Keeping small bowls of prepped ingredients near the stove lets you move through each step smoothly, especially when working with a delicate sauce.
- Preparation Time: 15 minutes
The 7 Essential Steps to Perfect Chicken Bryan
Step 1 – Season and Prep the Chicken
Drizzle your chicken with olive oil and rub it all over each breast. Sprinkle Italian seasoning, garlic powder, salt, and pepper on both sides. Use your hands to press the seasoning gently into the surface so it adheres well.
Let the seasoned chicken sit for about 5 minutes before grilling. This rest gives the salt a little time to interact with the surface, helping the flavors penetrate just below the outer layer. It’s a simple detail that pays off in every bite.
Step 2 – Grill the Chicken to Juicy Perfection
- Preheat your grill or grill pan to medium-high heat (around 400–450°F / 200–230°C).
- Lightly oil the grates using tongs and a folded paper towel dipped in oil. This reduces sticking and encourages clean grill marks.
- Place the chicken on the grill at a slight angle to the grates and leave it alone for 5–6 minutes. Avoid pressing or moving it—this time is when the sear forms.
- Rotate each piece 90 degrees and cook for another 2 minutes on the same side to create crosshatch marks if you like.
- Flip once and cook the second side for 5–6 minutes until the internal temperature reaches 165°F (74°C).
Transfer the chicken to a clean plate and let it rest for at least 5 minutes. This resting period allows the juices to redistribute so they stay in the meat instead of running out when you slice or cut into it.
- Cooking Time for Chicken: About 12–15 minutes
Step 3 – Build the Base of the Lemon Butter Sauce
While your chicken rests, move to the stovetop:
- In a large skillet, melt the butter over medium heat, swirling the pan so it melts evenly.
- Add the minced garlic and cook for about 30 seconds, just until fragrant. Stir constantly to prevent burning.
- Pour in the white wine and use a wooden spoon to scrape up any bits from the bottom of the pan. Allow the wine to simmer for about 2 minutes so the alcohol cooks off and the flavor concentrates.
This forms the foundation of your sauce, and keeping the heat moderate helps you avoid scorching the butter or garlic.
Step 4 – Layer the Flavors in the Sauce
Now you’ll bring the sauce to life:
- Add the fresh lemon juice and chicken broth to the skillet, stirring to combine.
- Bring the mixture to a gentle simmer. You want soft, steady bubbles, not a hard boil.
- Let the sauce reduce for about 5 minutes, or until it thickens slightly and the flavors taste more concentrated.
- Stir in the chopped fresh basil and season with a light pinch of salt and a few grinds of black pepper. Taste and adjust—remember that goat cheese will add more saltiness later.
You’re aiming for a sauce that coats the back of a spoon and tastes bright, buttery, and well-balanced.
Step 5 – Prepare the Signature Goat Cheese Topping
In a small bowl:
- Add the crumbled goat cheese.
- Stir in the chopped sun-dried tomatoes.
- Add the basil ribbons and fold gently to combine.
If you’re using pine nuts, toast them in a dry skillet over medium heat for 2–3 minutes, stirring frequently, until golden and aromatic. Let them cool slightly, then sprinkle them into the goat cheese mixture.
This topping should stay somewhat chunky. You’re not making a spread—you want pockets of cheese that soften and melt into the hot sauce when they hit the plate.
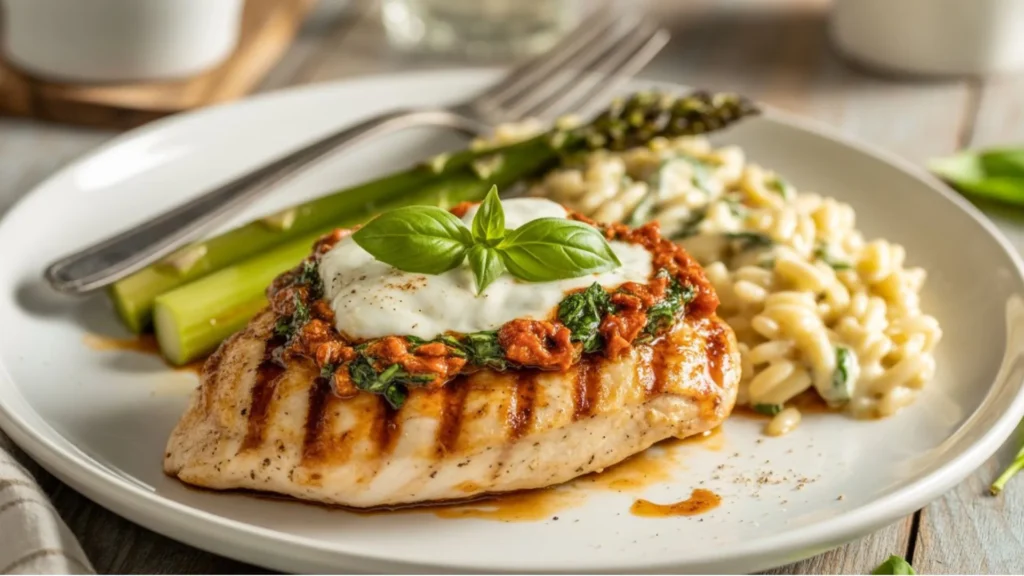
Step 6 – Assemble Your Chicken Bryan
You’re now ready to bring everything together:
- Arrange the rested grilled chicken breasts on serving plates or in a large serving dish.
- Spoon the warm lemon butter sauce over the chicken, letting it run down the sides and pool slightly around each piece.
- Top each breast generously with the goat cheese and sun-dried tomato mixture. Aim for an even distribution so every bite gets a little of everything.
If you prefer a slightly melted topping, you can place the assembled chicken (in an oven-safe dish) under the broiler for 1–2 minutes. Watch carefully so the cheese softens but doesn’t brown too much.
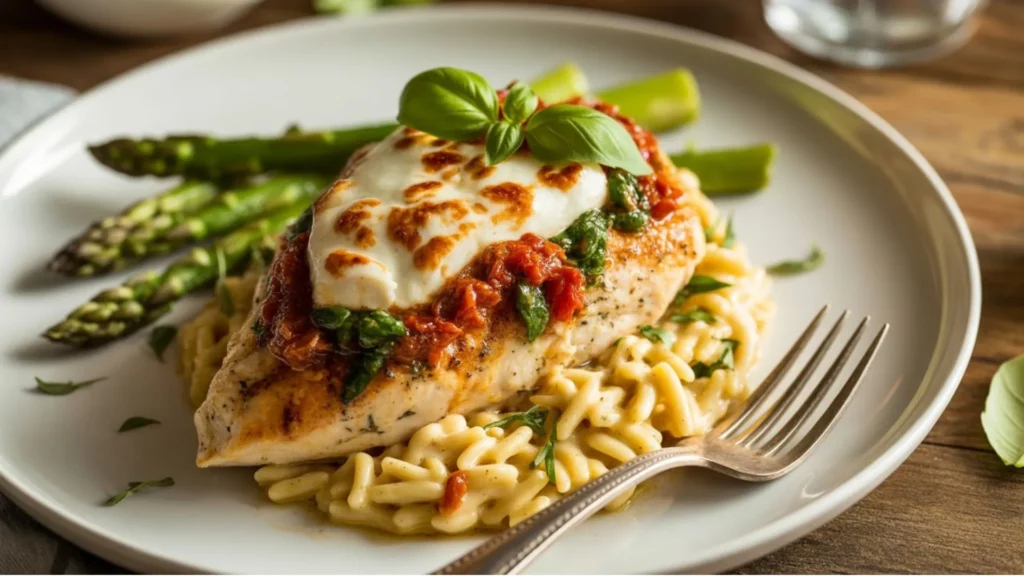
Step 7 – Finish with Restaurant-Style Plating
Presentation may feel like a small detail, but it has a big impact on how impressive your dish feels:
- Garnish with a bit of fresh basil on top of each chicken breast.
- Drizzle any remaining sauce around the plate.
- Wipe the rim of each plate for a clean, restaurant-style finish.
Serve your Chicken Bryan immediately while the chicken is hot, the goat cheese is soft, and the sauce is silky.
- Cooking Time (overall at the stove and grill): About 25 minutes
- Total Time (including prep): About 40 minutes
- Servings: 4
Expert Tips for Restaurant-Quality Results at Home
To consistently nail this chicken bryan recipe, keep these tips in mind:
- Use a meat thermometer instead of guessing doneness.
- Don’t rush preheating the grill or grill pan—proper heat is key to getting a good sear.
- Always rest the chicken before slicing or serving.
- Choose fresh lemons and fresh basil over bottled juice and dried herbs.
- Use good-quality goat cheese so it softens smoothly instead of turning grainy.
- Consider doubling the sauce if your family loves to spoon it over sides like potatoes or pasta.
These habits turn what might feel like a “special occasion” dish into something you can reliably repeat any time.
Serving Suggestions and Side Pairings
Chicken Bryan pairs beautifully with simple, comforting sides that let the sauce shine. You might serve it with:
- Creamy garlic mashed potatoes to soak up the lemon butter.
- Roasted asparagus or green beans with a sprinkle of parmesan.
- Angel hair pasta tossed in olive oil, garlic, and herbs.
- A crisp Caesar salad for freshness and crunch.
- Warm garlic bread or crusty rolls for dipping in the extra sauce.
If you enjoy wine, try a crisp white like Pinot Grigio or an unoaked Chardonnay. If you lean toward reds, a light Pinot Noir or Chianti can work well without overpowering the chicken.
Storage and Reheating Guide
Life doesn’t always allow you to cook and eat everything in one sitting. Here’s how to handle leftovers while preserving as much quality as possible.
Storing Leftovers
- Let the chicken cool to room temperature before storing.
- Place the chicken and sauce in an airtight container and refrigerate for up to 3 days.
- For best texture, keep the goat cheese and sun-dried tomato mixture in a separate container and add it fresh when you reheat and serve.
Reheating Methods
- Oven Method (Best): Place chicken in a baking dish, spoon a bit of sauce over the top, cover with foil, and warm at 350°F (175°C) for 15–20 minutes, or until heated through. Add the goat cheese topping right before serving.
- Stovetop Method: Slice the chicken and warm it gently in a skillet over medium-low heat with some sauce until hot.
- Microwave (Last Resort): Reheat in short bursts at medium power, covered, to avoid drying the chicken out.
If the sauce tightens too much when you reheat, whisk in a small splash of broth or water and a squeeze of fresh lemon to bring it back to life.
Variations and Customizations
Once you’ve mastered the classic chicken bryan recipe, you can play with variations that suit your preferences or dietary needs.
Dietary Adjustments
- Low-Carb / Keto: Serve over cauliflower mash, zucchini noodles, or a simple salad instead of pasta or potatoes.
- Dairy-Conscious: Swap butter for olive oil in the sauce and use a dairy-free soft cheese alternative in place of goat cheese.
Flavor Variations
- Add a pinch of red pepper flakes to the sauce if you enjoy a gentle kick.
- Stir a spoonful of capers into the sauce for briny notes that pair beautifully with lemon.
- Swap goat cheese for feta if you prefer a sharper, saltier profile.
- Add chopped marinated artichokes or a handful of baby spinach to the sauce for extra texture and color.
These variations keep the core character of the dish intact while letting you tweak it to your taste.
Helpful Related Recipes and Inspiration
If you love building a rotation of flavorful chicken dishes, you can explore more ideas and variations beyond Chicken Bryan. For a broader collection of chicken mains, sides, and flavor combinations you can adapt at home, you might like browsing a curated chicken category such as:
- Chicken inspirations and ideas for other meat and seafood meals:
https://palatablerecipes.com/meat-seafood/chicken-recipes/
And if you want to compare your version with another take on the same classic, you can look at a dedicated Chicken Bryan style recipe from a large recipe database:
- Another copycat-style Chicken Bryan preparation here
Using these as references can give you new ideas for seasoning, sides, or small tweaks to make the dish your own.
FAQ: Chicken Bryan Recipe
Can you make Chicken Bryan without a grill?
Yes, you can. If you don’t have a grill, use a grill pan or heavy skillet on the stovetop. Sear the chicken over medium-high heat on both sides until browned, then finish cooking in a 400°F (200°C) oven until it reaches 165°F inside. You’ll lose a bit of smoky grill flavor, but the sauce and toppings still deliver an excellent result.
How do you keep the chicken from drying out?
Pound the chicken to even thickness, avoid overcooking, and always check the internal temperature. Once it reaches 165°F, take it off the heat and let it rest for 5 minutes before cutting or serving. Those few minutes of resting make a big difference in juiciness.
Can you prepare any parts of Chicken Bryan ahead of time?
You can. You can pound and season the chicken earlier in the day and keep it in the fridge, mix the goat cheese and sun-dried tomato topping, and even make the sauce in advance. When reheating the sauce, warm it gently and add a bit of fresh lemon juice and basil to revive the flavor.
What can you use instead of goat cheese?
If you’re not a fan of goat cheese, you can substitute with feta for a tangier, saltier bite, or with a mild, creamy cheese such as ricotta for a softer flavor. Just keep in mind that each cheese will give the dish a slightly different personality.
Is this recipe good for meal prep?
Yes, it can work well for meal prep as long as you store the components properly. Keep the chicken and sauce in one container and the topping in another. Assemble and warm them together just before serving to preserve texture and freshness.
Conclusion: Bring Restaurant-Level Chicken Bryan into Your Kitchen
When you break it down into seven focused steps, Chicken Bryan stops feeling like a restaurant luxury and becomes a dish you can confidently make any time. You now know how to choose the right ingredients, grill the chicken so it stays juicy, and build a lemon butter sauce that tastes bright instead of heavy. You’ve seen how the goat cheese, basil, and sun-dried tomatoes turn simple grilled chicken into something layered, memorable, and deeply satisfying.
The next move is yours. Set aside a little time, follow the steps, and let your kitchen fill with the aroma of grilled chicken, garlic, and lemon. Once you serve this dish and see the reactions around your table, it can easily become your go-to for special occasions, date nights, or when you simply want to treat yourself.
If this recipe earns a place in your regular rotation, share it, tweak it, and make it part of your own cooking story. And when you’re ready to expand your chicken repertoire even more, use those linked resources for fresh ideas and new directions. Now it’s time to fire up the grill, heat that skillet, and turn this chicken bryan recipe into a signature meal you’ll be proud to call yours.
Have You Given This Recipe A Try?
There are no reviews yet. Be the first one to write one.