

Table of Contents
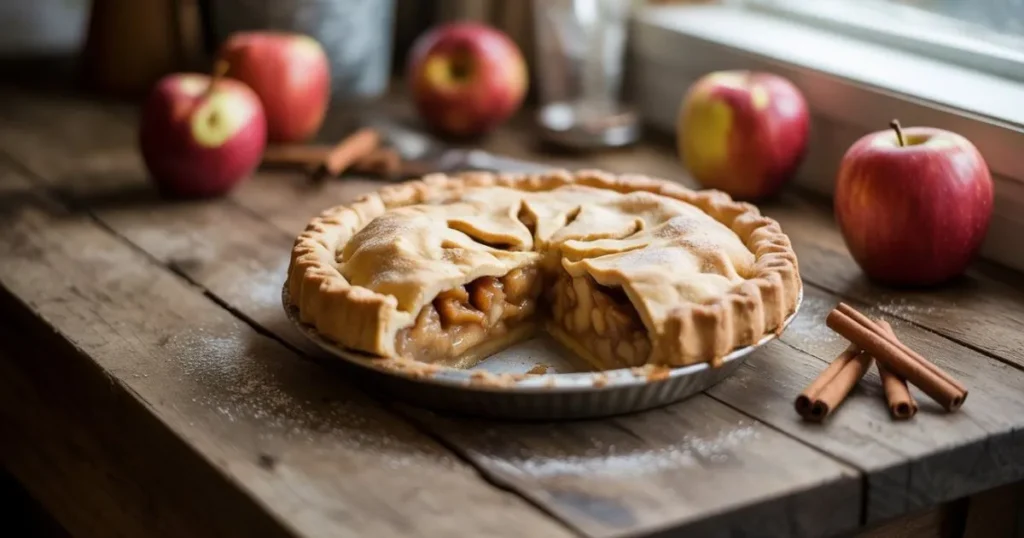
Homemade Apple Pie Recipe
Okay, let me tell you something – there’s nothing quite like walking into your kitchen and deciding today’s the day you’re gonna make an apple pie from scratch. I’m talking about that moment when you’re feeling all domestic and cozy, maybe it’s raining outside, and you just want to fill your house with the most amazing smell ever.
I used to be totally intimidated by homemade apple pie recipes. Like, who has time for all that rolling and crimping and whatever else goes into it? But here’s the thing I learned: it’s actually not that scary once you break it down. Plus, there’s something ridiculously satisfying about making something this delicious with your own two hands.
So grab your apron (or just wear clothes you don’t mind getting floury), and let’s make some magic happen in your kitchen!
Why This Homemade Apple Pie Recipe Works Every Time
Look, I’ve tried a bunch of different homemade apple pie recipes over the years, and let me tell you – some were disasters. Like, really bad disasters. Soggy bottoms, runny filling, crust that could double as a hockey puck. Not fun.
I’ve tested everything from traditional apple pie recipes to classic grandma-style versions, and while they all have their charm, this recipe? This one’s different. It works because it tackles all the sneaky little problems that can ruin your pie. We’re talking flaky crust that actually stays flaky, filling that’s not swimming in apple juice, and flavors that’ll make you do a little happy dance.
The secret isn’t some fancy technique or expensive ingredient – it’s just understanding what each step does and why it matters. Trust me, once you get it, you’ll be the pie person in your friend group.
Essential Ingredients for the Perfect Homemade Apple Pie Recipe
Quality Foundation Elements
Alright, let’s talk ingredients. You don’t need to break the bank here, but don’t go super cheap either. Think of it this way – you’re putting in all this effort, so let’s make it count!
For your crust (the foundation of greatness):
- 2½ cups all-purpose flour
- 1 teaspoon salt
- 1 tablespoon granulated sugar
- 1 cup cold unsalted butter, cubed (and I mean COLD – like straight from the fridge cold)
- 6-8 tablespoons ice water
For your filling (where the magic happens):
- 8 medium apples (we’ll talk varieties in a sec)
- ¾ cup granulated sugar
- 2 tablespoons brown sugar (because why not double up on sweetness?)
- 2 tablespoons all-purpose flour
- 1 tablespoon cornstarch (your secret weapon against runny filling)
- 1 teaspoon ground cinnamon
- ¼ teaspoon ground nutmeg
- ¼ teaspoon ground ginger
- ⅛ teaspoon ground cloves
- 2 tablespoons fresh lemon juice
- 1 teaspoon vanilla extract
- 2 tablespoons cold butter, diced
Apple Selection Mastery
Here’s where people get all overwhelmed, but honestly? It’s not rocket science. You want a mix of apples because different ones bring different things to the party.
My go-to combo:
- 4 Granny Smith apples (these are the tart ones that won’t turn to mush)
- 3 Honeycrisp apples (sweet and they keep their shape pretty well)
- 1 Braeburn apple (adds some complexity – fancy, right?)
Can you use just one type? Sure, but mixing them up makes your homemade apple pie recipe way more interesting. It’s like having a conversation instead of a monologue, you know?
Complete Homemade Apple Pie Recipe with 7 Perfect Steps
What you’re making: A seriously good apple pie that’ll make your house smell incredible and have people asking for the recipe.
How long it takes: About 45 minutes to put together, 55 minutes in the oven
Total time: Around 1 hour 40 minutes (most of that is waiting, so relax!)
Feeds: 8 people (or 4 people who really love pie)
Step 1 – Create Your Perfect Pie Crust Foundation
Okay, deep breath. The crust is where people freak out, but we’re gonna nail this. Get a big bowl and whisk together your flour, salt, and sugar. Nothing fancy here – just mix it up.
Now comes the fun part (and by fun, I mean slightly messy). Add those cold butter cubes and start working them into the flour. You can use a pastry cutter if you’ve got one, or just use your hands like I do. You want it to look like chunky breadcrumbs with some bigger butter pieces still hanging out.
Here’s the key – add that ice water ONE tablespoon at a time. I cannot stress this enough. Don’t dump it all in at once or you’ll have a sticky mess. You’ll know you’re done when the dough just barely holds together when you squeeze it.
Split it in half, make two discs, wrap them in plastic wrap, and stick them in the fridge for at least an hour. This is when you clean up your floury kitchen and maybe have a snack.
Step 2 – Prepare Your Apple Filling Like a Master Baker
While your dough is chilling (literally), let’s deal with the apples. Peel them, core them, and slice them about ¼-inch thick. Try to keep them roughly the same size so they cook evenly.
Toss all those apple slices in a big bowl with both sugars, flour, cornstarch, and all those lovely spices. Add the lemon juice and vanilla, and mix it all up until every slice is coated.
Now here’s something most people skip – let this sit for about 15 minutes. The apples will start releasing their juices, which mix with the sugar to create this amazing syrup. It’s like a preview of what’s coming!
Step 3 – Roll Out Your Crust with Professional Confidence
Time to tackle the rolling! Take one disc out of the fridge and let it soften for about 5 minutes. You don’t want it rock hard, but you don’t want it warm either.
Flour your counter (generously – don’t be shy), and start rolling from the center out. Turn the dough every few rolls so it doesn’t stick. You’re going for about a 12-inch circle that’s roughly ⅛-inch thick.
Pro tip: It doesn’t have to be perfect! Wonky circles have character. Carefully move it to your pie pan – I like to fold it in half and then unfold it in the pan. Press it gently into place and trim the edges, leaving about an inch hanging over.
Step 4 – Assemble Your Homemade Apple Pie Recipe
This is when it starts looking like an actual pie! Spoon your apple mixture into the crust-lined pan. Make a little mound in the center because it’ll settle as it bakes.
Dot those cold butter pieces all over the apples – they’ll melt and make everything rich and delicious.
Roll out your second piece of dough the same way as the first, then drape it over your pie. You’ve got yourself a covered pie!
Step 5 – Seal and Vent for Optimal Results
Trim the top crust so you’ve got about ½-inch hanging over, then fold it under the bottom crust. Now you get to be artistic with the crimping! Use a fork or just pinch with your fingers – whatever makes you happy.
Here’s the super important part – cut some vents in the top. I usually do 4 or 5 slits with a sharp knife. These let steam escape so your pie doesn’t turn into a soggy mess or explode in your oven (yes, that can happen!).
Brush the whole thing with beaten egg and sprinkle some coarse sugar on top. This gives you that gorgeous golden color that makes everyone go “wow!”
Step 6 – Master the Two-Temperature Baking Method
Here’s where we get a little fancy with the oven technique. Start at 425°F – this high heat sets the crust quickly so it gets nice and flaky.
Bake for exactly 20 minutes at this temperature, then turn it down to 350°F and keep going for another 35-40 minutes. You’ll know it’s done when the crust is golden brown and the filling is bubbling away through those vents.
If the edges start getting too dark (and they might), just make some little foil tents to protect them. No big deal!
Step 7 – Exercise Patience for Maximum Flavor
Okay, this is the hardest part – you have to let it cool! I know, I know, it smells amazing and you want to dive right in, but trust me on this. Let it sit for at least 3 hours.
During this time, the filling goes from hot liquid to that perfect sliceable consistency. Cut it too early and you’ll have apple soup in a crust. Not cute.
Pro Tips for Homemade Apple Pie Recipe Mastery
Troubleshooting Common Challenges
Soggy bottom syndrome: Been there! Pre-bake your bottom crust for 10 minutes before adding the filling. Also, make sure your oven’s actually at the temperature it says it is – those things lie sometimes.
The great overflow: Put a baking sheet on the rack below your pie. Trust me on this one – cleaning apple goop off your oven floor is not fun.
Pale, sad-looking crust: That egg wash is your friend! Don’t skip it, and rotate your pie halfway through if your oven has hot spots.
Make-Ahead Strategies
Want to be really smart about this? You can totally make your homemade apple pie recipe ahead of time. Assemble the whole thing and freeze it unbaked for up to 3 months. When you’re ready to bake, just add 15-20 extra minutes to the cooking time.
You can also make the crust dough a few days ahead and keep it in the fridge, or freeze it for months. Future you will thank present you!
Nutritional Considerations and Serving Excellence
Each slice has about 380 calories, which honestly isn’t too bad for something this delicious. It’s got fruit in it, so that’s basically healthy, right? (Just kidding… sort of.)
Serve it however makes you happy – with vanilla ice cream, whipped cream, or if you’re feeling adventurous, try it with a slice of sharp cheddar. I know it sounds weird, but it’s surprisingly amazing!
Frequently Asked Questions About Homemade Apple Pie Recipe
What’s the secret to flaky crust in a homemade apple pie recipe? Cold butter is your best friend! Those cold chunks create steam when they hit the hot oven, and that steam makes layers. Also, don’t overwork the dough – you’re not kneading bread here.
Can I just use one type of apple in my homemade apple pie recipe? You can, but why would you want to? It’s like eating vanilla ice cream when you could have cookies and cream. Different apples bring different flavors and textures to the party.
Help! My homemade apple pie recipe filling is always runny! Add more thickener (that flour and cornstarch combo), make sure you’re letting the apple mixture sit so the juices can mingle, and double-check your oven temperature. Runny filling usually means something didn’t cook long enough or hot enough.
How should I store my homemade apple pie? Just cover it loosely and leave it on the counter for a couple days, or stick it in the fridge for up to 5 days. Honestly though, it’s best in the first day or two after you make it.
Can I freeze my homemade apple pie recipe? Absolutely! Freeze it before or after baking. Unbaked pies keep for 3 months, baked ones for 2 months. Just thaw overnight in the fridge before reheating.
Why is my homemade apple pie recipe filling watery? Some apples are just juicier than others. If this keeps happening, drain off some of the liquid after your apple mixture has been sitting, or add an extra tablespoon of cornstarch next time.
Your Apple Pie Adventure Awaits
Look, I’m not gonna lie – your first homemade apple pie recipe might not be Instagram perfect. Mine definitely wasn’t! But you know what? It’ll still taste incredible, and you’ll learn something with every pie you make.
The best part about mastering this homemade apple pie recipe isn’t just the delicious results (though those are pretty great). It’s the confidence you get from creating something amazing from scratch. Plus, nothing says “I’ve got my life together” quite like pulling a gorgeous pie out of your oven.
So what are you waiting for? Your kitchen’s calling, your ingredients are ready, and your house is about to smell like pure happiness. Get started on this homemade apple pie recipe adventure – your taste buds (and your friends) will totally thank you for it!
Now go make some pie magic happen!
Have You Given This Recipe A Try?
There are no reviews yet. Be the first one to write one.