

Table of Contents
Pumpkin Sourdough Bread: Complete Guide
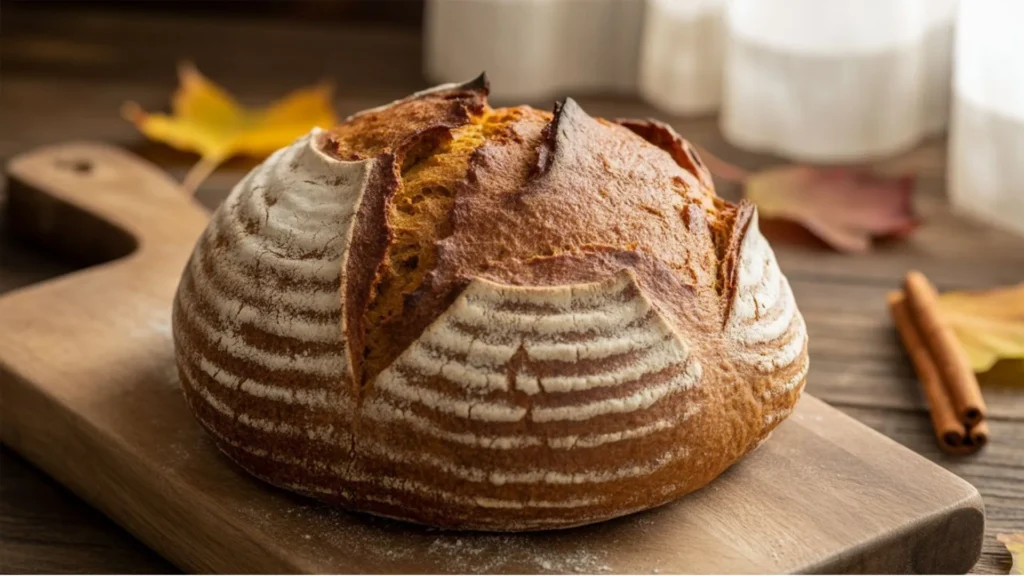
The golden glow of autumn mornings brings with it an irresistible urge to fill your kitchen with warm, comforting aromas. Picture yourself pulling a perfectly bronzed loaf of pumpkin sourdough bread from your oven, its crust crackling as it cools, releasing that distinctive scent of wild fermentation mingled with seasonal spices. This isn’t just wishful thinking, it’s entirely achievable when you master the art of incorporating pumpkin into your sourdough practice.
Your journey toward creating exceptional pumpkin sourdough bread begins with understanding that this seasonal variation demands respect for both traditional fermentation techniques and the unique properties that pumpkin brings to your dough. The natural sugars, moisture content, and fiber structure of pumpkin create opportunities for incredible flavor development while presenting specific challenges that many bakers struggle to overcome.
Understanding the Magic Behind Pumpkin Sourdough Bread
What Sets This Autumn Bread Apart
When you introduce pumpkin puree into your sourdough formula, you’re essentially creating a completely different baking environment. The natural sugars present in pumpkin act as additional food sources for your wild yeast culture, accelerating fermentation while contributing to complex flavor development that commercial yeasts simply cannot achieve.
Your pumpkin sourdough bread will exhibit characteristics that make it distinctly superior to standard varieties:
- Enhanced moisture retention keeps your loaf fresh longer
- Natural beta-carotene provides nutritional benefits and gorgeous color
- Subtle sweetness reduces dependency on added sugars
- Complex flavor profile develops through extended fermentation
- Improved digestibility thanks to the breakdown of proteins and starches
For those following special dietary requirements, you can explore gluten-free sourdough alternatives that maintain similar fermentation benefits while accommodating wheat sensitivities.
The Science of Seasonal Fermentation
Understanding how pumpkin affects your fermentation timeline becomes crucial for consistent results. The additional moisture and sugars create an environment where your sourdough culture becomes more active, potentially cutting your bulk fermentation time by 25-30% compared to standard white sourdough recipes.
The Foundation Recipe: Your Perfect Pumpkin Sourdough Bread
Before diving into advanced techniques, you need a reliable base recipe that consistently delivers excellent results. If you’re looking for additional inspiration, check out this easy pumpkin sourdough bread recipe for alternative approaches to seasonal baking.
Essential Ingredients
Your ingredient selection directly impacts the final quality of your pumpkin sourdough bread:
- 100g active sourdough starter (fed 4-6 hours prior, doubling in size)
- 375g bread flour (minimum 12% protein content)
- 150g pumpkin puree (strained and room temperature)
- 225g filtered water (adjusted based on pumpkin moisture)
- 10g sea salt (avoid iodized varieties)
- 15g raw honey (enhances fermentation activity)
- 2g ground cinnamon (Ceylon variety preferred)
- 1g fresh grated nutmeg
- 30g extra virgin olive oil (adds richness and extends shelf life)
Step-by-Step Process
Your mixing technique sets the foundation for proper gluten development:
- Combine your active starter with lukewarm water and honey, whisking until completely dissolved
- Integrate pumpkin puree gradually, ensuring no lumps remain
- Mix flour, salt, and spices in your largest mixing bowl
- Create a well in the flour mixture and pour in your wet ingredients
- Use a bowl scraper to combine until you achieve a shaggy, slightly sticky dough
- Drizzle olive oil over the surface and incorporate with wet hands
Timing Breakdown
Active preparation: 45 minutes spread across the day
Bulk fermentation: 4-6 hours at 72°F
Cold retard: 12-24 hours refrigerated
Baking time: 45 minutes total
Complete process: 18-30 hours from mixing to cooling
Tip #1: Mastering Pumpkin Puree Preparation for Optimal Results
Selecting Your Pumpkin Variety
Your choice of pumpkin variety dramatically influences the final texture and flavor of your pumpkin sourdough bread. Avoid carving pumpkins, which contain excessive water and little flavor.
Superior varieties for bread making:
- Sugar pie pumpkins deliver concentrated sweetness with manageable moisture
- Butternut squash provides creamy texture and subtle nutty notes
- Kabocha squash offers rich, complex flavors with lower water content
- High-quality canned pumpkin ensures consistent results year-round
Moisture Management Techniques
Excess moisture represents the primary challenge when crafting pumpkin sourdough bread. Your puree preparation directly affects dough handling and final texture.
Professional moisture reduction methods:
- Line a fine-mesh strainer with cheesecloth and drain puree for 2-3 hours
- Spread puree on parchment-lined baking sheets, refrigerate overnight
- Gently press puree between paper towels before incorporating
- Roast prepared puree at 300°F for 15-20 minutes to concentrate flavors
Flavor Enhancement Strategies
Transform ordinary pumpkin puree into a flavor powerhouse through strategic preparation:
- Roast pumpkin halves cut-side down until caramelized edges develop
- Add a pinch of salt during roasting to intensify natural sweetness
- Cool completely before pureeing to prevent excess steam moisture
- Taste and adjust seasoning before incorporating into your dough
Tip #2: Hydration Balance – The Key to Perfect Texture
Understanding Effective Hydration Levels
Your pumpkin sourdough bread requires careful hydration calculation since pumpkin puree contributes approximately 88% water content to your formula. This additional moisture can transform manageable dough into sticky, unworkable mass without proper adjustments.
Calculating true hydration percentage:
Total liquid (water + pumpkin moisture) ÷ flour weight × 100
For optimal handling, aim for 70-75% effective hydration, accounting for pumpkin’s water content.
Environmental Factors Affecting Hydration
Your baking environment significantly impacts how much water your flour absorbs:
- Humid conditions: Reduce water by 10-15ml
- Dry climates: May require additional 5-10ml water
- Seasonal flour variations: Winter wheat often needs more hydration
- Altitude considerations: Higher elevations require increased liquid
Dough Consistency Indicators
Learn to recognize proper hydration through tactile and visual cues:
- Slightly tacky surface that doesn’t stick aggressively to clean hands
- Smooth, supple texture after completing stretch and fold sequences
- Dough holds its shape during pre-shaping without excessive spreading
- Gentle finger poke creates indentation that slowly springs back
Tip #3: Fermentation Timing for Maximum Flavor Development
Bulk Fermentation Adjustments
Your pumpkin sourdough bread ferments faster than standard recipes due to increased sugar content. Monitor dough development rather than strictly following time guidelines.
Temperature-based timing adjustments:
- 68-72°F: Expect 4-6 hour bulk fermentation
- 72-76°F: Monitor closely after 3-4 hours
- Below 68°F: May require 6-8 hours for complete development
Visual Fermentation Markers
Train your eyes to recognize optimal fermentation completion:
- Volume increases by 50-70% from initial size
- Surface becomes smooth and slightly domed
- Gentle jiggle reveals aerated, light texture
- Pleasant aroma combines yeast activity with pumpkin sweetness
Cold Retardation Benefits
Extended cold fermentation transforms your pumpkin sourdough bread from good to exceptional:
- 12-18 hours: Develops mild complexity
- 18-24 hours: Achieves optimal flavor balance
- 24-36 hours: Creates deep, nuanced taste profile
- Beyond 36 hours: Risk of over-fermentation and structural breakdown
Monitor your shaped loaf during cold retard, looking for gradual size increase and firm but yielding texture when gently pressed.
Tip #4: Shaping Techniques for Professional Results
Pre-Shaping Strategy
Your pumpkin sourdough bread’s higher moisture content requires modified handling techniques. Work confidently but gently to preserve the delicate gas structure created during fermentation.
Essential pre-shaping steps:
- Turn dough onto lightly floured surface using bowl scraper
- Allow 2-3 minute rest for gluten relaxation
- Gather edges toward center using bench scraper
- Create gentle tension without degassing
- Rest 15-20 minutes before final shaping
Final Shaping Excellence
Transform your pre-shaped round into a bakery-worthy boule:
- Surface preparation: Dust work surface minimally with flour
- Tension building: Pull dough toward yourself while rotating
- Seam creation: Pinch bottom seam securely closed
- Banneton placement: Position seam-side up in well-floured proofing basket
Proofing Container Options
Your choice of proofing vessel affects final appearance and crust development:
- Traditional bannetons: Create beautiful spiral patterns
- Lined bowls: Produce smooth, rounded loaves
- Oval baskets: Generate elegant batard shapes
- Tea towel-lined containers: Offer budget-friendly alternatives
Tip #5: Scoring and Baking for Stunning Results
Pre-Baking Preparation
Your oven setup determines whether your pumpkin sourdough bread achieves professional-quality results or disappoints with poor spring and uneven baking.
Essential equipment preparation:
- Preheat Dutch oven with lid to 475°F for minimum 45 minutes
- Position rack in lower third of oven
- Prepare parchment paper sling for easy transfer
- Ready sharp razor blade or bread lame for scoring
Scoring Techniques for Success
Proper scoring allows controlled expansion and creates stunning visual appeal:
Classic scoring approaches:
- Single diagonal slash at 45-degree angle, 1/4-inch deep
- Cross pattern for rustic appearance and even expansion
- Decorative wheat stalk design celebrating autumn harvest
- Multiple parallel cuts for consistent crumb structure
Work quickly and decisively – hesitation creates ragged cuts that heal poorly during baking.
Baking Protocol for Perfect Crust
Your baking technique determines final texture, color, and flavor development:
Stage One (Steam Phase):
- Transfer scored loaf to preheated Dutch oven
- Cover immediately and bake at 450°F for 22 minutes
- Steam creates initial crust flexibility for maximum expansion
Stage Two (Browning Phase):
- Remove lid carefully to avoid steam burns
- Reduce temperature to 425°F
- Continue baking 23-28 minutes until deep golden brown
- Internal temperature should reach 205-208°F
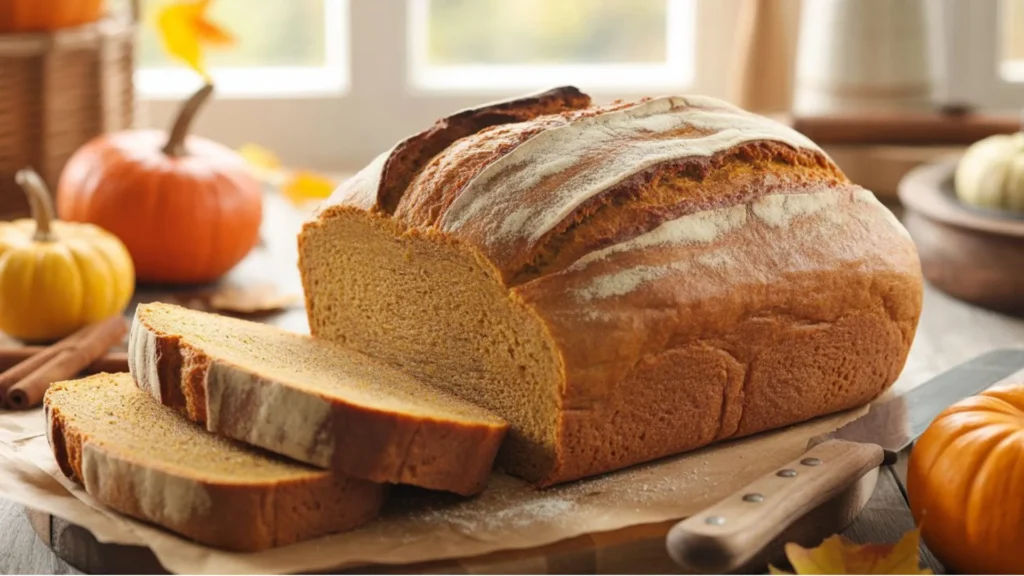
Cooling and Storage
Your patience during cooling directly affects final texture and flavor:
- Cool on wire rack minimum 2 hours before slicing
- Internal structure continues setting during cooling period
- Optimal flavor develops 4-6 hours after baking
- Store cut-side down on cutting board, covering with kitchen towel
Troubleshooting Common Challenges
Dense, Gummy Texture Solutions
When your pumpkin sourdough bread turns out heavy and dense:
- Verify starter activity through float test before mixing
- Extend bulk fermentation until proper volume increase achieved
- Reduce pumpkin puree quantity in next attempt
- Ensure adequate gluten development through proper mixing
Overly Wet or Sticky Results
Address excessive moisture through systematic adjustments:
- Strain pumpkin puree longer to remove excess water
- Reduce base water by 15-20ml in subsequent bakes
- Add flour gradually during mixing if dough becomes unmanageable
- Consider environmental humidity factors affecting flour absorption
Alternative Flour Considerations
If you’re working with dietary restrictions, explore gluten-free sourdough bread options that can be adapted for pumpkin variations. These alternatives require adjusted hydration ratios and different handling techniques but can produce equally satisfying results.
Transform Your Autumn Baking Today
Your journey toward pumpkin sourdough bread mastery requires patience, practice, and attention to detail. Each loaf teaches valuable lessons about fermentation timing, ingredient behavior, and technique refinement. Start with this foundation recipe, then experiment with spice combinations, flour blends, and shaping variations to create your signature autumn bread.
Don’t wait for perfect conditions – begin your pumpkin sourdough adventure today. Your kitchen deserves the warmth and satisfaction that comes from mastering this seasonal masterpiece, and your family will treasure the memories created around these golden, aromatic loaves.
Remember that exceptional pumpkin sourdough bread comes from understanding your ingredients, respecting fermentation processes, and maintaining consistent technique. With these five essential tips guiding your practice, you’ll soon be creating bakery-quality results that capture autumn’s essence in every perfectly crafted slice.
Have You Given This Recipe A Try?
There are no reviews yet. Be the first one to write one.