
Table of Contents
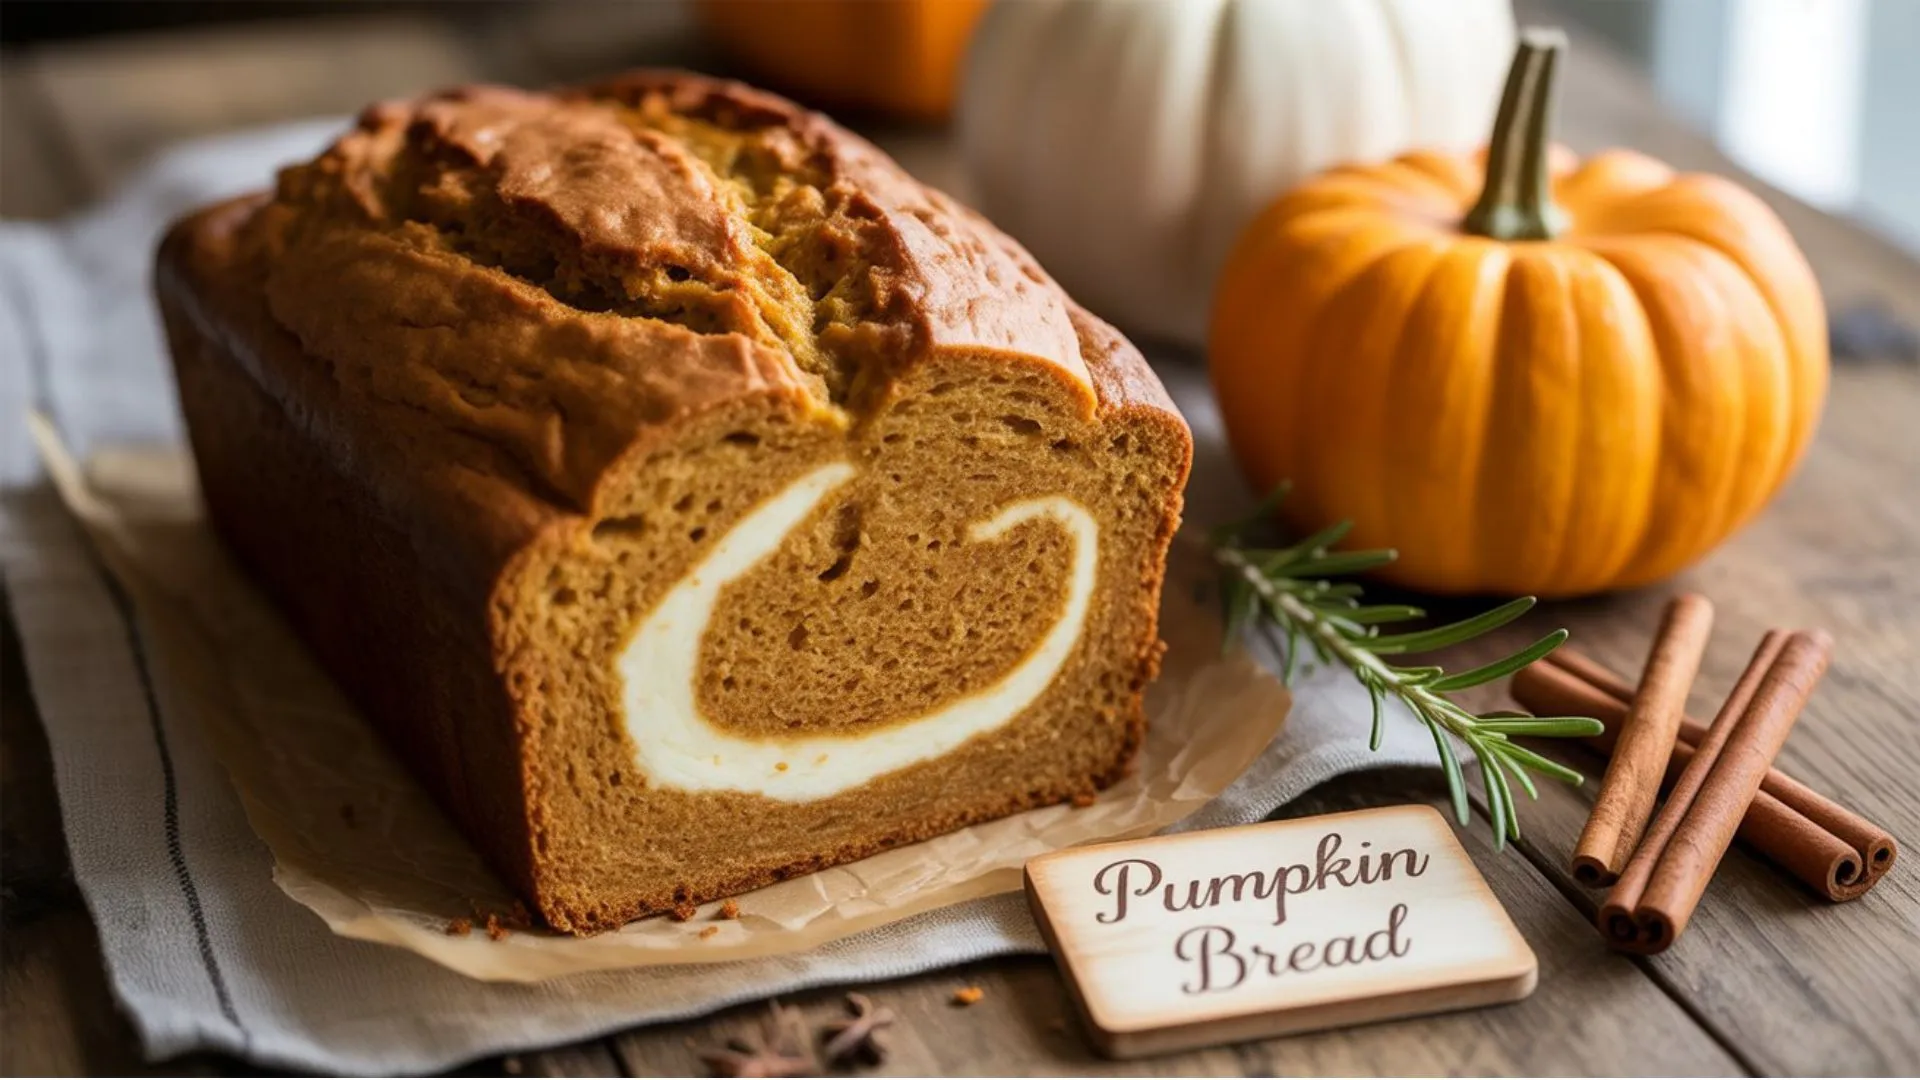
Cream Cheese Filling For Pumpkin Bread: Transform Your Fall Baking
Picture yourself pulling a golden loaf of pumpkin bread from the oven, only to discover that your carefully prepared cream cheese filling has vanished into the depths of your batter. You’re left staring at what should have been beautiful swirls of tangy richness, now transformed into an underwhelming, soggy disappointment. This heartbreaking scenario plays out in countless kitchens every fall, leaving home bakers frustrated and questioning their abilities.
The secret to mastering cream cheese filling for pumpkin bread lies not in luck, but in understanding the precise techniques that professional bakers use to achieve those Instagram-worthy swirls every single time. Your journey toward creating bakery-quality pumpkin bread with perfectly distributed cream cheese filling starts with these seven game-changing tips that address the most common pitfalls plaguing home bakers.
Understanding the Science Behind Perfect Cream Cheese Filling
Why Temperature Matters Most
Temperature control serves as the foundation for successful cream cheese filling integration. When your cream cheese sits at room temperature for approximately two hours before use, its molecular structure becomes pliable enough to blend smoothly without creating lumps that ruin your final product. Cold cream cheese resists incorporation, leading to chunky, uneven distribution throughout your pumpkin batter.
Your filling’s temperature directly impacts its density relative to your pumpkin batter. When both components reach similar temperatures, they maintain better suspension during baking, preventing the dreaded sinking effect that transforms your beautiful design into a dense bottom layer.
The Role of Fat Content in Cream Cheese
Full-fat cream cheese contains the necessary fat molecules that provide stability and richness to your filling. These fats create a barrier that helps maintain the filling’s integrity during the baking process. When you substitute low-fat alternatives, you compromise this structural support, resulting in a watery consistency that disperses unevenly throughout your bread.
Choose cream cheese brands with at least 30% fat content for optimal results. Philadelphia and similar premium brands offer consistent performance, while store brands may vary in fat distribution, affecting your final outcome. For comprehensive guidance on selecting the right cream cheese for various applications, explore this detailed cream cheese filling resource that covers seven essential recipes and techniques.
Essential Ingredients for the Perfect Cream Cheese Filling
Base Cream Cheese Filling Recipe
This foundational recipe creates the ideal balance between stability and flavor, ensuring your cream cheese filling maintains its presence throughout the baking process.
Ingredients:
- 8 oz cream cheese, room temperature
- 1/4 cup granulated sugar
- 1 large egg yolk
- 1 teaspoon vanilla extract
- Pinch of salt
Instructions:
Beat your room temperature cream cheese using an electric mixer on medium speed until completely smooth and fluffy, approximately three minutes. Gradually incorporate sugar, beating continuously until the mixture achieves a uniform consistency without grittiness.
Add your egg yolk, vanilla extract, and salt, mixing just until combined. Overmixing at this stage can break down the cream cheese structure, creating a thin consistency that won’t hold its shape during swirling.
Preparation Time: 5 minutes
Total Time: 5 minutes
Flavor Variations That Complement Pumpkin
Enhance your basic cream cheese filling by incorporating complementary flavors that amplify the autumn essence of your pumpkin bread. Maple syrup additions require reducing other liquid ingredients to maintain proper consistency. Cinnamon and nutmeg create warming notes that marry beautifully with pumpkin spices, while orange zest introduces bright citrus undertones that cut through the richness.
Tip #1 – Achieving the Perfect Consistency
The Goldilocks Principle of Cream Cheese Filling
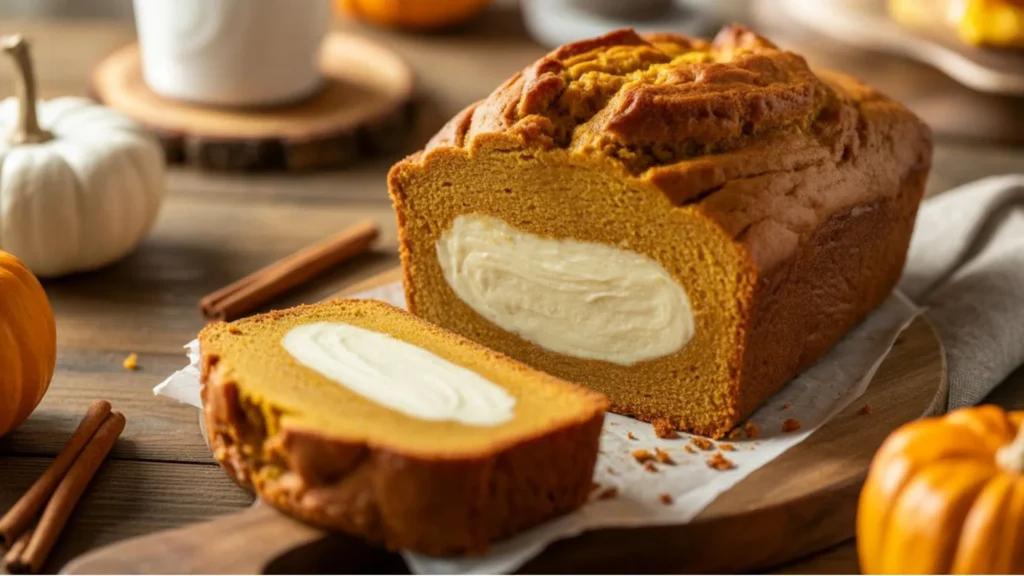
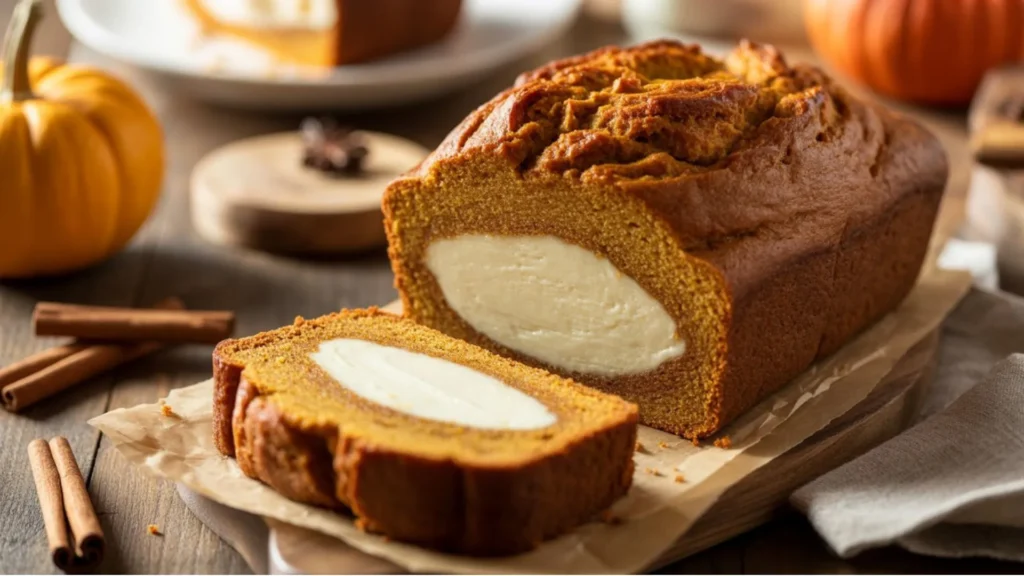
Your cream cheese filling consistency determines its behavior during both assembly and baking. Overly thick filling resists swirling, creating choppy, irregular patterns that look amateurish in your finished loaf. Conversely, thin filling lacks the structural integrity to maintain distinct swirls, instead bleeding into your pumpkin batter and disappearing entirely.
The perfect consistency allows smooth swirling while maintaining definition between your filling and batter. Your finished mixture should fall from a spoon in thick ribbons that hold their shape momentarily before blending into the bowl.
Testing Your Filling Consistency
Perform the ribbon test by lifting your mixer beaters from the bowl. Properly mixed filling will create ribbons that maintain their form for two to three seconds before dissolving back into the mixture. If your filling drops immediately, it requires additional cream cheese or a stabilizing agent like cornstarch.
When your filling appears too thick, resist the temptation to add liquid ingredients. Instead, continue beating at medium speed to incorporate more air, which naturally lightens the texture without compromising stability.
Tip #2 – Mastering the Swirling Technique
Professional Swirling Methods
Create bakery-quality swirls using the dollop and drag technique. Distribute spoonfuls of your cream cheese filling evenly across your pumpkin batter surface, spacing them approximately two inches apart. Using a thin knife or skewer, draw figure-eight patterns through your filling, connecting the dollops while maintaining distinct cream cheese ribbons.
Limit yourself to six to eight swirling motions total. Excessive swirling homogenizes your mixture, eliminating the beautiful contrast between your pumpkin base and cream cheese filling that makes this bread visually stunning.
Advanced Cream Cheese Filling Recipe with Swirl Technique
This enhanced version incorporates stabilizing ingredients that maintain better definition during baking while creating more dramatic visual appeal.
Ingredients:
- 8 oz cream cheese, room temperature
- 1/3 cup powdered sugar
- 1 large egg yolk
- 2 tablespoons sour cream
- 1 teaspoon vanilla extract
- 1 tablespoon cornstarch
Instructions:
Combine cream cheese and sour cream, beating until perfectly smooth. Sift powdered sugar and cornstarch together to eliminate lumps, then gradually incorporate into your cream cheese mixture.
Add egg yolk and vanilla, mixing until just combined. The cornstarch addition provides extra structure that helps your filling maintain its shape during the baking process.
Preparation Time: 8 minutes
Total Time: 8 minutes
Tip #3 – Preventing the Dreaded Sinking Filling
Density Management Strategies
Sinking occurs when your cream cheese filling becomes denser than your surrounding pumpkin batter during baking. Combat this by ensuring your pumpkin batter maintains sufficient thickness to support your filling’s weight. Add an extra two tablespoons of flour to your pumpkin bread recipe when incorporating cream cheese filling.
Temperature matching between components prevents density shifts during baking. Both your pumpkin batter and cream cheese filling should feel similarly cool to the touch when combined.
Layer Distribution Techniques
The sandwich method creates multiple thin layers of cream cheese filling throughout your bread rather than concentrating it in one area. Pour half your pumpkin batter into your prepared pan, add half your cream cheese filling, then repeat with remaining ingredients.
This distribution technique ensures every slice contains beautiful cream cheese swirls while preventing structural weak points that can cause your bread to collapse or create soggy sections. For a complete recipe demonstration of this layering technique, check out this cream cheese-filled pumpkin bread guide that showcases professional assembly methods.
Tip #4 – Timing Your Preparation for Success
Make-Ahead Strategies
Prepare your cream cheese filling up to 48 hours in advance, storing it covered in your refrigerator. This make-ahead approach allows flavors to meld while maintaining food safety standards. Remove your prepared filling from refrigeration 30 minutes before assembly to restore working consistency.
Properly stored cream cheese filling maintains its quality through proper moisture barrier techniques. Press plastic wrap directly onto your filling’s surface to prevent skin formation, then cover your container with an airtight lid.
Assembly Timeline for Perfect Results
Begin your cream cheese preparation while your oven preheats and your pumpkin batter ingredients reach room temperature. This coordination ensures all components achieve optimal consistency simultaneously, preventing delays that can affect your final results.
Weather conditions impact your timing requirements. Humid environments may require longer temperature equalization periods, while dry conditions can cause your filling to develop a skin more quickly.
Tip #5 – Customizing Your Cream Cheese Filling
Spiced Cream Cheese Filling Recipe
Transform your basic filling into a warming spice blend that complements your pumpkin bread’s autumn flavors while adding complexity to each bite.
Ingredients:
- 8 oz cream cheese, room temperature
- 1/4 cup brown sugar, packed
- 1 large egg yolk
- 1/2 teaspoon ground cinnamon
- 1/4 teaspoon ground nutmeg
- 1/8 teaspoon ground ginger
- 1 teaspoon vanilla extract
Instructions:
Cream together your room temperature cream cheese and brown sugar until light and fluffy. The brown sugar’s molasses content adds depth while its finer texture incorporates more smoothly than granulated alternatives.
Whisk your spices together in a separate bowl to ensure even distribution, preventing concentrated pockets of spice intensity. Gradually incorporate your spice mixture along with egg yolk and vanilla, beating just until combined.
Preparation Time: 7 minutes
Total Time: 7 minutes
Texture Add-Ins That Work
Mini chocolate chips provide delightful surprise elements without disrupting your filling’s structure. Choose mini varieties over regular chips to maintain smooth swirling capabilities. Finely chopped pecans add textural interest while complementing your pumpkin and cream cheese flavors.
Avoid fresh fruits or ingredients with high moisture content, as these additions can destabilize your filling’s consistency and create food safety concerns during storage.
Tip #6 – Baking Temperature and Time Adjustments
How Cream Cheese Filling Affects Baking
Cream cheese filling increases your bread’s overall moisture content, requiring temperature and timing modifications to achieve proper doneness throughout. Reduce your standard baking temperature by 25 degrees Fahrenheit to prevent over-browning while allowing adequate time for internal cooking.
Extend your baking time by 10 to 15 minutes beyond your standard pumpkin bread recipe. The additional dairy content requires extra heat penetration to reach safe internal temperatures while maintaining your desired texture.
Doneness Testing Methods
Standard toothpick tests become unreliable with cream cheese additions, as the filling may cling to your testing instrument even when your bread is properly baked. Instead, gently press your bread’s center; it should spring back slowly but completely when done.
Internal temperature monitoring provides the most accurate doneness assessment. Your finished bread should reach 200-205°F in its center, measured with an instant-read thermometer inserted away from cream cheese pockets.
Tip #7 – Storage and Serving Best Practices
Proper Storage Techniques
Store your finished cream cheese filled pumpkin bread at room temperature for maximum flavor development during the first 24 hours. The cream cheese content actually helps maintain moisture longer than plain versions, extending your bread’s optimal eating window.
After the initial day, refrigerate your bread to prevent spoilage while maintaining quality. Wrap individual slices in plastic wrap for grab-and-go convenience, or store your whole loaf in an airtight container.
Serving and Presentation Tips
Allow refrigerated bread to reach room temperature before serving for optimal flavor release and texture. Alternatively, warm individual slices in a 300°F oven for two to three minutes to restore that fresh-baked appeal.
Clean slicing requires a sharp, thin-bladed knife wiped clean between cuts. The cream cheese can stick to your blade, creating ragged edges that compromise your presentation.
Troubleshooting Common Cream Cheese Filling Problems
Problem-Solving Guide
Lumpy filling results from cold cream cheese or insufficient mixing time. Rescue lumpy mixtures by pressing them through a fine-mesh strainer, then re-beating until smooth. Prevention remains easier than correction, so always ensure proper temperature before beginning.
Separated or curdled mixtures indicate temperature shock or overmixing. Add one tablespoon of fresh cream cheese at room temperature while beating slowly to re-emulsify your mixture.
Prevention Tips
Avoid common substitutions that compromise your results. Light cream cheese, cream cheese spreads, and whipped varieties lack the fat content necessary for proper structure and flavor development.
Environmental factors like humidity and altitude affect your results. High humidity may require additional flour in your filling, while high altitude baking necessitates reduced sugar and increased flour to maintain proper consistency.
FAQ Section
Can I use low-fat cream cheese for pumpkin bread filling?
While technically possible, full-fat cream cheese provides superior stability and richer flavor for cream cheese filling for pumpkin bread. Low-fat versions create thinner consistency that may sink during baking and deliver less satisfying taste results.
How do I prevent cream cheese filling from sinking?
Maintain similar temperatures between your pumpkin batter and cream cheese filling, use room temperature ingredients throughout, and avoid overmixing when creating swirl patterns in your cream cheese filling for pumpkin bread.
Can cream cheese filling for pumpkin bread be made ahead?
Absolutely! Prepare your cream cheese filling up to 48 hours in advance, storing it covered in your refrigerator. Bring it to room temperature 30 minutes before use for optimal swirling consistency.
What’s the best way to swirl cream cheese filling?
Drop evenly spaced spoonfuls of cream cheese filling across your pumpkin batter surface, then use a thin knife to create figure-8 patterns. Limit swirling motions to maintain distinct visual separation.
How long does pumpkin bread with cream cheese filling last?
Properly stored pumpkin bread with cream cheese filling for pumpkin bread remains fresh at room temperature for 2-3 days or refrigerated for up to one week. The cream cheese actually enhances moisture retention compared to plain versions.
Transform Your Fall Baking Today
Mastering cream cheese filling for pumpkin bread elevates your autumn baking from ordinary to extraordinary. These seven essential techniques provide the foundation for consistent, bakery-quality results that will impress your family and friends while satisfying your own creative ambitions.
Start with your next batch by implementing just one or two of these tips, gradually incorporating additional techniques as you build confidence. Remember that great baking develops through practice, patience, and attention to detail rather than complicated recipes or expensive equipment.
Your perfectly swirled, moisture-rich pumpkin bread awaits. Gather your ingredients, warm your cream cheese, and begin creating the autumn memories your kitchen deserves. Each slice will remind you why mastering these fundamental techniques transforms ordinary ingredients into extraordinary experiences that define the season’s best flavors.
Ready to impress at your next gathering? Start your cream cheese filled pumpkin bread journey today, and discover why this classic combination continues captivating bakers and bread lovers alike, season after season.
Have You Given This Recipe A Try?
There are no reviews yet. Be the first one to write one.