

Table of Contents
Okay, let’s be real for a second. How many times have you pulled chicken out of the oven only to discover it’s drier than your sense of humor after a long Monday? Your family gives you those polite “mmm, thanks honey” bites while secretly drowning everything in ranch dressing. Meanwhile, you’re wondering why restaurant chicken always tastes like it was kissed by angels while yours tastes like… well, disappointment.
I’ve totally been there, and I’m here to spill the tea on why your chicken game might need some work. The good news? It’s not your fault! You’ve probably been using the same tired techniques everyone else uses, and spoiler alert – they don’t work that great for chicken thighs.
These seven secrets I’m about to share aren’t some fancy chef nonsense that requires a culinary degree. They’re real, practical tricks that’ll turn your kitchen into the place everyone actually wants to eat. Trust me, once you nail these creamy oven baked chicken thighs, your family’s gonna be fighting over who gets seconds.
Why Your Current Chicken Method Isn’t Working
Here’s the thing – most of us cook chicken thighs like they’re chicken breasts, and that’s where everything goes sideways. It’s like wearing flip-flops to a snowball fight. Wrong tool, wrong situation, guaranteed disaster.
Chicken thighs are basically the cool, laid-back cousin of chicken breasts. They’ve got more fat, more flavor, and they’re way more forgiving if you mess up a little. But you’ve gotta treat them differently to get the magic to happen.
What makes chicken thighs the MVP of chicken parts:
- They’ve got natural fat marbling (fancy talk for “juicy goodness”)
- Dark meat = more flavor (science, people!)
- The connective tissue actually helps instead of hurts
- That skin? It’s like nature’s built-in protection system
Once you get why thighs are different from breasts, everything else starts making sense. It’s like finally understanding why pineapple belongs on pizza (fight me).
Secret #1: Master the Two-Temperature Technique
Alright, here’s where most people mess up – they stick with one temperature the whole time. That’s like trying to have a conversation at both a library volume and a rock concert volume. It just doesn’t work.
You need to think of cooking chicken thighs like a two-act play. Act one is all about drama and high energy (high heat), and act two is about that slow, romantic buildup (lower heat).
Here’s your game plan:
- Round 1: Crank it to 425°F for about 15-20 minutes
- Round 2: Dial it back to 350°F for the rest of the show
- The finish line: 175°F internal temp (trust me, not 165°F)
- Don’t forget: Let it chill for 5-10 minutes after cooking
This trick is honestly a game-changer. You get crispy skin that actually stays crispy, and the cream sauce doesn’t have a meltdown in your oven. Plus, your meat stays juicy instead of turning into chicken jerky.
And please, for the love of all that’s good, get yourself a meat thermometer. Stop guessing when your chicken’s done – that’s how we end up with rubber chicken at family dinners.
Secret #2: Transform Your Chicken with Strategic Brining
Okay, I know what you’re thinking – “brining sounds way too fancy for a Tuesday night.” But hear me out! It’s literally just soaking chicken in salty water, and it makes such a huge difference that you’ll wonder why nobody told you about this sooner.
Even if you only brine for 30 minutes (like, while you’re scrolling through Netflix trying to find something to watch), you’ll get chicken that’s about 15% juicier. That’s not just me talking – that’s actual food science doing its thing.
Your no-fuss brine recipe:
- 4 cups warm water (not hot, just warm)
- 1/4 cup kosher salt (don’t use table salt, it’s too intense)
- 2 tablespoons sugar (balances out the salt)
- 1 bay leaf (because we’re fancy like that)
- 1 smashed garlic clove (just whack it with a knife)
How to not mess this up:
- Mix everything until the salt disappears completely
- Let it cool down so you’re not cooking the chicken accidentally
- Dump your chicken in for anywhere from 30 minutes to 2 hours
- Pat it dry like your life depends on it
Pro tip: Don’t go crazy and brine overnight unless you want mushy chicken. Nobody wants mushy chicken. It’s almost as bad as overcooked pasta.
Secret #3: Choose Your Cream Base Like a Professional
Not gonna lie, this is where things can go really wrong or really right. Pick the wrong cream, and you’ll end up with a chunky, separated mess that looks like it belongs in a horror movie.
Heavy cream is your best friend here – it’s got enough fat to handle the heat without having a complete breakdown. But I get it, heavy cream isn’t always in the budget or the diet plan, so let me break down your options.
Your cream lineup, ranked:
Heavy Cream (The MVP):
- This is the Beyoncé of creams – it just doesn’t fail
- Highest fat content means it won’t curdle on you
- Makes everything taste like a fancy restaurant
Crème Fraîche (The Sophisticated Choice):
- Sounds fancy, tastes amazing
- Won’t break even if you accidentally overheat it
- Has this cool tangy thing going on
Half-and-Half + Cornstarch (The Budget Hero):
- Mix in about a teaspoon of cornstarch per cup
- Works great if you’re watching pennies
- Just be a little more careful with your heat
Greek Yogurt Mix (The Health-Conscious Option):
- Blend with a little cream so it doesn’t get weird
- Adds protein, which is nice
- Add it at the end so it doesn’t get angry
Whatever you choose, here’s the golden rule: always warm up your cream gradually. Don’t just dump cold cream into a hot pan unless you want to see what scrambled cream looks like (spoiler: it’s not pretty).
Secret #4: Build Complex Flavors Through Proper Layering
This is where we separate the “just following a recipe” cooks from the “holy cow, how did you make this?” cooks. It’s all about building flavors like you’re constructing the perfect sandwich – every layer matters.
Don’t just throw everything in a pan and hope for the best. That’s like putting on your socks after your shoes – technically possible, but definitely not ideal.
Your flavor building blocks:
The Foundation Crew:
- Onions for that sweet, mellow base
- Garlic because, duh, everything’s better with garlic
- Shallots if you’re feeling fancy (they’re like onions’ sophisticated cousin)
- Celery for that earthy, “I know what I’m doing” vibe
The Herb Squad:
- Thyme is like the reliable friend who never lets you down
- Rosemary brings the drama (in a good way)
- Sage is all warm and cozy
- Tarragon is for when you want to feel like a French chef
The Spice Cabinet All-Stars:
- Paprika for color and a tiny bit of heat
- Black pepper (freshly ground, please!)
- Garlic powder for extra garlic backup
- Onion powder because why not double down?
The Bright Stuff:
- White wine for sophistication (and because you can drink the rest)
- Lemon juice for that final “wow” factor
- A splash of vinegar if you’re feeling adventurous
Here’s the secret sauce (pun intended): cook your aromatics first, let the wine do its thing and pick up all those tasty brown bits, then slowly build your cream base. Save some fresh herbs for the end because nobody likes sad, overcooked herbs.
The Ultimate Creamy Oven Baked Chicken Thighs Recipe
Alright, time to put your money where your mouth is! This recipe combines all the secrets into one absolutely killer dish that’ll have your family asking what you did different (and you can just smile mysteriously). For even more inspiration, check out this detailed guide on creamy oven baked chicken thighs that shares additional tips and variations.
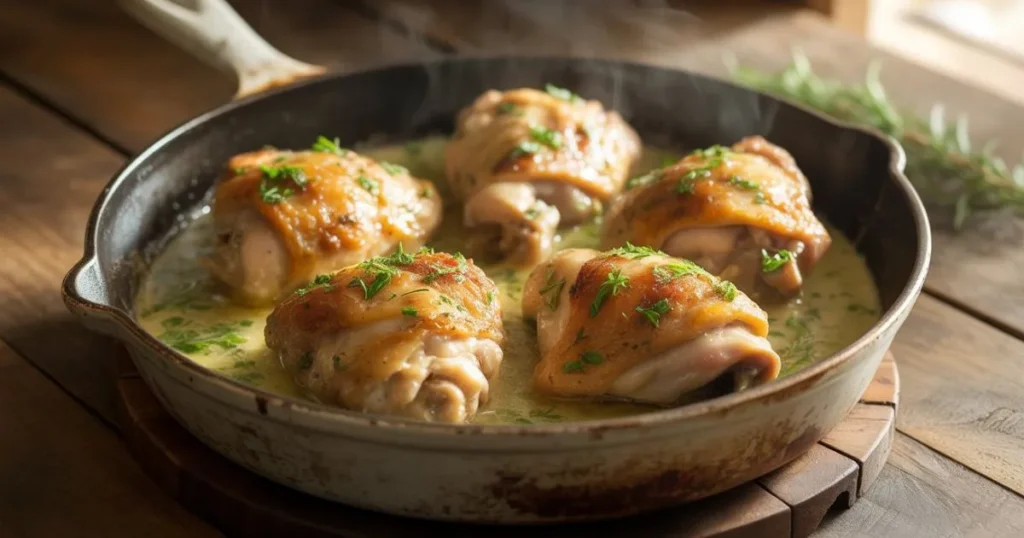
What you’re making: Bone-in chicken thighs swimming in a luxurious cream sauce that’s got white wine, herbs, and enough flavor to make you forget takeout exists. The chicken comes out with crispy skin and meat so tender it practically falls off the bone.
Shopping list:
- 8 bone-in, skin-on chicken thighs (don’t even think about skinless)
- 1 cup heavy cream (or your chosen alternative)
- 1/2 cup dry white wine (something you’d actually drink)
- 1 large onion, sliced thin
- 4 garlic cloves, minced (or use the jar stuff, I won’t judge)
- 2 tablespoons fresh thyme leaves
- 1 tablespoon Dijon mustard (the fancy kind if you’ve got it)
- 2 tablespoons olive oil
- 1 teaspoon paprika
- Salt, pepper, and fresh parsley for garnish
Let’s get cooking:
- Prep your chicken: Do the brining thing for at least an hour (seriously, don’t skip this). Pat them dry like you mean it, then season both sides with salt, pepper, and paprika. Be generous – chicken can handle it.
- Get that sear: Heat olive oil in your biggest oven-safe skillet over medium-high heat. When it’s shimmering, lay those thighs skin-side down and don’t touch them for 5-6 minutes. I know it’s tempting, but resist! Let them do their thing until the skin releases naturally and looks golden brown.
- Build the base: Take the chicken out and set it aside. Pour off most of the fat (leave about 2 tablespoons – that’s liquid gold right there). Toss in your onions and cook them until they’re soft and starting to caramelize. Add the garlic and cook for just 30 seconds (any longer and it gets bitter).
- Wine time: Pour in that white wine and scrape up all the good brown bits from the bottom. Let it bubble away for a few minutes until it reduces by half. This is where the magic starts happening.
- Cream dreams: Take the pan off the heat (important!), whisk in the mustard first, then slowly add the cream and thyme. Put it back on low heat and stir until everything’s happy together.
- The grand finale: Nestle those chicken thighs back in skin-side up (don’t bury the skin in sauce!). Pop the whole thing in a 375°F oven for 35-40 minutes.
- Patience, grasshopper: Let it rest for 5 minutes, sprinkle with parsley, and prepare for the compliments to roll in.
Time breakdown:
- Prep: 20 minutes (plus that hour of brining while you watch TV)
- Hands-on cooking: 25 minutes
- Oven time: 40 minutes
- Total: About 2.5 hours, but most of it’s just waiting around
Secret #5: Achieve Perfect Skin Every Single Time
Let’s talk about the holy grail of chicken cooking – crispy skin that stays crispy even with all that creamy sauce action. It seems impossible, right? Like having your cake and eating it too, except with chicken.
The trick is understanding that crispy skin is all about moisture management and strategic sauce placement. Think of it like waterproofing your boots – you want protection without sacrificing function.
Your crispy skin battle plan:
Moisture is the enemy:
- Pat that skin dry like you’re trying to win a prize for it
- Let the chicken sit out for 10-15 minutes after patting (air circulation is your friend)
- Sprinkle a tiny bit of baking powder on the skin (trust me on this one)
- Never, ever pour sauce directly over the skin
Searing is your secret weapon:
- Medium-high heat for the initial sear
- Skin-side down first (presentation side always goes down first)
- Don’t flip until it releases naturally – if it’s sticking, it’s not ready
- You should hear a nice steady sizzle the whole time
Oven strategy:
- Keep that skin above the sauce line
- If it’s not crispy enough at the end, hit it with the broiler for 2-3 minutes
- Watch it like a hawk during broiling – things can go from perfect to charcoal real quick
The best part? The skin actually gets better as it rests, so don’t panic if it doesn’t look perfect straight out of the oven.
Secret #6: Master Sauce Consistency Like a Chef
Nobody wants watery sauce or sauce so thick you need a spoon to serve it. You’re aiming for that perfect “coats the back of a spoon” consistency that makes everything look and taste professional.
The good news is that cream sauces are pretty forgiving once you know a few tricks. The bad news is that there are definitely ways to mess them up spectacularly.
Your sauce-saving toolkit:
When it’s too thin: Just simmer it uncovered until it thickens up. If you’re in a hurry, whisk together 1 tablespoon cornstarch with 2 tablespoons cold water and stir that in. Let it bubble for a couple minutes and you’re golden.
When it’s too thick: Gradually whisk in some warm chicken broth or more cream. Don’t dump it all in at once – that’s how you end up with soup instead of sauce.
When it looks like cottage cheese (aka curdled): Don’t panic! Take it off the heat immediately and whisk in a few tablespoons of cold cream. Sometimes you can save it by straining out the chunks, but prevention is way better than fixing.
When it tastes like nothing: This is usually a salt issue. Taste it and adjust with salt, pepper, or a squeeze of lemon juice. Sometimes a little extra Dijon mustard works magic too.
The key is to taste as you go and make adjustments. Don’t just follow the recipe blindly – your taste buds know what they want!
Secret #7: Elevate with Gourmet Flavor Combinations
Once you’ve got the basic recipe down pat, it’s time to have some fun! These variations will keep your family from getting bored and give you serious bragging rights at potluck dinners.
Mediterranean vibes: Throw in some sun-dried tomatoes, fresh basil, and kalamata olives. Crumble in some feta at the end for that authentic Greek feel. A squeeze of lemon brightens everything up beautifully.
French countryside feels: Sauté some mushrooms with the onions and use tarragon instead of thyme. Swap the wine for a splash of cognac if you’re feeling fancy (or just want an excuse to buy cognac). A sprinkle of Gruyère cheese at the end makes it très magnifique.
All-American comfort: Mix in some maple syrup with whole grain mustard for sweet and savory magic. Use apple cider instead of wine, and add some crispy bacon because bacon makes everything better. Fresh sage is perfect with the autumn flavors.
Southwest fusion: Smoked paprika and a tiny bit of chipotle pepper give it a smoky kick. Throw in some corn and bell peppers for color and crunch. Finish with lime juice and cilantro for that fresh contrast.
Each one follows the same basic method, so once you’re comfortable with the original, these variations are easy peasy. It’s like having a whole arsenal of impressive dinner options!
Serving Your Masterpiece
You’ve put in all this work, so let’s make sure you serve it right! The sides you choose can make or break the whole experience – you want things that complement without competing.

Carb companions that actually make sense:
- Mashed potatoes: The classic choice that never disappoints. They soak up that sauce like champions.
- Rice pilaf: Nutty and sophisticated, plus it won’t fight with your flavors
- Egg noodles: Pure comfort food that makes everything feel cozy
- Crusty bread: Perfect for sauce-sopping (which is totally acceptable behavior)
Veggie sides that won’t ruin the vibe:
- Honey-roasted carrots: Sweet enough to balance the richness without being weird about it
- Simple steamed broccoli: Classic green vegetable that doesn’t overthink things
- Sautéed spinach: Wilts right into the sauce and adds some nutritional points
- Roasted Brussels sprouts: For when you want to feel like a grown-up
Wine pairing (because why not?): Stick with medium-bodied whites that won’t wrestle with your cream sauce. Think Chardonnay, Pinot Grigio, or if you’re feeling rebellious, a light Pinot Noir works surprisingly well.
And here’s a pro tip: arrange everything on the plate like you actually care about presentation. Spoon the sauce around the chicken, not over the skin, and sprinkle some fresh herbs on top. Instagram-worthy without trying too hard.
Conclusion: Transform Your Cooking Forever
Look, I’m not saying these seven secrets will solve all your life problems, but they’ll definitely solve your “what’s for dinner” problems. And honestly, that’s pretty life-changing when you think about it.
The best part about mastering creamy oven baked chicken thighs? Once you get the hang of it, you can basically cook this recipe with your eyes closed. It becomes second nature, and you’ll start tweaking things based on what you have in your fridge or what sounds good that day.
Don’t expect perfection on your first try – even professional chefs had to practice. But I promise you, even a slightly imperfect version of this recipe is going to be way better than whatever you were making before.
Your family’s going to start requesting this dish specifically, and you’re going to feel like the kitchen rock star you always knew you could be. Plus, there’s something deeply satisfying about making restaurant-quality food in your own kitchen while wearing your pajama pants.
Ready to become the chicken thigh whisperer of your household? Start with Secret #1 tonight – try that two-temperature method on whatever chicken you’ve got hanging around. Then come back and tell me I wasn’t right about everything. Your taste buds (and your family) will thank you later!
Frequently Asked Questions About Creamy Oven Baked Chicken Thighs
How long do you bake creamy oven baked chicken thighs? You’ll want to bake your creamy oven baked chicken thighs for about 35-40 minutes at 375°F after you’ve done the initial searing. But seriously, get a meat thermometer and look for 175°F internal temp – timing can vary based on the size of your thighs.
Can you make creamy oven baked chicken thighs without wine? Absolutely! You can swap the wine in your creamy oven baked chicken thighs with chicken broth, apple juice, or just skip it entirely. The dish will still be amazing – the wine just adds a little extra sophistication.
Why does cream curdle in oven baked chicken thighs? Usually it’s because the heat’s too high or you added the cream too fast. For perfect creamy oven baked chicken thighs, always temper your cream by adding it gradually and keep the heat at medium-low when you’re working with dairy.
Do boneless thighs work for creamy oven baked chicken thighs? Sure do! Boneless thighs work great for creamy oven baked chicken thighs – just cut your cooking time by about 10-15 minutes since they cook faster. Look for 165°F internal temp instead of 175°F.
How should you store leftover creamy oven baked chicken thighs? Pop those leftover creamy oven baked chicken thighs in the fridge covered, and they’ll be good for about 4 days. Reheat gently in a 350°F oven, and don’t be afraid to add a splash more cream if the sauce looks sad.
What sides pair best with creamy oven baked chicken thighs? Mashed potatoes, rice, or pasta are your best bets with creamy oven baked chicken thighs since they’ll soak up all that incredible sauce. Add some steamed veggies for color and to make yourself feel better about the cream situation!
Have You Given This Recipe A Try?
There are no reviews yet. Be the first one to write one.