
Table of Contents
I’ll never forget the first time I made honey garlic chicken for my family. My eight-year-old, who usually picks at everything and only eats plain pasta, actually asked for seconds. My husband looked up from his plate with this surprised expression and said, “We’re definitely making this again.” That’s when I knew I’d stumbled onto something special.
You know that feeling when you’re standing in your kitchen at 6 PM, staring at another plain chicken breast, wondering how restaurants make their honey garlic chicken taste so incredible? I used to think it required some secret chef technique or fancy ingredients I’d never heard of. Turns out, the magic is way simpler than that – it’s all about balancing sweet honey with aromatic garlic and picking the right cooking method for your crazy schedule.
Whether you’re rushing through the door with hungry kids asking “what’s for dinner?” every five minutes, or you actually have a peaceful weekend to experiment in the kitchen, these five methods will help you create that restaurant-quality honey garlic chicken your family will rave about. Once you see how that glossy, golden sauce coats every piece of tender chicken, you’ll understand why this dish has become our go-to weeknight dinner.
Understanding the Magic Behind Honey Garlic Chicken
Here’s the deal with honey garlic chicken – it’s all about timing and balance. When you heat honey, it basically turns into liquid gold through caramelization, giving you those gorgeous brown colors and complex flavors you see at restaurants. Meanwhile, garlic does its thing by releasing these amazing compounds that make your whole kitchen smell incredible.
But here’s where most people mess up (and I learned this the hard way): if you add your honey sauce too early, you’ll end up with burnt, bitter nastiness instead of that perfect sweet-savory combo. Wait too long though, and your chicken turns into cardboard while your sauce just sits there doing nothing. The sweet spot? That magical moment when everything comes together and coats each piece perfectly.
Essential Ingredients You’ll Need
Before we dive into the fun stuff, let’s grab these basics that work for all five methods. Don’t worry – you probably have most of this already:
The Must-Haves:
- 2 pounds boneless chicken (and yes, thighs are way better than breasts – trust me on this one)
- 1/4 cup real honey (please don’t use that fake stuff in the squeeze bottle)
- 4-6 fresh garlic cloves, chopped up good
- 2 tablespoons soy sauce (the low-sodium kind won’t make you feel like you’re eating salt)
- 1 tablespoon cooking oil (whatever you’ve got works)
- Salt and pepper (obviously)
The Nice-to-Haves:
- 1 teaspoon fresh ginger (grated, not that powdered stuff)
- 1 tablespoon rice vinegar
- Red pepper flakes if you like a little kick
- Fresh herbs like thyme (makes you feel fancy)
- Sesame seeds for sprinkling on top
Method 1: Classic Skillet Honey Garlic Chicken
This is my go-to method when I need dinner fast and don’t want to mess around. Your stovetop gives you total control, so you can adjust things as you go and not worry about ruining everything. Plus, you get that gorgeous caramelization that makes your chicken look like it came from a restaurant.
What Makes This Method Special
Honestly? You can watch everything happen and fix it if things start going sideways. No guessing games, no crossing your fingers – just you, your pan, and some seriously good chicken in under twenty minutes.
Ingredients You’ll Use
- 2 pounds chicken thighs, cut into chunks (don’t make them tiny – you’re not feeding toddlers)
- 1/4 cup honey (I love wildflower, but whatever you’ve got works)
- 5 garlic cloves, minced fine (or just use a garlic press like a normal person)
- 2 tablespoons soy sauce
- 1 tablespoon olive oil
- 1 teaspoon fresh ginger, grated (worth the extra effort, I promise)
- 1/2 teaspoon salt
- 1/4 teaspoon black pepper
- 2 green onions, sliced up for the pretty factor
Step-by-Step Instructions
- Season your chicken with salt and pepper – don’t be shy about it
- Heat up your oil in a big skillet until it’s nice and hot (but not smoking!)
- Toss in the chicken but don’t crowd it – they need their space to get golden
- Let it cook for 5-6 minutes without poking at it (I know it’s hard, but resist!)
- Mix your sauce while the chicken’s doing its thing
- Pour that beautiful sauce over everything and turn the heat down a bit
- Let it bubble away for 2-3 minutes until it gets thick and glossy
- Sprinkle on the green onions and call it done
Prep Time: 10 minutes
Cook Time: 10 minutes
Total Time: 20 minutes (seriously!)
Method 2: Oven-Baked Honey Garlic Chicken
This one’s for when you want to throw everything in the oven and forget about it while you deal with other stuff. Perfect for those nights when you’re juggling homework help, laundry, and trying to remember if you fed the dog.
Why This Method Works
Your oven doesn’t play favorites – it heats everything evenly, so you won’t get those annoying burnt spots that happen when you’re distracted. Plus, you can make a ton at once, which means leftovers for lunch tomorrow!
Ingredients for Oven Success
- 2 pounds chicken drumsticks or thighs (bone-in keeps things juicy)
- 1/3 cup honey
- 6 garlic cloves, minced
- 3 tablespoons soy sauce
- 2 tablespoons olive oil
- 1 tablespoon Dijon mustard (adds a little zing)
- 1 teaspoon paprika (for color and a tiny bit of smokiness)
- 1/2 teaspoon salt
- 1/4 teaspoon pepper
Pro tip: If you want to try the classic approach that inspired this recipe, check out this tried-and-true honey garlic chicken thighs recipe that’s been a favorite for years!
Detailed Cooking Process
- Crank your oven to 425°F – we want some serious heat for caramelization
- Line a baking sheet with parchment paper (cleanup is way easier)
- Mix everything together in a big bowl until it’s all glossy and gorgeous
- Dump the chicken in and make sure every piece gets coated
- Spread it out on your baking sheet – don’t pile it up
- Bake for 25-30 minutes, flipping once in the middle
- Check it’s done with a meat thermometer (165°F – don’t guess!)
- Let it rest for 5 minutes (hardest part of the whole recipe)
Prep Time: 10 minutes
Cook Time: 30 minutes
Total Time: 40 minutes
Method 3: Slow Cooker Honey Garlic Chicken
This is the “set it and forget it” champion! Perfect for those crazy busy days when you want to come home to something amazing without any effort. Your slow cooker turns even the toughest chicken into something that falls apart with a fork.
The Slow Cooking Advantage
Time does all the work for you here. The flavors get all cozy together while you’re at work, and you come home to a house that smells absolutely incredible. Plus, it’s basically impossible to mess up.
Slow Cooker Ingredient List
- 2 pounds chicken thighs (bone-in is best for this method)
- 1/2 cup honey
- 1/4 cup soy sauce
- 8 garlic cloves, minced (go crazy – more is better)
- 1 tablespoon apple cider vinegar
- 1 teaspoon ground ginger
- 1/2 teaspoon red pepper flakes (optional, but why not live a little?)
- 2 tablespoons cornstarch
- 2 tablespoons cold water
Simple Slow Cooking Steps
- Dump the chicken in your slow cooker
- Mix all the sauce stuff in a bowl (except the cornstarch and water)
- Pour it all over the chicken – make sure everything’s covered
- Cook on low for 6-7 hours (or high for 3-4 if you’re impatient)
- Take out the chicken and shred it if you want
- Mix cornstarch with water to make a slurry (fancy name for thickener)
- Stir it into the juices and cook on high for 10 minutes
- Mix everything back together and enjoy your masterpiece
Prep Time: 10 minutes
Cook Time: 6-7 hours (but you’re not doing anything!)
Total Time: 6-7 hours
Method 4: Air Fryer Honey Garlic Chicken
If you’ve got an air fryer and want to feel good about eating crispy chicken, this one’s for you! It’s healthier than regular frying but still gives you that satisfying crunch we all crave.
Air Fryer Benefits
You get crazy crispy skin without drowning everything in oil. It’s like magic, but with science! Perfect for when you want to indulge but not completely blow your healthy eating goals.
Air Fryer Ingredients
- 2 pounds chicken wings or drumettes
- 1/4 cup honey
- 4 garlic cloves, minced
- 2 tablespoons soy sauce
- 1 tablespoon sesame oil (worth buying if you don’t have it)
- 1 teaspoon rice vinegar
- 1/2 teaspoon garlic powder
- 1/4 teaspoon cayenne (if you like heat)
- Cooking spray
Air Fryer Technique
- Heat up your air fryer to 380°F
- Season the chicken with garlic powder, salt, and pepper
- Give it a light spray with cooking oil
- Cook for 12 minutes, flipping halfway (set a timer!)
- Mix your sauce while it’s cooking
- Brush on half the sauce and cook 3 more minutes
- Toss with the rest of the sauce as soon as it comes out
- Serve immediately while it’s still crispy
Prep Time: 8 minutes
Cook Time: 15 minutes
Total Time: 23 minutes
Method 5: Instant Pot Honey Garlic Chicken
Your pressure cooker is like having a kitchen superhero – it makes tough chicken incredibly tender in no time. This method’s perfect when you need to meal prep or feed a crowd without much fuss.
Pressure Cooking Advantages
The high pressure basically forces all those flavors deep into the meat while keeping everything super moist. You’ll get fork-tender chicken that tastes like it’s been cooking all day, but in way less time.
Pressure Cooker Ingredients
- 2 pounds chicken thighs (boneless or bone-in – both work great)
- 1/3 cup honey
- 6 garlic cloves, minced
- 1/4 cup soy sauce
- 2 tablespoons chicken broth
- 1 tablespoon olive oil
- 1 teaspoon fresh thyme leaves (or 1/2 teaspoon dried)
- 1/2 teaspoon onion powder
- 2 tablespoons cornstarch
- 2 tablespoons cold water
Pressure Cooking Instructions
- Hit sauté on your Instant Pot and heat the oil
- Brown the chicken on both sides (about 3 minutes each)
- Mix your sauce while the chicken’s browning
- Pour it all over the chicken
- Seal it up and cook on high pressure for 10 minutes
- Quick release the pressure (carefully!)
- Take out the chicken for now
- Switch back to sauté and mix your cornstarch with water
- Stir in the slurry and let it thicken up
- Put the chicken back and coat with that gorgeous thick sauce
Prep Time: 10 minutes
Cook Time: 20 minutes
Total Time: 30 minutes
Professional Tips for Honey Garlic Chicken Success
Selecting the Right Chicken Cut
Look, I’m gonna be straight with you – thighs are where it’s at. They’ve got more fat, which means more flavor and way less chance of drying out. Chicken breasts work fine, but you’ve gotta watch them like a hawk. Bone-in pieces stay juicier, but they take longer to cook. Your call!
Honey Quality Matters
Not all honey is created equal, friends. That plastic bear stuff works in a pinch, but if you want to get fancy, try wildflower honey for complex flavor or orange blossom for something a little different. Trust me, your taste buds will notice.
Garlic Preparation Techniques
Fresh garlic is everything. Those pre-minced jars? They’re convenient but they taste like sadness compared to the real deal. If you’re feeling lazy, use a garlic press – it’s a total game-changer and saves your fingers from smelling garlicky all day.
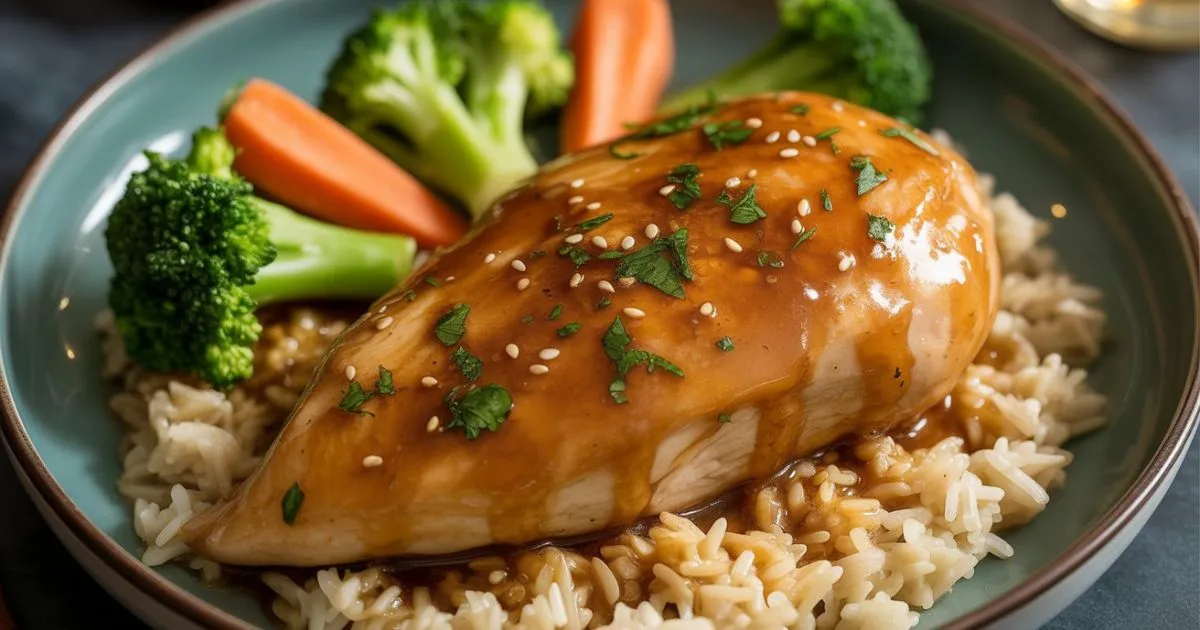
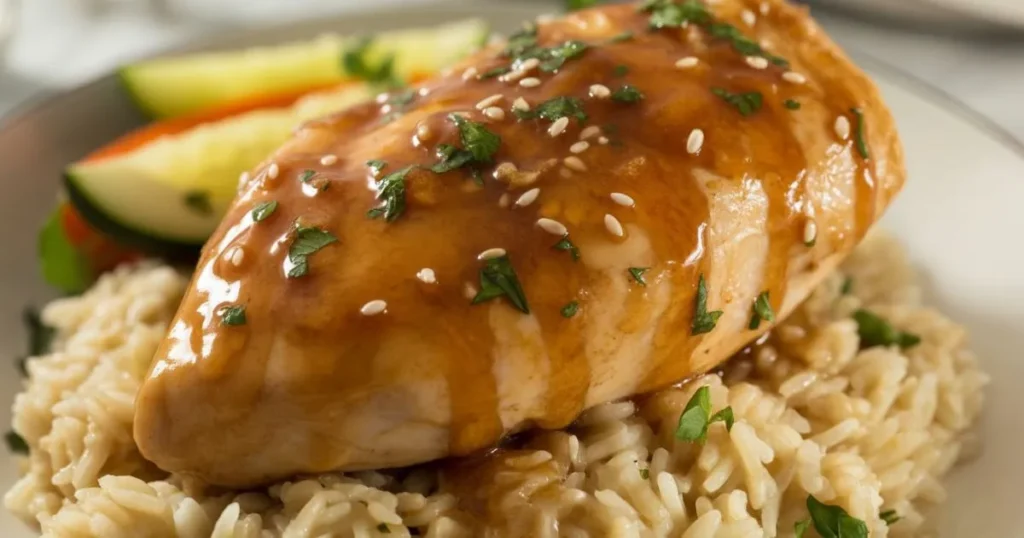
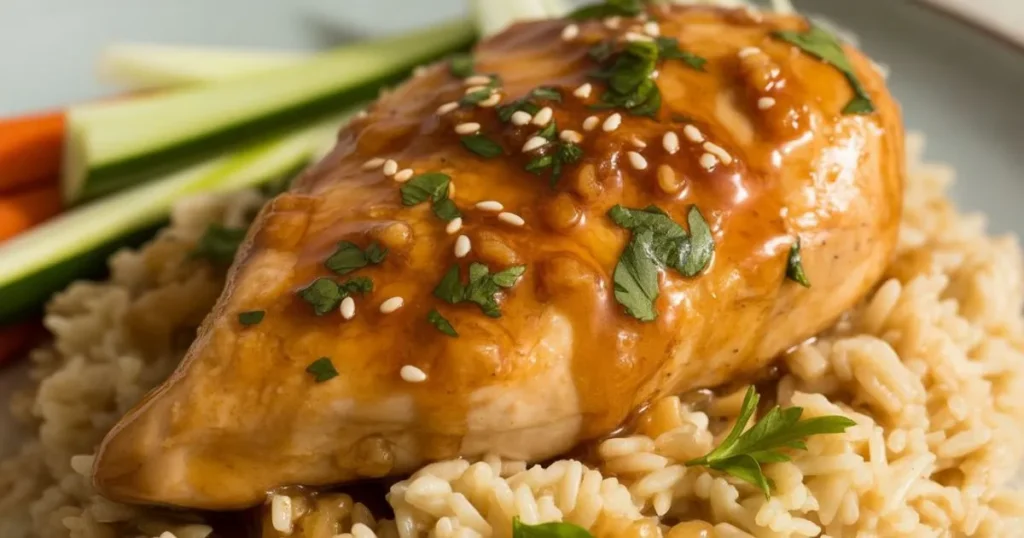
Serving Suggestions That Complete Your Meal
Perfect Rice Pairings
You’re gonna want something to soak up all that amazing sauce, and rice is your best friend here. Plain jasmine rice is classic, but coconut rice makes it feel fancy. Brown rice if you’re trying to be healthy, or just go wild and make some fried rice with whatever veggies are hiding in your fridge.
Speaking of pasta alternatives, this honey garlic chicken also works incredibly well in garlic parmesan chicken pasta – just swap out the regular chicken for your honey garlic version!
Complementary Vegetables
Steam some broccoli and squeeze lemon on it – classic combo that works every time. Roasted asparagus is great if you want to feel a little fancy. Or just stir-fry whatever vegetables you’ve got with some garlic and call it a day.
Fresh Salad Options
A simple salad with sesame dressing is perfect to cut through all that richness. Cucumber salad with rice vinegar is super refreshing too. Or honestly? Just buy a bag of pre-made salad mix and throw some dressing on it – we’re not judging here!
If you’re looking for more ways to use up your leftover honey garlic chicken, check out these amazing cheesy garlic chicken wraps – they’re perfect for lunch the next day!
Common Mistakes You Should Avoid
Temperature Control Issues
Don’t crank the heat to eleven thinking it’ll cook faster – you’ll just burn the honey and end up with bitter chicken. Medium heat is your friend. And please, for the love of all that’s good, use a meat thermometer. Guessing is how you end up with either rubber chicken or food poisoning.
Sauce Consistency Problems
If you add the honey too early when pan-frying, it’ll burn faster than you can say “dinner disaster.” Wait until the end, and if your sauce ends up too thin, just mix some cornstarch with cold water and stir it in. Easy fix!
Ingredient Substitution Guidelines
Out of honey? Maple syrup works great. Need gluten-free? Use coconut aminos instead of soy sauce. Sauce too thick? Add a splash of chicken broth. Don’t stress about having everything perfect – cooking should be fun, not stressful!
Nutritional Benefits of Homemade Honey Garlic Chicken
Health Advantages You’ll Enjoy
Making this at home means you know exactly what’s going into your food. You get quality protein, natural honey instead of high fructose corn syrup, and fresh garlic that’s actually good for you. Plus, no weird preservatives or additives that you can’t pronounce.
Approximate Nutritional Information
Each serving has around 280-320 calories depending on how you cook it, about 25-30 grams of protein (hello, muscles!), and reasonable amounts of carbs and fats. Way better than most takeout options, and you can control the sodium by using less soy sauce if you want.
Storage and Meal Prep Strategies
Proper Storage Methods
Leftovers will keep in the fridge for about 3 days – if they last that long! You can freeze it for up to 3 months, though the sauce might get a little weird when you thaw it. Just label everything with dates so you don’t end up playing “guess the mystery container” later.
Reheating Techniques
Reheat gently so the sauce doesn’t break. Microwave in short bursts, stirring between. Or throw it in a low oven if you’ve got time. Add some fresh herbs when you reheat to make it taste fresh again.
Take Action: Start Cooking Tonight
Alright, here’s the deal – you now have five completely foolproof ways to make honey garlic chicken that’ll blow your mind. No more staring sadly at boring chicken dinners or spending way too much on takeout that’s probably not even as good as what you can make at home.
Pick whichever method fits your life right now. Got 20 minutes? Go with the skillet. Want to set it and forget it? Slow cooker all the way. Feeling fancy? Try the oven method. Just pick one and start cooking!
And hey, don’t stress about making it perfect the first time. Even if you mess it up a little, it’ll probably still taste amazing. That’s the beauty of honey garlic chicken – it’s pretty forgiving. So grab your ingredients, pick your method, and get ready to become the hero of your dinner table. Your family’s gonna wonder what happened to you, but in the best possible way!
Have You Given This Recipe A Try?
There are no reviews yet. Be the first one to write one.