
Table of Contents
Easy Peach Pie Cruffins Recipe: 5 Easy Steps for Bakery Magic
Let me tell you about the day I accidentally became the neighborhood baking legend. It started when my sister challenged me to recreate those fancy cruffins from that expensive bakery downtown, you know, the ones that cost like $8 each? I thought, “How hard could it be?” Famous last words, right? But then I discovered this magical combination of buttery croissant layers stuffed with cinnamon-spiced peaches, and honestly? My kitchen smelled so incredible that my neighbors kept “randomly” stopping by. Now I’m that person everyone texts when they need dessert for a party, and I’m absolutely not complaining!
Understanding the Cruffin Phenomenon: Your Gateway to Pastry Excellence
So what’s a cruffin anyway? Great question! It’s basically what happens when a croissant and a muffin fall madly in love and have the most adorable pastry baby ever. You get all those buttery, flaky layers from the croissant but in a cute little muffin shape that’s perfect for grabbing and going.
And when you stuff it with peachy goodness? Oh my goodness, it’s like summer decided to give you the biggest hug ever. The combination is absolutely magical – you’ve got that familiar peach pie flavor wrapped up in pastry that’ll make your neighbors incredibly jealous.
Why Your Kitchen Needs This Recipe
Listen, I’m gonna be real with you – this Peach Pie Cruffins Recipe is going to change your life. Here’s why:
- You’ll look like a baking genius: Seriously, people will think you went to pastry school
- Super flexible: Got apples instead? Berries? Throw ’em in there!
- Make-ahead friendly: Perfect for when you want to impress but don’t want to stress
- Built-in portion control: No more “oops I ate half a pie” situations (we’ve all been there)
Gathering Your Ingredients: Building Blocks of Bakery Magic
Alright, let’s talk shopping list. Don’t worry – you probably have most of this stuff already, and the rest you can grab at any regular grocery store.
Essential Dough Components:
- 2 ½ cups all-purpose flour (the regular stuff works fine, don’t stress)
- 1 packet active dry yeast (check that expiration date – trust me on this one)
- ¼ cup granulated sugar
- 1 teaspoon salt (I use kosher, but whatever you’ve got works)
- ¾ cup whole milk, warmed up (like baby bottle temperature)
- 1 large egg (farm fresh if you’re feeling fancy)
- 3 tablespoons butter, melted
- 1 cup cold butter (this is where the magic happens!)
Signature Peach Filling Ingredients:
- 4 big, juicy peaches (give ’em a gentle squeeze – they should have a little give)
- ⅓ cup brown sugar (packed down like you mean it)
- 2 tablespoons cornstarch (the secret to not-soggy bottoms)
- 1 teaspoon vanilla extract (real stuff is better, but vanilla’s vanilla)
- 1 teaspoon cinnamon (because duh)
- ¼ teaspoon nutmeg (fresh grated if you’re showing off)
- A pinch of salt
- 1 tablespoon lemon juice (keeps those peaches from getting funky)
Finishing Touches:
- 2 tablespoons melted butter for brushing
- ¼ cup cinnamon sugar (aka edible glitter)
- Maybe some vanilla glaze if you’re feeling extra
My Two Cents on Ingredient Shopping
Here’s the deal with peaches – you want them to smell peachy and give just a little when you press gently. Avoid the rock-hard ones (unless you’ve got time to wait) and definitely skip anything that looks bruised or sad.
For butter, splurge a little if you can. European-style butter has more fat, which means flakier layers. But honestly? Regular butter works great too. Don’t let perfect be the enemy of delicious, you know?
Mastering Your Peach Pie Cruffins Recipe: 5 Essential Steps
Step 1: Creating Your Foundation Dough
What we’re doing here: Making the base that’s gonna become those amazing flaky layers. It’s easier than you think!
Here’s how:
- Grab your biggest bowl and whisk together flour, yeast, sugar, and salt
- Make a little well in the middle (like a flour volcano) and pour in your warm milk, egg, and melted butter
- Mix it all up until it looks like dough – about 6 minutes by hand or 4 if you’ve got a stand mixer doing the heavy lifting
- Plop it in a buttered bowl, cover with a damp towel, and find the warmest spot in your house
- Let it double in size (about an hour – perfect time to clean up or scroll Instagram)
- Give it a gentle punch down and stick it in the fridge for at least 30 minutes
Time check:
- Mixing: 15 minutes
- Rising: 60 minutes (Netflix episode time!)
- Chilling: 30 minutes minimum
Step 2: Executing Perfect Lamination Technique
What we’re doing here: This is where we create those Instagram-worthy layers. Don’t panic – it’s like making a butter sandwich, but fancier.
Here’s the game plan:
- Roll your chilled dough into a rectangle about 12×8 inches (doesn’t have to be perfect)
- Take your cold butter and whack it between some parchment until it’s about 8×4 inches (great stress relief!)
- Plop that butter on half your dough, then fold the other half over like you’re tucking it into bed
- Roll it out gently to 12×8 again – be nice to those butter layers
- Fold it in thirds like a letter, wrap it up, and back to the fridge for 30 minutes
- Do this rolling and folding thing two more times with chilling breaks (I know, I know, but it’s worth it!)
Time reality check:
- Each fold session: 15 minutes
- Total with all the chilling: About 2.5 hours (but most of that is hands-off time)
Step 3: Crafting Your Peach Pie Filling
What we’re doing here: Making sure our peaches don’t turn our beautiful cruffins into a soggy mess. We’re smarter than that!
The process:
- Chop your peaches into little cubes – aim for about ½ inch pieces
- Toss them in a saucepan with brown sugar and let them get to know each other over medium heat
- After about 4 minutes, they’ll start getting juicy (that’s what we want!)
- Mix your cornstarch with a couple tablespoons of water and stir it in
- Add all the good stuff – vanilla, cinnamon, nutmeg, salt, and lemon juice
- Keep stirring for about 3 more minutes until it gets nice and thick
- Let it cool down completely (I mean it – hot filling equals disaster)
Time breakdown:
- Prep: 10 minutes
- Cooking: 7 minutes
- Cooling: 45 minutes (perfect time to finish that Netflix episode)
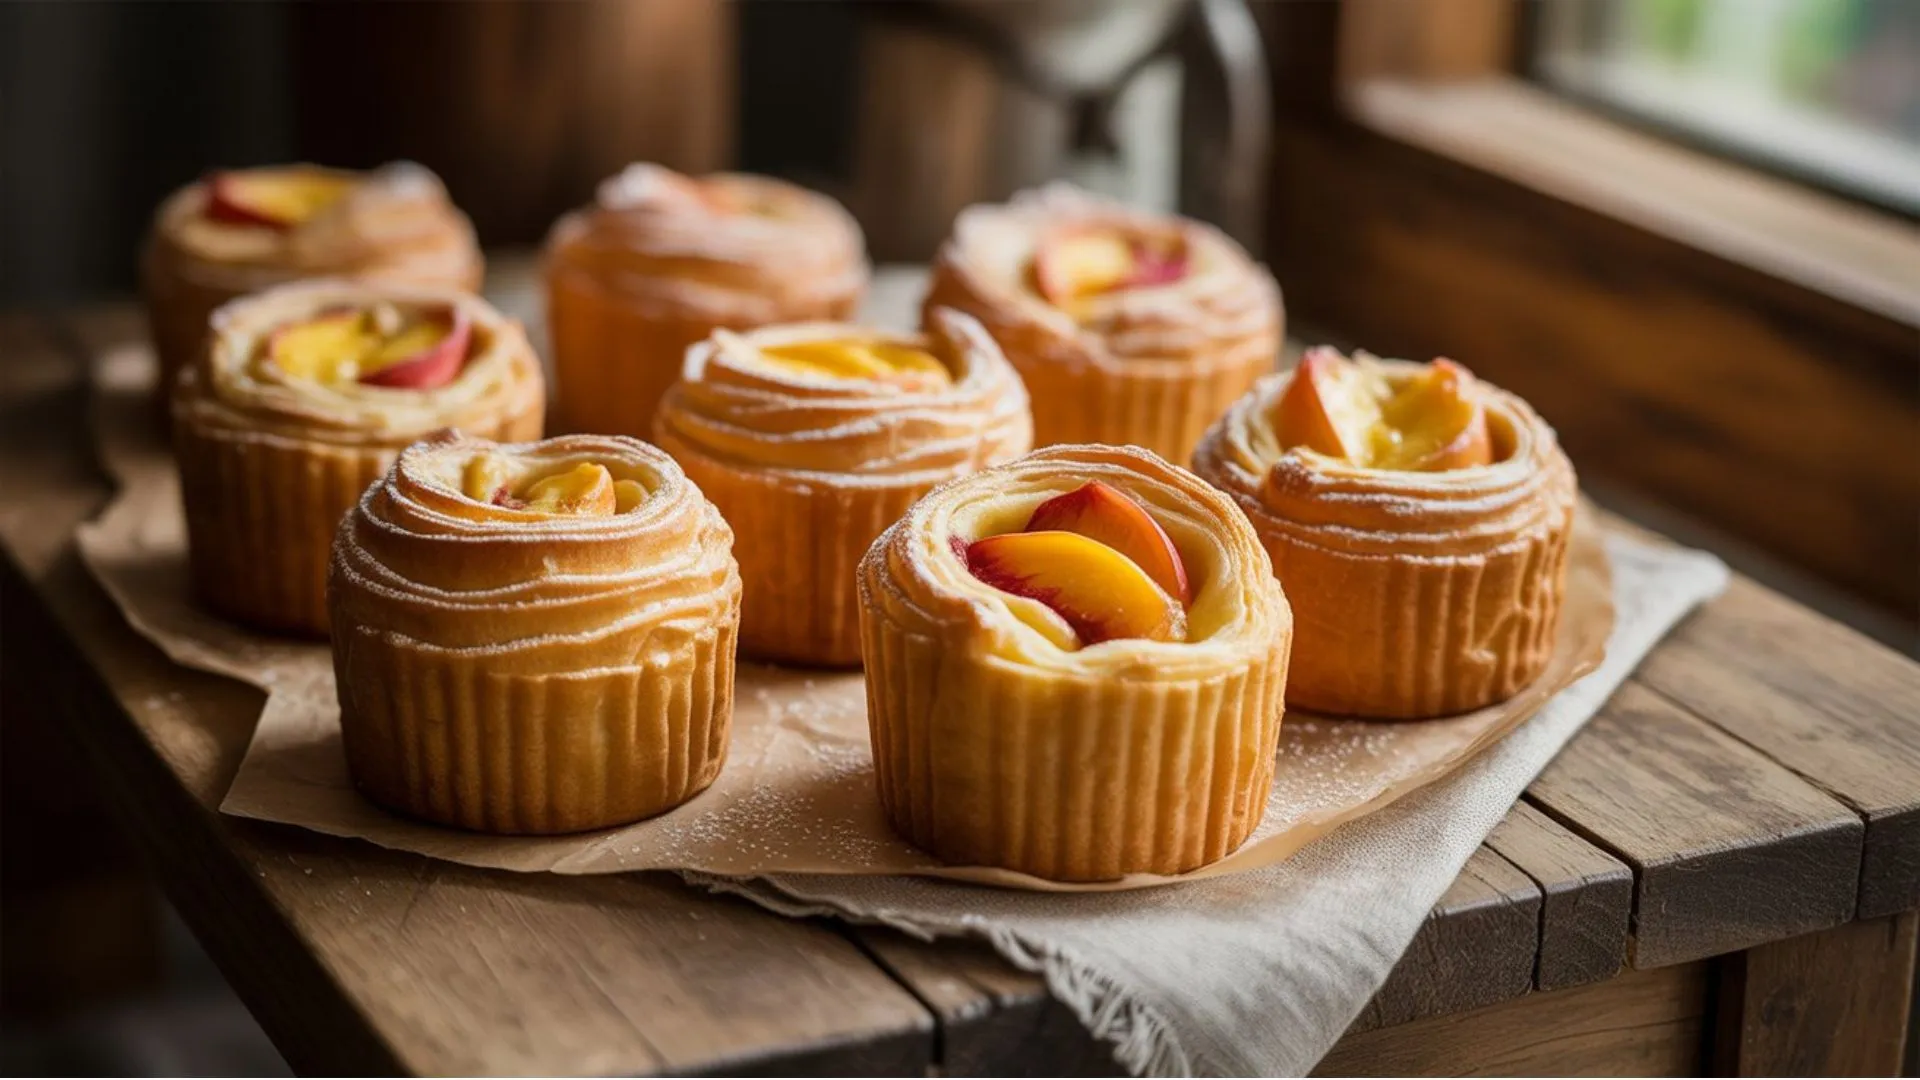
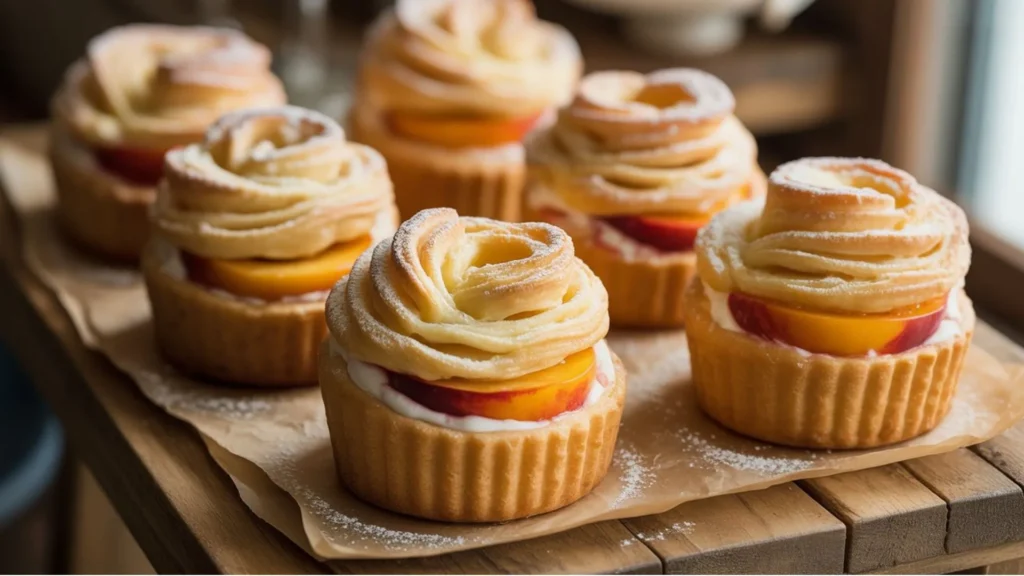
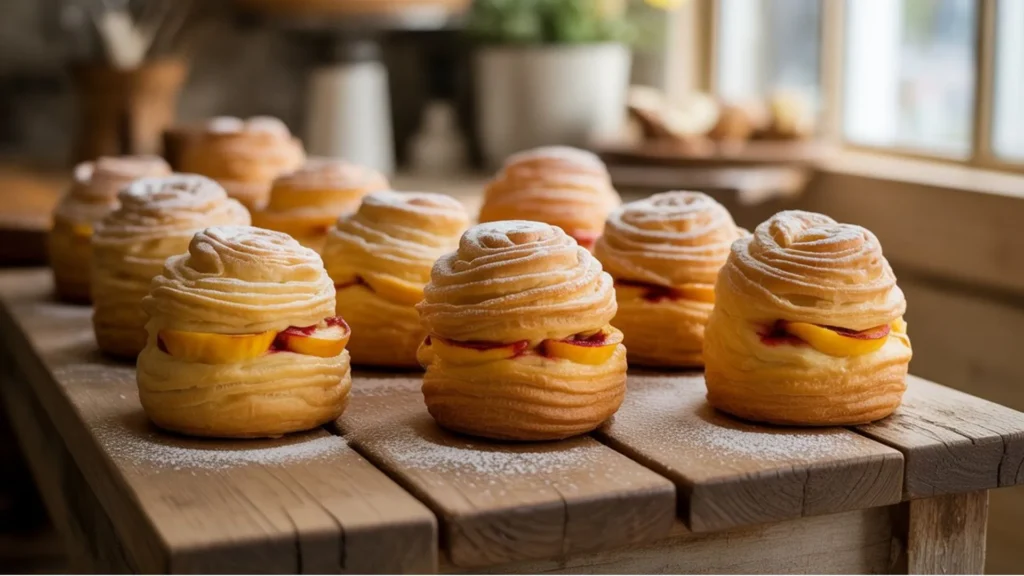
Step 4: Shaping Your Cruffins with Precision
What we’re doing here: The fun part! We’re turning all our hard work into actual cruffin shapes.
Let’s do this:
- Roll your final dough out to about 16×12 inches – think pizza box size
- Cut it into 6 strips lengthwise (roughly 2 inches wide each – eyeball it!)
- Gently stretch each strip to about 18 inches long (don’t be aggressive, just coax it)
- Spoon your cooled peach filling down the length of each strip
- Roll each one up into a spiral, starting from one end
- Pop them cut-side up in your greased muffin tin – they should look like little cinnamon rolls
Time investment:
- Rolling and cutting: 15 minutes
- Assembly: 20 minutes (this part’s actually pretty fun!)
Step 5: Achieving Golden Perfection
What we’re doing here: The grand finale! Time to turn these little spirals into bakery-worthy masterpieces.
Final steps:
- Crank your oven to 375°F (and actually use a thermometer if you have one – ovens lie)
- Let your cruffins puff up in their muffin cups for about 25 minutes
- Brush the tops with melted butter (because everything’s better with butter)
- Bake for 26-30 minutes until they’re golden brown and gorgeous
- Let them cool for 5 minutes before you move them (I know it’s torture, but trust me)
- While they’re still warm, brush with more butter and roll them in cinnamon sugar
Final countdown:
- Last rise: 25 minutes
- Baking: About 28 minutes
- Total project time: About 4.5 hours (but so worth it!)
Professional Techniques for Superior Results
Don’t Stress About Temperature
Look, I’m not gonna lie – temperature matters here. Keep things cool during the butter folding part, and make sure your milk isn’t too hot for the yeast (it should feel like a warm bath, not a hot tub).
Pro tip: Get yourself an instant-read thermometer. It takes the guesswork out of everything and they’re like $10.
How to Tell If You’re Winning
You’ll know your butter layers are working when you can see streaks in the dough without any butter breaking through. And when your cruffins are ready to bake, they should look puffy but not like they’re about to explode.
Making Them Even Better
Want to get fancy? Try mixing different types of peaches for more complex flavor. Or swap the cinnamon for cardamom if you’re feeling adventurous. A little orange zest in the filling? Chef’s kiss
When Things Go Wrong (Because They Sometimes Do)
The Great Butter Escape
If butter starts leaking out during baking, your layers probably got too warm during the folding process. Next time, be more patient with the chilling – I know, I know, patience is hard.
Dense and Heavy Instead of Light and Flaky
This usually means either your yeast was dead (check those dates!) or you let them rise too long at the end. It happens to the best of us.
Soggy Bottom Blues
If your bottoms are soggy, your filling wasn’t thick enough or wasn’t cool enough when you assembled. Learn from it and move on – they’ll still taste amazing!
Mix It Up Throughout the Year
Seasonal Swaps
- Fall vibes: Use apples with extra cinnamon and maybe a pinch of allspice
- Winter comfort: Pears with cardamom are surprisingly amazing
- Spring freshness: Strawberries with a tiny bit of fresh basil (trust me on this)
- Summer party: Mixed berries because why pick just one?
If you’re totally obsessed with peaches like I am, you’ll definitely want to check out more amazing peach recipes – there’s a whole world of peachy goodness waiting for you!
Making Everyone Happy
- Gluten-free friends: Use a good 1:1 gluten-free flour blend
- Vegan crew: Plant-based butter works great (though the texture’s a bit different)
- Less sugar please: Honey or maple syrup work beautifully
Storing and Serving Like a Pro
Keeping Them Fresh
These beauties stay good on your counter for about 2 days in an airtight container. Fridge storage gets you about a week, and you can freeze them for up to 3 months (wrap individually – future you will thank you).
Serving Suggestions
Serve them slightly warm if you can. They’re incredible with vanilla ice cream, or just dust them with powdered sugar and call it a day. Sometimes simple is perfect.
Bringing Them Back to Life
To reheat, pop them in a 350°F oven for about 5-7 minutes. Don’t use the microwave – it’ll make them sad and chewy.
Conclusion: Your Journey to Pastry Mastery
You know what? You’ve just learned something pretty amazing. This Peach Pie Cruffins Recipe isn’t just about following steps – it’s about creating something that’ll make people’s day better. And honestly? That feels pretty good.
Sure, it takes some time and patience, but most good things do. Don’t beat yourself up if your first batch isn’t perfect – even fancy pastry chefs had to practice this stuff. Each time you make them, you’ll get a little better, and before you know it, you’ll be the person everyone asks to bring dessert to parties.
The best part? You made these with your own two hands. That’s something to be proud of, whether they turn out Instagram-perfect or just taste incredible.
Frequently Asked Questions
How’s this Peach Pie Cruffins Recipe different from making regular muffins?
This Peach Pie Cruffins Recipe uses fancy laminated dough (like croissants) instead of regular muffin batter, which creates those amazing flaky layers. Yeah, it takes longer, but the payoff is SO much better – we’re talking next-level texture here.
Can I prep parts of this Peach Pie Cruffins Recipe ahead of time?
Absolutely! You can make the laminated dough up to 2 days early and keep it in the fridge. The peach filling’s good for a day ahead too. Just assemble and bake fresh for the best results.
How do I know if I nailed the lamination in my Peach Pie Cruffins Recipe?
You’ll see butter streaks running through the dough when you roll it out, and it won’t tear easily. When they’re baked, you should be able to pull apart distinct flaky layers – it’s pretty satisfying, actually!
What’s the secret to avoiding soggy Peach Pie Cruffins Recipe bottoms?
Cook that filling until it’s properly thick (the cornstarch is your friend here) and let it cool completely before you assemble. Hot or runny filling is the enemy of crispy pastry.
Can I freeze unbaked Peach Pie Cruffins Recipe portions?
You bet! Shape them all the way, freeze them solid in the muffin tins, then transfer to freezer bags. Bake straight from frozen – just add about 8-10 extra minutes to the baking time.
Ready to become the hero of your kitchen? Grab those ingredients, put on some good music, and get ready to create something absolutely amazing. Your friends and family are going to lose their minds when they taste these – and you’ll have the biggest smile knowing you made them from scratch!
P.S. If you want to see more photos of these gorgeous cruffins and get some visual inspiration for your own baking adventure, check out this Pinterest board – the pictures are absolutely drool-worthy!
Have You Given This Recipe A Try?
There are no reviews yet. Be the first one to write one.